Yamaha RXV1065 Owner's Manual
Yamaha RXV1065 - RX AV Receiver Manual
 |
UPC - 027108933474
View all Yamaha RXV1065 manuals
Add to My Manuals
Save this manual to your list of manuals |
Yamaha RXV1065 manual content summary:
- Yamaha RXV1065 | Owner's Manual - Page 1
U RX-V1065 AV Receiver OWNER'S MANUAL - Yamaha RXV1065 | Owner's Manual - Page 2
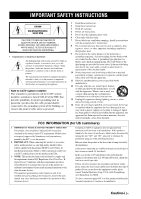
time. 14 Refer all servicing to qualified service personnel. Servicing is required when the instructions contained in this manual, meets FCC requirements. Modifications not expressly approved by Yamaha determined by turning the unit "OFF" and "ON", please try to eliminate the problem by using - Yamaha RXV1065 | Owner's Manual - Page 3
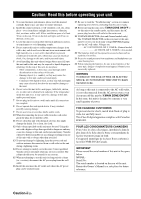
damage by lightning, keep the power cord and qualified Yamaha service personnel when any service is read the "Troubleshooting" section on even if you turn off this unit B digital apparatus complies MODEL: Serial No.: The serial number is located on the rear of the unit. Retain this Owner's Manual in - Yamaha RXV1065 | Owner's Manual - Page 4
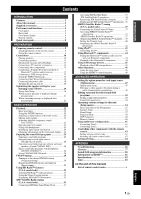
2 About this manual 3 Supplied accessories 3 Part names and functions 4 Front panel 4 Rear panel 5 Front panel display 6 Remote control 7 Quick start guide 8 L PREPARATION Preparing remote control 9 Installing batteries in the remote control 9 Using the remote control 9 Connections 10 - Yamaha RXV1065 | Owner's Manual - Page 5
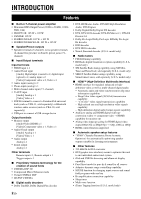
Home Dock, sold separately (U.S.A. model only) • SIRIUS Satellite Radio tuning capability, using SiriusConnect tuner, sold separately (U.S.A. model only) ■ HDMI™ (High-Definition Multimedia Interface) • HDMI interface for standard, enhanced or high- definition video as well as multi-channel digital - Yamaha RXV1065 | Owner's Manual - Page 6
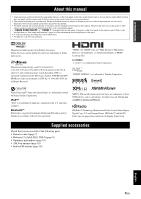
HDMI Licensing LLC. x.v.Color "x.v.Color" is a trademark of Sony Corporation. "SILENT CINEMA" is a trademark of Yamaha logo are proprietary trademarks of iBiquity Digital Corp. Supplied accessories Check that you received all of the following parts. • Remote control (page 7) • Batteries (2) ( - Yamaha RXV1065 | Owner's Manual - Page 7
on standby. • when the HDMI control function is on • when the HDMI signal standby-through function is currently working C ZONE2 CONTROL Enables operation of a receiver set in Zone2, including input source switching, volume control and tuner operation, with the main amplifier or remote control after - Yamaha RXV1065 | Owner's Manual - Page 8
-Tuner Home Dock (sold separately) (page 33). d PHONO jacks For connecting a turntable (page 15). e MONITOR OUT jacks Outputs visual signals from this unit to a video monitor, such as a TV (page 14). REMOTE IN/OUT jacks For connecting an external component that supports the remote control function - Yamaha RXV1065 | Owner's Manual - Page 9
up when Zone2 is turned on. j SLEEP indicator Lights up when the sleep timer is activated (page 46). k MUTE indicator Flashes when audio is muted. l VOLUME indicator Displays volume levels. m Cursor indicators Light up if corresponding cursors on the remote control are available for operations - Yamaha RXV1065 | Owner's Manual - Page 10
by the remote control (page 62). c SOURCE POWER Switches an external component on and off. d Input selection keys HDMI 1-4 Selects HDMI inputs 1 through 4. AV 1-6 Selects AV inputs 1 through 6. AUDIO 1/2 Selects AUDIO inputs 1 and 2. V-AUX Selects a signal input from the VIDEO AUX jacks - Yamaha RXV1065 | Owner's Manual - Page 11
as DVD player 1 Video monitor such as TV 1 Video cable or HDMI cable Yamaha iPod universal dock or Bluetooth wireless audio receiver ☞P. 17 • Connecting the FM and AM antennas ☞P. 18 • Connecting an XM Mini-Tuner Home Dock ☞P. 33 • Connecting a SiriusConnect tuner ☞P. 37 Step 4: Turn - Yamaha RXV1065 | Owner's Manual - Page 12
PREPARATION Preparing remote control Installing batteries in the remote control 13 Using the remote control The remote control transmits a directional infrared ray. Be sure to aim the remote control directly at the remote control sensor on this unit during operation. Remote control sensor window - Yamaha RXV1065 | Owner's Manual - Page 13
supports up to 7.1-channel surround. We recommended the following speaker layout in order to obtain the optimum surround effect. 7.1-channel speaker layout Speaker channels included in Dolby Digital and DTS signals. Use a subwoofer with a built-in amplifier, such as the Yamaha Active Servo - Yamaha RXV1065 | Owner's Manual - Page 14
subwoofers are connected, the same sound is output from them. ba ed kj HDMI 3 HDMI 4 E ANTENNA HD Radio FM GND AM UNBAL. SPEAKERS EXTRA SP ZONE2 FRONT SURROUND SUR. BACK PRE OUT 1 SUBWOOFER 2 c gf hi ■ 7.1-channel (with presence speakers) Speakers a Front speaker L b Front speaker R c - Yamaha RXV1065 | Owner's Manual - Page 15
U.K., Europe, Russia and Asia models) Tighten the knob and then insert the banana plug into the end of the terminal. Caution Before making bi-amplification connections, remove any brackets or cables that connect a woofer with a tweeter. Refer to the instruction manuals of speakers for details. When - Yamaha RXV1065 | Owner's Manual - Page 16
signals. Use optical fiber cables for optical digital audio signals. Jack and cables HDMI jacks HDMI HDMI Description To transmit digital video and digital audio signals. Use HDMI cables. y • We recommend that you use a commercially available 19-pin HDMI cable no longer than 5 meters (16 feet - Yamaha RXV1065 | Owner's Manual - Page 17
( TV ) AV 1 COAXIAL AV 2 COAXIAL (CD) AV 3 OPTICAL AV 4 AV 5 AV 6 AV OUT AUDIO1 AUD y • This unit supports the HDMI control function (page 46). If your TV supports the HDMI control function, you can control this unit with the remote control of your TV. ■ To connect component video monitor - Yamaha RXV1065 | Owner's Manual - Page 18
remote control. HDMI output Audio/Video HDMI output HDMI 1 (BD/DVD) HDMI 1 HDMI 2 HDMI 2 HDMI 3 HDMI 3 HDMI 4 HDMI 4 External component with component video output Audio Video Audio Optical digital output Component video Coaxial digital output AV 1 (TV) AV 2 OPTICAL COMPONENT VIDEO - Yamaha RXV1065 | Owner's Manual - Page 19
missing speakers, connect at least a 5.1channel speaker system when using this feature. • You can specify a video signal to be output during a multi-channel audio reproduction (page 49). If your DVD player has analog multi-channel output jacks, connect them to the MULTI CH INPUT jacks while making - Yamaha RXV1065 | Owner's Manual - Page 20
TUNING/CH h OPTIMIZER MIC VOLUME VIDEO AUX USB VIDEO AUDIO USB Infrared signal receiver or Yamaha component IR flasher or Yamaha component (CD or DVD player, etc.) y • If connecting a Yamaha component that supports the SCENE control signal reception to the REMOTE OUT jack of this unit, you - Yamaha RXV1065 | Owner's Manual - Page 21
HDMI 3 HDMI 4 ANTENNA HD Radio FM GND AM REMOTE nearest authorized Yamaha dealer or service center. remote control) to turn on this unit. 2 Press KMAIN ZONE ON/OFF (or pPOWER) again to turn off this unit (standby mode). y • The unit needs a few seconds until ready to play back. • You can also turn - Yamaha RXV1065 | Owner's Manual - Page 22
. • This unit and the video monitor are turned on. • This unit is selected as the video input source of the video monitor. • The connected subwoofer is turned on and the volume level is set to about half way (or slightly less). • The crossover frequency controls of the connected subwoofer are set - Yamaha RXV1065 | Owner's Manual - Page 23
an error message is displayed during measurement" (page 21). • If problems occur during measurement, "Check xx warning(s)" (xx indicates the number of in a place where it will be subjected to high temperatures such on an AV component. y • If you do not want to apply the measurement results, select - Yamaha RXV1065 | Owner's Manual - Page 24
"Error" appears on the GUI screen. Check the error and solve the problem. For details on each error message, see page 75. Press jCursor n once Exit" and then press jENTER. Error E-1 : No Front Speakers FrontL/R channel signals are not detected. Check wiring and connections of the front L/R speakers - Yamaha RXV1065 | Owner's Manual - Page 25
Input source HDMI 1 AV 1 AV 3 TUNER Sound field program Straight Straight Straight 7ch Enhancer y • When this unit is on standby, you can turn on this unit by pressing PSCENE (or hSCENE). • If you connect a Yamaha DVD/CD player that has the capability of the SCENE control signals to the REMOTE OUT - Yamaha RXV1065 | Owner's Manual - Page 26
GUI screen 1 Press iON SCREEN on the remote control. The GUI screen appears on the video monitor. Select Scene BD/DVD TV CD RADIO 2 Use jCursor k / you set the balance extremely off, sounds may not match those from other channels well. Enjoying pure hi-fi sound Use Pure Direct mode to enjoy the - Yamaha RXV1065 | Owner's Manual - Page 27
information When HDMI 1-4 or AV1-4 is selected as the input source, you can display audio/video signal information. y • Input signal information is displayed on both the GUI screen and front panel display. 1 Select the desired input source and then press rOPTION on the remote control. The Option - Yamaha RXV1065 | Owner's Manual - Page 28
a Yamaha digital sound field processing (DSP) chip. You can enjoy multi-channel sounds a sound field program with the remote control Perform the following operations depending on the channel audio such as Dolby Digital and DTS. It has been designed with the concept of "an ideal movie theater - Yamaha RXV1065 | Owner's Manual - Page 29
video sources such as a classic movie in an atmosphere of a good old movie theater. reflection data that limits the effects range per channel in order to offer a powerful playing environment for "Action Game" to represent the depth and 3D feeling of the field during play, while offering movie- - Yamaha RXV1065 | Owner's Manual - Page 30
for music. Neural Surround processing for any sources. The Neural Surround decoder supports PCM (sampling rate of 96 kHz or lower), Dolby Digital, DTS Digital Surround (except for DTS 96/24), DSD and analog 2-channel input sources. When Neural Surround-incompatible signals are being input while the - Yamaha RXV1065 | Owner's Manual - Page 31
(SILENT CINEMA™) SILENT CINEMA allows you to enjoy multi-channel sources with your headphones. SILENT CINEMA mode is automatically selected mode or straight decode mode is selected. Using CINEMA DSP 3D mode CINEMA DSP 3D mode creates the intensive and accurate stereoscopic sound field in the - Yamaha RXV1065 | Owner's Manual - Page 32
receive strong signals without any interference. Once the search starts, release the key. When you keep stations, use manual station preset. (U.S.A. model only) You manually. 1 Rotate the RINPUT selector (or press dTUNER) to select "TUNER" as the input source. 2 Press rOPTION on the remote control - Yamaha RXV1065 | Owner's Manual - Page 33
station preset or manual station preset. Press model only) This unit may take a little time to call a sub-audio program of an HD Radio station. Clearing preset stations 1 Rotate the RINPUT selector (or press dTUNER) to select "TUNER" as the input source. 2 Press rOPTION on the remote control - Yamaha RXV1065 | Owner's Manual - Page 34
(or song being played) supports the iTunes Tagging feature, the TAG indicator lights up in the front panel display and "TAG" appears on the GUI screen. Lights up HD TAG TUNED WXYZ-FM 2 While a song you want to tag is being played back, press vTAG on the remote control. If a song is tagged - Yamaha RXV1065 | Owner's Manual - Page 35
(U.S.A. model only) y • This unit transmits the "tag" data to the iPod if an iPod that supports iTunes Tagging feature is stationed in the Yamaha iPod program number (absolute) ■ GUI screen Press tDISPLAY on the remote control to turn on or off the information display. The following information is - Yamaha RXV1065 | Owner's Manual - Page 36
property of their respective owners. All rights reserved. SIRIUS and XM subscriptions sold separately. Taxes and a one-time activation fee may apply. XM tuners and home docks or SIRIUS tuners (each sold separately) are required to receive the SIRIUS or XM satellite radio service. All programming and - Yamaha RXV1065 | Owner's Manual - Page 37
as "1", "2" and "3". y • To display the Radio ID number displayed on the front panel display, select channel "0". • To enter a one-digit or two-digit channel number, press the lNumeric keys on the remote control and then press lENT to confirm the input number. • Instead of pressing lENT to tune into - Yamaha RXV1065 | Owner's Manual - Page 38
directly select a preset number by pressing a lNumeric keys while calling a preset channel. Clearing preset channels You can clear the assignments of preset XM Satellite Radio channels. 1 Press rOPTION on the remote control. The Option menu for "XM" is displayed. 2 Press jCursor k / n repeatedly to - Yamaha RXV1065 | Owner's Manual - Page 39
XM® Satellite Radio tuning (U.S.A. model only) Displaying the XM Satellite Radio™ information Use this Radio information display modes. Channel Channel number, channel name Category Channel category, channel number ■ GUI screen Press tDISPLAY on the remote control to turn on or off the information - Yamaha RXV1065 | Owner's Manual - Page 40
instructions provided with the SiriusConnect tuner. SiriusConnect Tuner and the antenna (sold separately) SIRIUS DOCK COMPONENT VIDEO Refer to the instruction manuals supplied with SUPPORTED" appears on the front panel display, this unit does not support ID is 12-digit number and Radio channel "0" - Yamaha RXV1065 | Owner's Manual - Page 41
as "1", "2" and "3". y • To display the Sirius ID number displayed on the front panel display, select channel "0". • To enter a one-digit or two-digit channel number, press the lNumeric keys on the remote control and then press lENT to confirm the input number. • Instead of pressing lENT to tune - Yamaha RXV1065 | Owner's Manual - Page 42
Hits 1 Press FPRESET l / h (or ePRESET k / n) repeatedly to change the preset channel number (1 to 40). Clearing preset channels You can clear the assignments of preset SIRIUS Satellite Radio channels. 1 Press rOPTION on the remote control. The Option menu for "SIRIUS" is displayed. 2 Press jCursor - Yamaha RXV1065 | Owner's Manual - Page 43
code number (PIN) and select the channels to be locked. 1 Press rOPTION on the remote control. The Option menu for "SIRIUS" is displayed. 2 Press jCursor k / n repeatedly to select "Parental Lock" and then press jENTER. 3 Use jCursor l / h (to select a digit to edit) and jCursor k / n (to select - Yamaha RXV1065 | Owner's Manual - Page 44
cannot receive the signals, "ACQUIRING" appears on the front panel display. • When an information is unavailable, "----" appears. ■ GUI screen Press tDISPLAY on the remote control to turn on or off the information display. The following information is displayed on the GUI screen. d Category Channel - Yamaha RXV1065 | Owner's Manual - Page 45
• Select "Music" to browse music files. • Select "Videos" to browse video files. Note • The "Videos" menu does not appear unless the both your iPod and Yamaha iPod universal dock support the video browsing feature. Controlling iPod in simple remote mode You can perform basic iPod operations (play - Yamaha RXV1065 | Owner's Manual - Page 46
> Artists > Albums > Songs • Composers > Albums > Songs Menu items of "Videos" Menu items vary depending on the files stored on your iPod. ■ Play information "DOCK" is selected as the input source. 2 Press rOPTION on the remote control. The Option menu for "iPod" is displayed (page 47). 3 Press - Yamaha RXV1065 | Owner's Manual - Page 47
"BLUETOOTH" (DOCK) as the input source. 2 Turn on the Bluetooth component you want to pair with and set it to pairing mode. For details on operation of the Bluetooth component, refer to the manual supplied with it. 3 Press rOPTION on the remote control. The Option menu for "BLUETOOTH" is displayed - Yamaha RXV1065 | Owner's Manual - Page 48
portable player connected to the USB port on the front panel of this unit. This unit supports input source. The GUI screen appears on the video monitor. USB Road to India Symphony 01 Symphony . Shuffle/repeat playback 1 Press rOPTION on the remote control while "USB" is selected as the input source - Yamaha RXV1065 | Owner's Manual - Page 49
DVD player (HDMI control function supported) with HDMI, you can also control the device. • We suggest that you use products (TV, DVD player, Blu-ray player or HD DVD player) from the same manufacturer. 1 Turn on all devices connected to this unit with HDMI. For details, refer to the manual supplied - Yamaha RXV1065 | Owner's Manual - Page 50
the desired input source. 2 Press rOPTION on the remote control. The Option menu for the selected input source is Mode Extended Signal Info Surround AV 5-6 Volume Trim Input HDMI 1 DSP Straight AUDIO1/2 Volume Volume Clear Trim Preset MULTI CH Volume Video Out Trim Details of the menu items - Yamaha RXV1065 | Owner's Manual - Page 51
that cannot be expressed as the above, a total number of channels such as "5.1ch" may be displayed. Sampling Frequency Bitrate The sampling frequency per second in analog-to-digital conversion. The bit rate of input signal per second. Notes • "No Signal" is displayed when no signals are input - Yamaha RXV1065 | Owner's Manual - Page 52
composite). Then follow the procedure below to select the video to be output during a multi-channel audio reproduction. 1 Rotate the RINPUT selector (or press dMULTI) to select "MULTI CH" as the input source. 2 Press rOPTION on the remote control. The Option menu for "MULTI CH" is displayed. 3 Press - Yamaha RXV1065 | Owner's Manual - Page 53
"On" (page 60). 1 Turn on the video monitor connected to this unit. 2 Press iON SCREEN on the remote control. The GUI screen appears on the video monitor. 3 Press jCursor n initial dialogue position. 3D DSP Choices: On*, Off When CINEMA DSP 3D is enabled, sets whether to use sound field programs in - Yamaha RXV1065 | Owner's Manual - Page 54
INTRODUCTION PREPARATION BASIC OPERATION Editing surround decoders/sound field programs Level Level Level Level Note • This setting is available only when "Extra Speaker Assignment" is set to "Presence" (page 56). Sound field parameters for advanced configurations ■ Parameters for adjusting - Yamaha RXV1065 | Owner's Manual - Page 55
circuit and tone control. ■ Parameters for 7ch Stereo Center Level / Surround L Level / Surround R Level / Surround Back Level / Presence L Level / Presence R Level Adjustable range: 0 to 100% Adjusts the volume of the center, surround L/R, surround back and presence L/R channels in the 7ch Stereo - Yamaha RXV1065 | Owner's Manual - Page 56
for Neo:6 Music Center Image Adjustable range: 0.0 to 0.3* to 1.0 Adjusts the front left and right channel output relative to the center channel to make the center channel more or less dominant as necessary. Editing surround decoders/sound field programs ADVANCED OPERATION ADDITIONAL INFORMATION - Yamaha RXV1065 | Owner's Manual - Page 57
video signals input from the HDMI jack and audio signals. Fine adjusts a delay time of HDMI Auto. Manual Delay Manually fine adjusts the delay of audio and visual output. Function Setup Sets various items for HDMI and display. HDMI Sets various items for input sources. HDMI Control Standby - Yamaha RXV1065 | Owner's Manual - Page 58
Manual Setup", press jCursor k / n. Example (Speaker Configuration) Speaker Configuration Front Speaker Front panel display Small Large ;Speaker Setup In this section, procedures of setting menus using the video monitor are described. 1 Press iON SCREEN on the remote control 6 To turn off the - Yamaha RXV1065 | Owner's Manual - Page 59
to "Small". [2] Outputs low-frequency components when the sizes of speakers are set to "Large". [3] Outputs low-frequency components of the front left and right channels and the channel of speaker, the size of which is set to "Small". [4] Outputs low-frequency components of the front left and right - Yamaha RXV1065 | Owner's Manual - Page 60
your subwoofer has a volume control or a crossover frequency control, set the volume to h to select the desired speaker while "Channel" is selected, press jCursor k / you can adjust the settings of "Manual Setup" while listening to a test home use. ADDITIONAL INFORMATION APPENDIX English 57 En - Yamaha RXV1065 | Owner's Manual - Page 61
of the HDMI control function when a component that supports the HDMI control function is connected with this unit. When this parameter is set to "On", this unit output signals input from the HDMI 1-4 jacks to the video monitor even when this unit is on standby. On Enables the HDMI control function - Yamaha RXV1065 | Owner's Manual - Page 62
output from the HDMI OUT jack when the HDMI signals are converted from analog video input signals by a video conversion function. Through Outputs the video signals without changing the aspect ratio. 16:9 Outputs the video signals that displays 4:3 images on a 16:9 TV with black bands on the - Yamaha RXV1065 | Owner's Manual - Page 63
the following templates. - Blu-ray - DVD - SetTopBox - Game - TV - DVR - CD - CD-R - Satellite - VCR - Tape - MD - PC - iPod - HD DVD - "blank" Entering an original name is turned on. When this parameter is set to "Off", the volume level used at the time when the Zone2 unit was set to standby is - Yamaha RXV1065 | Owner's Manual - Page 64
using the supplied remote control. Only analog signal can be sent to the second zone. If you want to output sounds to Zone2, connect an external component to the AV5-6, AUDIO1-2 or VIDEO AUX (AUDIO) jacks (by analog connection). For example, if you want to output sound from an HDMI DVD player to the - Yamaha RXV1065 | Owner's Manual - Page 65
canceled and this unit returns to the main zone operation mode. ■ To control Zone2 by using the remote control Switch bMAIN/ZONE2 to the "ZONE2" position. Operations in the Zone2 operation mode ■ Turning on or set Zone2 to standby Press AZONE2 ON/OFF (or pPOWER). ■ Operating Zone2 Rotate the RINPUT - Yamaha RXV1065 | Owner's Manual - Page 66
step 1. Resetting all remote control codes [HDMI 4] - - - [AV 1] - - - You can reset all remote control codes to the factory default settings. [AV 2] [AV 3] [AV 4] [AV 5] [AV 6] - - - CD Yamaha 5013 - - - - - - - - - 1 Press oCODE SET on the remote control using a pointed - Yamaha RXV1065 | Owner's Manual - Page 67
to the FRONT speaker terminals, set "SP IMP." to "6ΩMIN.". REMOTE ID -XXX Choices: ID1*, ID2 Sets a remote control ID. When using multiple Yamaha AV receivers, you can operate them with a single remote control by setting the receiver IDs to the same setting. SR PIN -XXX Choices: RESET, CANCEL - Yamaha RXV1065 | Owner's Manual - Page 68
ID code. To switch to ID1: Press lNumeric keys to enter "5019". To switch to ID2: Press lNumeric keys to enter "5020". Once the remote control code is registered, nTRANSMIT blinks twice. If it fails, nTRANSMIT blinks six times. Repeat from step 1. y • If you initialize the settings of this unit - Yamaha RXV1065 | Owner's Manual - Page 69
APPENDIX Troubleshooting Refer to the table below when this unit does not function properly. If the problem you are experiencing is not listed below or if the instruction below does not help, turn off this unit, disconnect the power cable, and contact the nearest authorized Yamaha dealer or service - Yamaha RXV1065 | Owner's Manual - Page 70
output from a specific speaker. Cause The video software is copy-protected. Remedy Troubleshooting See page Incorrect input or output cable connections. No appropriate input source has been selected. Speaker connections are not secure. The volume is turned down or muted. Signals this unit cannot - Yamaha RXV1065 | Owner's Manual - Page 71
Troubleshooting Problem Cause Remedy No sound is heard from the subwoofer. "LFE / Bass Out" is set to "Front" and a Dolby Digital, DTS or AAC signals is being played. Set "LFE / Bass Out" to "Subwoofer" or "Both". "LFE / Bass Out" is set to "Subwoofer" or "Front" and a 2-channel source is - Yamaha RXV1065 | Owner's Manual - Page 72
PREPARATION BASIC OPERATION HDMI™ Troubleshooting Problem Cause Remedy No picture or sound. The number of the connected HDMI components is over the limit. Disconnect some of the HDMI components. The connected HDMI component does not support high-bandwidth digital copyright protection (HDCP - Yamaha RXV1065 | Owner's Manual - Page 73
provide the does not appear. information. iTunes Tagging (U.S.A. model only) Remedy See page Problem Cause Tag data cannot be transferred to your iPod when it is station in the Yamaha iPod universal dock (YDS10). "YDS-10" does not support tag file transfer. Remedy Use "YDS-11" to transfer - Yamaha RXV1065 | Owner's Manual - Page 74
has not received XM's signal for an extended period. Consult the latest channel guide at http://www.xmradio.com/ for the current list of channels. For cases this unit to standby, disconnect and reconnect the XM MiniTuner Home Dock and re-install the Mini-Tuner in the Home Dock and turn on this unit. - Yamaha RXV1065 | Owner's Manual - Page 75
Troubleshooting SIRIUS Satellite Radio (U.S.A. model only) If an firmware. CALL 888-539-SIRIUS The selected channel is not subscribed. TO SUBSCRIBE SUBSCRIPTION UPDATED INVALID CHANNEL Not Available The subscription information is updated. The selected channel is currently out of service - Yamaha RXV1065 | Owner's Manual - Page 76
of the same manufacturer using "List of remote control codes" at the end of this manual. If this unit does not work when you press jCursor, do the following. When the key does not work during DVD disc menu operation: press the dInput selection keys on the remote control again. When the key does not - Yamaha RXV1065 | Owner's Manual - Page 77
Troubleshooting Status message Disconnected Unable to play Bluetooth™ Cause Your iPod is removed from the Yamaha Yamaha Bluetooth wireless audio receiver Check whether your Bluetooth component is turned on and then try again. again. See page 44 44 44 Problem The music files and folder cannot - Yamaha RXV1065 | Owner's Manual - Page 78
Troubleshooting device. device. There is a problem with the signal path Turn off this unit and reconnect occurs repeatedly, contact a qualified Yamaha service center. Before Auto Setup Error L/R speaker connections. R channels are detected. Only right surround back channel signal If you connect - Yamaha RXV1065 | Owner's Manual - Page 79
Troubleshooting Error message E-7:NO MIC E-8:NO SIGNAL Cause The optimizer microphone was placed and connected. The optimizer microphone or OPTIMIZER MIC jack may be defective. Contact the nearest Yamaha dealer or service center. Run "Auto Setup" again. 19 10, 11 - 19 Run "Auto Setup" again - Yamaha RXV1065 | Owner's Manual - Page 80
sound with discrete channel output. Supporting bitrates up to 6.0 Mbps, Dolby Digital Plus can carry up to 7.1 discreet audio channels simultaneously. Supported by HDMI version 1.3 and designed for the optical disc players and AV receivers/amplifiers of the future, Dolby Digital Plus also remains - Yamaha RXV1065 | Owner's Manual - Page 81
a high-definition home theater experience. Supporting bitrates up to 24.5 Mbps for Blu-ray Disc, DTS-HD Master Audio can carry up to 7.1 discrete channels of 24-bit/96 kHz audio simultaneously. Supported by HDMI version 1.3 and designed for the optical disc players and AV receivers/amplifiers of the - Yamaha RXV1065 | Owner's Manual - Page 82
■ "x.v.Color" A color space standard supported by HDMI version 1.3. It is a more extensive color space than sRGB, and allows the expression of colors that could not be expressed before. While remaining compatible with - Yamaha RXV1065 | Owner's Manual - Page 83
to making the sound live, these reflections enable us to tell where the player is situated as well as the size and shape of the room in which theater in the listening room of your own home by using the Yamaha original sound field technology combined with various digital audio systems. ■ CINEMA DSP 3D - Yamaha RXV1065 | Owner's Manual - Page 84
following connections: - multi-channel analog audio input (page 16) - digital input (OPTICAL or COAXIAL) • Refer to the supplied instruction manuals of the input source component, and set the component appropriately. Notes • When CPPM copy-protected DVD-Audio is played back, video and audio signals - Yamaha RXV1065 | Owner's Manual - Page 85
, Front Speaker: Small 1.0 V/1.2 kΩ ZONE2 OUT 200 mV/1.2 kΩ • Headphone Jack Rated Output/Impedance AV5, etc. (1 kHz, 50 mV, 8 100 mV/470 Ω • models 400 W/500 VA [Other models 400 W • Standby Power Consumption (HDMI Control: Off, Standby Through: Off 0.2 W or less (HDMI Control: On, Standby - Yamaha RXV1065 | Owner's Manual - Page 86
Preset, Option menu 48 COAXIAL jack 13 CODE SET, remote control 7 COMPONENT VIDEO jack 13 Connect, Option menu 49 Connecting audio and video player 15 Connecting audio player 16 Connecting Bluetooth wireless audio receiver 17 Connecting external amplifier 16 Connecting external decoder 16 - Yamaha RXV1065 | Owner's Manual - Page 87
h, front panel 4 Turning off 18 Turning on 18 TV control key, remote control 7 TV monitor connection 14 ■U Updating firmware 64 USB port, front panel 4 USB storage device connection 17 USB storage device playback 45 USB, troubleshooting 74 ■V VER, advanced setup 64 VIDEO (VIDEO AUX) jack - Yamaha RXV1065 | Owner's Manual - Page 88
Index INTRODUCTION PREPARATION BASIC OPERATION ADVANCED OPERATION APPENDIX English "KMAIN ZONE ON/OFF" or "pPOWER" (example) indicates the name of the parts on the front panel or the remote control. Refer to "Part names and functions" on page 4. 85 En - Yamaha RXV1065 | Owner's Manual - Page 89
List of remote control codes TV A.R. Systems Acme Acura ADC Admiral Advent Adventura Adyson Agashi Agazi Aiko Aim Aiwa Akai Akiba Akura Alaron Alba Albatron Alcyon Alleron Allorgan Allstar - Yamaha RXV1065 | Owner's Manual - Page 90
Fujitsu Siemens Funai Futuretech Galaxi Galaxis Gateway GBC GE Geant Casino GEC Geloso General Technic Genexxa GFM Giant Gibralter GoldHand Goldline GoldStar Goodmans Gorenje GPM GPX Gradiente Graetz Granada Grandin Gronic Grundig Grunpy Haier Halifax Hallmark Hampton Hanseatic Hantarex Hantor - Yamaha RXV1065 | Owner's Manual - Page 91
Neckermann NEI Net-TV Neufunk New Tech New World NewTech Nicamagic Nikkai Nikko Nobliko Nokia Norcent Nordic Nordmende Nordvision Novatronic Oceanic Okano Olevia ONCEAS Onwa Opera Oppo Optimus Optoma Optonica Orbit Orion Orline Osaki Oso Otto Versand Pael Palladium Palsonic Panama Panasonic - Yamaha RXV1065 | Owner's Manual - Page 92
, 0260, 0263, 0271, 0274, 0327 Wincom 0055, 0056 Xrypton 0274 Yamaha 0000, 0001, 0002, 0003, 0004, 0005, 0072, 0090, 0096, Baur 1078 Beaumark 1020 Bell & Howell 1019 Bestar 1075, 1076, 1091 Black Panther Line 1075, 1091 Blaupunkt 1078 Bondstec 1076, 1090 Broksonic 1054 Bush - Yamaha RXV1065 | Owner's Manual - Page 93
1075, 1091 Universum 1072, 1077, 1078 Vector Research 1018 Video Concepts 1018 Videon 1074 Videosonic 1020 Viewsonic 1066 Voodoo 1066 1022, 1023 Yamaha 1018, 1019 Yamishi 1079, 1090 Yokan 1079, 1090 Yoko 1076, 1077, 1079, 1090 Zenith 1032 ZT Group 1066 DVD 4Kus 2097 - Yamaha RXV1065 | Owner's Manual - Page 94
2179, 2186 Disney 2078, 2088 DK Digital 2257 Dmtech 2226 Dual 2302 Durabrand 2218 DVX 2305 Easy Home 2309 Eclipse 2304 E-Dem 2318 Electrohome 2269 GFM 2176 Giec 2300 Global Solutions 2305 Global Sphere 2305 Go Video 2135, 2215 Goodmans 2247, 2289, 2298, 2300, 2308, 2330, - Yamaha RXV1065 | Owner's Manual - Page 95
2317 Telefunken 2307 Tensai 2312 Tevion 2228, 2305, 2311 Theta Digital 2207 Thomson 2229, 2238, 2284, 2294 Tokai 2302, 2310 DVD Recorder Aspire Astar Broksonic Go Video Hitachi Insignia Irradio JVC LG Liteon Panasonic Philips Pioneer Pye Samsung Sansui Sanyo Sony Sylvania Toshiba Yamaha - Yamaha RXV1065 | Owner's Manual - Page 96
Cambridge 4136 Canal Satellite 4135 Canal+ 4135 CaptiveWorks 4049 Channel Master 4060, 4085 Chaparral 4025 CHEROKEE 4138 Chess 4134 4107, 4139 DDC 4085 Delega 4085 Dew 4096 Diamond 4097 Digiality 4137 Digital Stream 4059 DIRECTV 4017, 4018, 4020, 4021, 4022, 4024, 4037 - Yamaha RXV1065 | Owner's Manual - Page 97
UEC Uher UltimateTV Uniden Unisat Unitor Universum US Digital Variosat Vega Ventana Viewsat Visiosat Voom Vortec 4131, 4133 4052, 4057, 4145 4086 CD Yamaha 5000, 5013 CD Recoder Yamaha 5001 MD Yamaha 5002, 5003, 5004 Tape Yamaha 5005, 5006 Tuner Yamaha 5007, 5008, 5009, 5010, 5014, 5015 - Yamaha RXV1065 | Owner's Manual - Page 98
© 2009 Yamaha Corporation All rights reserved. Printed in Malaysia WQ94920
-
 1
1 -
 2
2 -
 3
3 -
 4
4 -
 5
5 -
 6
6 -
 7
7 -
8
-
9
-
10
-
11
-
12
-
13
-
14
-
15
-
16
-
17
-
18
-
19
-
20
-
21
-
22
-
23
-
24
-
25
-
26
-
27
-
28
-
29
-
30
-
31
-
32
-
33
-
34
-
35
-
36
-
37
-
38
-
39
-
40
-
41
-
42
-
43
-
44
-
45
-
46
-
47
-
48
-
49
-
50
-
51
-
52
-
53
-
54
-
55
-
56
-
57
-
58
-
59
-
60
-
61
-
62
-
63
-
64
-
65
-
66
-
67
-
68
-
69
-
70
-
71
-
72
-
73
-
74
-
75
-
76
-
77
-
78
-
79
-
80
-
81
-
82
-
83
-
84
-
85
-
86
-
87
-
88
-
89
-
90
-
91
-
92
-
93
-
94
-
95
-
96
-
97
-
98
 |
 |

RX-V1065
AV Receiver
OWNER’S MANUAL
U