3Com 3CRWE675075-UK User Guide - Page 40
Setting Up an Ad-Hoc, Network
 |
UPC - 662705477848
View all 3Com 3CRWE675075-UK manuals
Add to My Manuals
Save this manual to your list of manuals |
Page 40 highlights
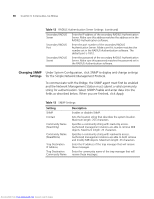
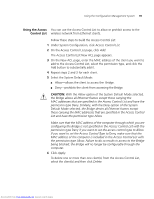
34 CHAPTER 3: CONFIGURING THE BRIDGE Setting Up an Ad-Hoc Network Operating in ad-hoc mode, two or more Bridges can associate among themselves to form an ad-hoc network without the intervention of an access point. You may wish to set up an ad-hoc network, for example, if a group is working away from the office, or if a group in the office needs to share files apart from the wired LAN. CAUTION: To ensure correct operation, the settings on the two Bridges must match exactly. To avoid the possibility of losing wireless association while you are configuring, 3Com recommends that you connect the Bridge directly to the computer. 1 Connect the first Bridge to power and use the Ethernet cable to connect it to the computer. 2 Use the 3Com Wireless Infrastructure Device Manager to select the Bridge and launch the Configuration Management System. 3 Under System Configuration, click Wireless Network. 4 In the Wireless Network page: a Locate the Network Mode field and select Ad-hoc (Peer-to-Peer). b Specify the Wireless LAN Service Area and the Channel Selection as described in "Setting Wireless Network Properties" on page 31. c Set the Data Preamble. To increase performance, select Short (Enhanced performance). When equipment that does not support short preamble is also being used, select Long (Wi-Fi Interoperable). When you are finished, click Apply. Security settings default to Open System (no security). Optionally, you can set different WEP settings as described in "Changing Wireless Security Settings" on page 35. 5 When you are finished, click Apply. 6 End the browser session. 7 Repeat steps 1-6 with the second Bridge. Make sure you configure Bridge settings to match exactly. When you are finished, click Apply and end the browser session. 8 Connect the Ethernet devices to the Bridges. If you use hubs, make sure that the Bridges are connected through the hub uplink ports. Downloaded from www.Manualslib.com manuals search engine
-
 1
1 -
2
-
3
-
4
-
5
-
6
-
7
-
8
-
9
-
10
-
11
-
12
-
13
-
14
-
15
-
16
-
17
-
18
-
19
-
20
-
21
-
22
-
23
-
24
-
25
-
26
-
27
-
28
-
29
-
30
-
31
-
32
-
33
-
34
-
 35
35 -
 36
36 -
 37
37 -
 38
38 -
 39
39 -
 40
40 -
 41
41 -
 42
42 -
 43
43 -
 44
44 -
 45
45 -
46
-
47
-
48
-
49
-
50
-
51
-
52
-
53
-
54
-
55
-
56
-
57
-
58
-
59
-
60
-
61
-
62
-
63
-
64
-
65
-
66
-
67
-
68
-
69
-
70
 |
 |