3Com 3CRWER300-73-US User Guide
3Com 3CRWER300-73-US - Wireless 11n Cable/DSL Firewall Router Manual
 |
UPC - 662705532622
View all 3Com 3CRWER300-73-US manuals
Add to My Manuals
Save this manual to your list of manuals |
3Com 3CRWER300-73-US manual content summary:
- 3Com 3CRWER300-73-US | User Guide - Page 1
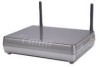
Wireless 11n Cable/DSL Firewall Router User Guide WL-602 3CRWER300-73 http://www.3Com.com/ Part No. 10016790 Rev. AA Published July 2008 - 3Com 3CRWER300-73-US | User Guide - Page 2
time. If there is any software on removable media described in this , this User Guide. Unless otherwise indicated, 3Com registered trademarks licensed exclusively through X/Open Company, Ltd. Netscape policy of 3Com Corporation to be environmentally-friendly in all operations. To uphold our policy - 3Com 3CRWER300-73-US | User Guide - Page 3
7 Conventions 8 Feedback About This User Guide 9 Related Documentation 9 INTRODUCING THE ROUTER Wireless 11n Cable/DSL Firewall Router 11 19 Using the Rubber Feet 20 Wall Mounting 20 Mounting Instructions for Cement Walls 20 Mounting Instructions for Wood Walls 21 Powering Up the Router 21 - 3Com 3CRWER300-73-US | User Guide - Page 4
PPTP Client Software 27 Disabling Web Proxy 27 RUNNING THE SETUP WIZARD Accessing the Router using the 3Com Detect Application 29 Running the 3Com Detect Application 29 Accessing 52 LAN Settings 52 DHCP Clients List 53 Wireless Settings 55 Configuration 56 Encryption 57 WPS 62 Connection Control 64 Client - 3Com 3CRWER300-73-US | User Guide - Page 5
81 SPI 81 Special Applications 85 Virtual Servers 86 DMZ 87 PC Privileges 88 Schedule Rule 90 URL Filter 91 Advanced 92 Security 92 VLAN 95 Static Routes 97 RIP 99 DDNS 101 SNMP 102 Syslog 103 Proxy ARP 104 QoS Settings 105 Traffic mapping 106 VPN 108 System Tools 115 Restart Router - 3Com 3CRWER300-73-US | User Guide - Page 6
/Feedback 124 Support 124 Feedback 124 TROUBLESHOOTING Basic Connection Checks 125 Browsing to the Router Configuration Screens 126 Connecting to the Internet 127 Forgotten Password and Reset to Factory Defaults 127 Wireless Networking 128 Recovering from Corrupted Software 130 Power Adapter 130 - 3Com 3CRWER300-73-US | User Guide - Page 7
SAFETY INFORMATION END USER SOFTWARE LICENSE AGREEMENT OBTAINING SUPPORT FOR YOUR 3COM PRODUCTS Register Your Product to Gain Service Benefits 148 Solve Problems Online 148 Purchase Extended Warranty and Professional Services 148 Access Software Downloads 149 Contact Us 149 Telephone Technical - 3Com 3CRWER300-73-US | User Guide - Page 8
- 3Com 3CRWER300-73-US | User Guide - Page 9
the 3Com Wireless 11n Cable/DSL Firewall Router (3CRWER300-73). This guide is intended user guides and release notes are available in Adobe Acrobat Reader Portable Document Format (PDF) on the 3Com World Wide Web site: http://www.3Com.com Naming Convention Throughout this guide, the 3Com Wireless - 3Com 3CRWER300-73-US | User Guide - Page 10
enter" in this guide, you must type something, and then press Return or Enter. Do not press Return or Enter when an instruction simply says "type ■ Emphasize a point. ■ Denote a new term at the place where it is defined in the text. ■ Identify menu names, menu commands, and software button names. - 3Com 3CRWER300-73-US | User Guide - Page 11
page) ■ Page number (if appropriate) Example: ■ 3Com Wireless 11n Cable/DSL Firewall Router User Guide ■ Part Number 10016790 Rev. AA ■ Page 24 Do not use this e-mail address for technical support questions. For information about contacting Technical Support, please refer to Appendix E. In addition - 3Com 3CRWER300-73-US | User Guide - Page 12
10 ABOUT THIS GUIDE - 3Com 3CRWER300-73-US | User Guide - Page 13
Wireless 11n Cable/DSL Firewall Router The 3Com Wireless wireless computers. The Router also provides protection in the form of an electronic "firewall" preventing anyone outside of your network from seeing your files or damaging your computers. The Router can also prevent your users from accessing - 3Com 3CRWER300-73-US | User Guide - Page 14
you use the Router in your network (Figure 2), it becomes your connection to the Internet. Connections can be made directly to the Router, or to a 3Com Switch, expanding the number of computers you can have in your network. Figure 2 Example Network Using a Firewall Router - 3Com 3CRWER300-73-US | User Guide - Page 15
: ■ One 3Com Wireless 11n Cable/DSL Firewall Router ■ One power adapter for use with the Router ■ Four rubber feet ■ One Ethernet cable ■ One CD-ROM containing this User Guide, copies of the quick install guide in various languages and the 3Com Detect application. ■ Installation guide ■ Support and - 3Com 3CRWER300-73-US | User Guide - Page 16
at least the following: ■ A computer with an operating system that supports TCP/IP networking protocols (for example Windows 2000/XP/Vista, Unix, Mac your Router. ■ An 802.11b, 802.11g or 802.11n draft2.0 compliant wireless NIC. ■ An active ADSL or Cable subscription and connection. Note that your - 3Com 3CRWER300-73-US | User Guide - Page 17
on. Fast flash during software upgrade. Fast flash for software reset to the factory defaults. Fast flash for hardware reset to the factory defaults. If the LED is off, the Wireless LAN has been disabled in the Router, or there is a problem. Refer to Chapter 6 Troubleshooting. 5 LAN Status LEDs (4 - 3Com 3CRWER300-73-US | User Guide - Page 18
THE ROUTER 6 WPS LED Blue WiFi Protected Setup (WPS) is a standard for easy and secure establishment of a wireless network, allowing wireless clients to connect securely to routers and access points. The WPS LED shows the status of the WPS function. It has a number of modes to help monitor the - 3Com 3CRWER300-73-US | User Guide - Page 19
(Figure 4) of the Router contains one WPS button, four LAN ports, one WAN port, one WiFi on/off button, a reset button, and a power adapter socket. Figure 4 Router - Rear Panel 1 Wireless Antenna The antennas should be placed in a 'V' position when initially installed. CAUTION: Do not force the - 3Com 3CRWER300-73-US | User Guide - Page 20
modem. 5 WiFi On/Off button Use this button to turn on/turn off the wireless function. Press the button for 3 seconds. 6 Reset Button If you want to reset your Router to factory default settings, or cannot access the web management interface (for example, due to a lost password), then you may use - 3Com 3CRWER300-73-US | User Guide - Page 21
THE ROUTER Introduction This chapter will guide you through a basic installation of to external ADSL or Cable modem. ■ is centrally located to the wireless computers that will connect to the Router. A suitable location might be on and access to the rear panel connectors, if necessary. - 3Com 3CRWER300-73-US | User Guide - Page 22
unit and through the vents in the side of the case is not restricted. 3Com recommends you provide a minimum of 25 mm (1 in.) clearance. Using the that the rubber feet are not fixed. Mounting To wall mount the unit: Instructions for Cement Walls 1 Make two holes 100 mm (3.9 in.) apart and insert - 3Com 3CRWER300-73-US | User Guide - Page 23
To wall mount the unit: Instructions for Wood Walls 1 Make the Router to a computer in order to be able to access the Internet. Follow these simple steps: 1 Using RJ-45 cable use of the Router to communicate with the Internet. 3Com recommends that you perform the initial Router configuration from a - 3Com 3CRWER300-73-US | User Guide - Page 24
22 CHAPTER 2: INSTALLING THE ROUTER To communicate wirelessly with your Router, your wireless NIC should be set as follows: ■ Encryption - none ■ SSID - 3Com ■ Channel - 11 This following figure shows a typical network configuration for 3Com Wireless 11n Cable/DSL Firewall Router. Figure 5 Network - 3Com 3CRWER300-73-US | User Guide - Page 25
computers need to be configured correctly for this to take place. To change the configuration of your computers to allow this, follow the instructions in this chapter. Obtaining an IP Address Automatically Windows 2000 If you are using a Windows 2000-based computer, use the following procedure to - 3Com 3CRWER300-73-US | User Guide - Page 26
3: SETTING UP YOUR COMPUTERS Figure 6 Local Area Properties Screen 6 Ensure that the options Obtain an IP address automatically, and Obtain DNS server address automatically are both selected as shown in Figure 7. Click OK. Figure 7 Internet Protocol (TCP/IP) Properties Screen 7 Restart your computer - 3Com 3CRWER300-73-US | User Guide - Page 27
click on Properties. Figure 8 Local Area Connection Properties Screen 6 Ensure that the options Obtain an IPv6,v4 address automatically, and Obtain DNS servers address automatically are both selected as shown in (Figure 9). Click OK. Figure 9 Internet Protocol Version 6 (TCP/IPv6) Properties Screen - 3Com 3CRWER300-73-US | User Guide - Page 28
appear. 5 Select Internet Protocol TCP/IP and click on Properties. 6 Ensure that the options Obtain an IP address automatically, and Obtain DNS servers automatically are both selected. Click OK. 7 Restart your computer. Macintosh If you are using a Macintosh computer, use the following procedure to - 3Com 3CRWER300-73-US | User Guide - Page 29
Disabling PPPoE and PPTP Client Software 27 Disabling PPPoE and PPTP Client Software If you have PPPoE client software installed on your computer, you will need to disable it. To do this: 1 From the and click LAN Settings at the bottom. Make sure that the Use Proxy Server option is unchecked. - 3Com 3CRWER300-73-US | User Guide - Page 30
28 CHAPTER 3: SETTING UP YOUR COMPUTERS - 3Com 3CRWER300-73-US | User Guide - Page 31
the contents of the CD-ROM. Select the 3Com Detect Application link to install the utility. Follow the onscreen instructions. If the auto-run program does not Once installed, the 3Com Detect Application can be accessed from the Windows Start/Programs list. When the 3Com Detect application starts, - 3Com 3CRWER300-73-US | User Guide - Page 32
Figure 11 3Com Detect Application a connected Router (default), or specifying an IP range. Note that specifying a large range may take some time for the search to complete. - search the same subnet Figure 13 Discovery Screen - search IP range Once your Router has been located, you will see the list - 3Com 3CRWER300-73-US | User Guide - Page 33
the Setup Wizard The Router setup program is Web-based, which means that it is accessed through your Web browser (Netscape Navigator 4.7 or higher, Internet Explorer 6.0 or higher, Mozilla 1.2.1 or higher, or Apple's Safari). To use the Setup Wizard: 1 Ensure that - 3Com 3CRWER300-73-US | User Guide - Page 34
to 11. 2. Customers outside of the US, Canada or Taiwan can download the firmware from the 3Com website (www.3com.com) which will enable operation on channels 12-13. You will be asked to verify your country before you can download the firmware what will enable the wider range of channels to be used - 3Com 3CRWER300-73-US | User Guide - Page 35
be guided step by step through a basic setup procedure. ■ if the Router has been configured previously, the Welcome screen will appear (Figure 18). There are three tabs: Notice Board, Password and Wizard. Figure 18 Welcome Screen ■ Go to the Notice Board tab to see the current software information - 3Com 3CRWER300-73-US | User Guide - Page 36
34 CHAPTER 4: RUNNING THE SETUP WIZARD The password screen allows you to change the current password and set the login time limit to the Router's management interface. Figure 19 Password Screen 1 To change the current password, enter the password in the Current Password field. 2 Enter the new - 3Com 3CRWER300-73-US | User Guide - Page 37
Accessing the Setup Wizard 35 Figure 20 Change Password Screen Time Zone drop-down menu. 4 Enter the time in the Synchronization Interval field. 5 Select the desired servers from the Time Server drop-down menu. 6 Check the Enable box in the Daylight Savings field, if daylight savings applies to - 3Com 3CRWER300-73-US | User Guide - Page 38
see page 37 ■ Static IP - Using fixed IP, see page 38 ■ PPPoE - PPP over Ethernet, providing routing for multiple PCs, see page 39 ■ PPTP - Point-to-Point Tunneling Protocol, see page 40 ■ L2TP - Layer 2 Tunneling Protocol, see page 41 and click Next. For further information on selecting a mode see - 3Com 3CRWER300-73-US | User Guide - Page 39
Accessing the Setup Wizard 37 Dynamic IP This mode is often used in cable connection when the ISP assigns IP address via DHCP. To set up the Router for use with a dynamic IP connection, use the following procedure: Figure 23 Host Name Screen 1 Host name is a name that some Internet Service Providers - 3Com 3CRWER300-73-US | User Guide - Page 40
Provider field. 2 Enter the subnet mask in the Subnet Mask field. 3 Enter the default gateway IP address in the Service Provider Gateway Address field. 4 Enter the DNS address in the DNS Address field. 5 If there is a secondary DNS, enter the IP address in the Secondary - 3Com 3CRWER300-73-US | User Guide - Page 41
Re-type your password in the Retype Password field. 4 The Service Name field is optional, enter this information if your ISP requires it. 5 Enter the MTU information, the default is 1492. Do not change the MTU value unless specifically instructed by your ISP. 6 Enter the maximum Idle Timeout for the - 3Com 3CRWER300-73-US | User Guide - Page 42
ISP assigned IP address via a PPTP Virtual Private Network connection (VPN). To set up the Router for use with a PPTP (Point to Point Tunneling Protocol) connection, use the following procedure: Figure 26 PPTP Screen 1 Enter the PPTP Server information. 2 Enter the User ID and Password required by - 3Com 3CRWER300-73-US | User Guide - Page 43
Protocol (L2TP) provides a standard method for transporting the link layer of the Point-to-Point Protocol (PPP) between a dial-up server and a Network Access Server, using a network connection in lieu of a physical point-to-point connection. This mode is most often used in Israel. To set up the - 3Com 3CRWER300-73-US | User Guide - Page 44
DHCP Server box to enable the DHCP function. 3 Enter the client IP address range in the IP Pool Start Address and IP Pool End Address fields. You can also click Auto IP Range to automatically set the starting and ending IP address: 192.168.1.2 ~ 192.168.1.254. 4 Click Next. The Wireless - 3Com 3CRWER300-73-US | User Guide - Page 45
Accessing the Setup Wizard 43 Wizard - Wireless The Wireless Settings screen allows you to set up the SSID and radio Setting channel used for the wireless connection. Figure 29 Wireless Setting Screen 1 Select the channel you want to use from the Channel drop-down menu. 2 Specify the SSID to be used - 3Com 3CRWER300-73-US | User Guide - Page 46
Security Mode Select the security mode, five options available: ■ Disabled: selecting this mode means no wireless security will be used. ■ 64-bit WEP : see page 45 ■ 128-bit WEP: see page 46 ■ WPA-PSK (no server): see page 47 ■ WPA (with Radius server): see page 48 Figure 30 Security Mode Screen - 3Com 3CRWER300-73-US | User Guide - Page 47
. Matching encryption keys must be setup on your Router and wireless client devices to use WEP. 3Com recommends to use stronger WPA/WPA2 security. Figure 31 64-bit WEP Screen To enable 64-bit WEP: 1 You can enter the 64-bit WEP key manually. Enter the WEP key as 5 pairs of hex digits - 3Com 3CRWER300-73-US | User Guide - Page 48
encryption keys must be set up on your Router and wireless client devices to use WEP. 3Com recommends to use stronger WPA/WPA2 security. Figure 32 128-bit WEP Screen To enable 128-bit WEP: 1 You can enter the 128-bit WEP key manually, enter your WEP key as 13 pairs of hex - 3Com 3CRWER300-73-US | User Guide - Page 49
are available: TKIP, AES, Auto for WPA AES for WPA2, and AES for both WPA and WPA2. WPA supports TKIP and AES Encryption technique, for some old module of wireless client cards, they may only support TKIP. In this case, we suggest you to select "AUTO for WPA, AES for WPA2". If your - 3Com 3CRWER300-73-US | User Guide - Page 50
suggest you to select "AUTO for WPA, AES for WPA2". If your wireless client cards can support AES over WPA, we suggest you directly select "AES for both WPA and WPA2". 4 Enter the IP address of the RADIUS server on your network into the RADIUS Server field. 5 Enter the port number that the RADIUS - 3Com 3CRWER300-73-US | User Guide - Page 51
Accessing the Setup Wizard 49 Wizard Configuration Summary When you have completed the Setup Wizard, a configuration summary will appear. Verify the configuration information of the Router and then click Apply to save your settings. 3Com recommends that you print out this page for your records. - 3Com 3CRWER300-73-US | User Guide - Page 52
50 CHAPTER 4: RUNNING THE SETUP WIZARD - 3Com 3CRWER300-73-US | User Guide - Page 53
click on an item from the main menu, the corresponding screen will then appear in the center. Welcome Screen The Welcome screen shows the current software information. Status Figure 36 Welcome Screen - 3Com 3CRWER300-73-US | User Guide - Page 54
Subnet Mask. The default setting is 255.255.255.0 ■ Enable/Disable the DHCP Server Function. The default is "Enable". ■ Specify the Starting and Ending IP Pool Domain Name. This field is optional. ■ Specify the IP address of 3Com NBX call processor. The Router will also provide a list of all client - 3Com 3CRWER300-73-US | User Guide - Page 55
Router as a DHCP Server, check Enable in the DHCP Server field. 3 Enter the IP address range in the IP Pool server will reserve the IP address for each computer. 5 Specify the Local Domain Name for your network (this step is optional). 6 Enter the IP address of the NBX Call Processor in the 3Com - 3Com 3CRWER300-73-US | User Guide - Page 56
- The client machine's host name, if configured. ■ MAC Address - The Media Access Control (MAC) address of the client's network card. ■ Client Type - Whether the client is connected to the Router by wired or wireless connection. ■ Check the Fix checkbox to permanently fix the IP address. ■ Click - 3Com 3CRWER300-73-US | User Guide - Page 57
to configure the settings for the wireless connections. You can enable or disable the wireless connection for your LAN. When disabled, no wireless PCs can gain access to either the Internet or other PCs on your wired or wireless LAN through this Router. Figure 39 Wireless Settings Screen There are - 3Com 3CRWER300-73-US | User Guide - Page 58
function using the WiFi on/off button at the back of the unit. Figure 40 Wireless Configuration Screen To enable the wireless function: 1 Check Enable Wireless Networking checkbox. 2 Select the wireless channel you want to use from the Channel drop-down menu. 3 Select the Extension Channel - 3Com 3CRWER300-73-US | User Guide - Page 59
mode ensures proper operation of 802.11g & 802.11n clients and access points when there is heavy 802.11b traffic in the operating environment. When protected mode is ON, 802.11g & 802.11n scans for other wireless network traffic before it transmits data. Therefore, using this mode in environments - 3Com 3CRWER300-73-US | User Guide - Page 60
keys must be setup on your Router and wireless client devices to use WEP. Note that 3Com recommends using WPA/WPA2 to secure your wireless connection. Figure 42 64-bit WEP Screen To setup 64-bit WEP: 1 You can enter the 64-bit WEP key manually: ■ enter the WEP key as 5 pairs of hex - 3Com 3CRWER300-73-US | User Guide - Page 61
must be set up on your Router and wireless client devices to use WEP. Note that 3Com recommends using WPA/WPA2 to secure your wireless connection. Figure 43 128-bit WEP Screen To setup 128-bit WEP: 1 You can enter the 128-bit WEP key manually: ■ enter your WEP key as 13 pairs of - 3Com 3CRWER300-73-US | User Guide - Page 62
wireless network must be identical. In 128-bit WEP mode, only one WEP key can be specified. 2 Click Apply. WPA-PSK (no server) WPA (Wi-Fi Protected Access and WPA2. WPA supports TKIP and AES Encryption technique, for some old module of wireless client cards, they may only support TKIP. In this case - 3Com 3CRWER300-73-US | User Guide - Page 63
. 6 Click Apply. WPA (with RADIUS Server) WPA (Wi-Fi Protected Access) provides dynamic key changes and constitutes the best security solution for both WPA and WPA2. WPA supports TKIP and AES Encryption technique, for some old module of wireless client cards, they may only support TKIP. In this case, we - 3Com 3CRWER300-73-US | User Guide - Page 64
server on your network into the RADIUS Server field. 5 Enter the port number that the RADIUS server is operating on in the RADIUS Port field. 6 Enter the key for the RADIUS server Setup (WPS) integrate the new WLAN clients into your wireless network easily. You can enable this function by entering - 3Com 3CRWER300-73-US | User Guide - Page 65
Wireless Settings 63 and select the PIN method. You should get a 8-digit PIN number from the WPS utility. Enter that 8-digit PIN WPS button located on the rear of the Router. Note that this setup precess will only be active for 2 minutes. Follow the instruction of your WLAN NIC to set up the WPS. - 3Com 3CRWER300-73-US | User Guide - Page 66
Control This feature is used to filter the clients based on their MAC addresses. Using this function, you can limit the access right of the wireless clients to this Router. Check the Enable MAC Address Filtering checkbox, the Connection Control screen will appear. Figure 47 Connection Control - 3Com 3CRWER300-73-US | User Guide - Page 67
clients that are connected to the Router. Figure 48 Client List Screen Click Refresh to update the list. WMM Wireless Multimedia (WMM) mode, which supports devices that meet the 801.11e QBSS standard. WMM uses traffic priority based on the four ACs; Voice, Video, Best Effort, and Background - 3Com 3CRWER300-73-US | User Guide - Page 68
to match any network-wide QoS policy. WMM also specifies a protocol that access points can use to communicate the configured traffic priority levels to QoS-enabled wireless clients. The following table explains the four access categories: Access Category WMM Designation Description 802.1D - 3Com 3CRWER300-73-US | User Guide - Page 69
. Specify a value in the range 0-65535 microseconds. ACM - Admission Control Mode, for the access category. When enabled, clients are blocked from using the access category. (Default: Disabled) Ack Policy (WMM Acknowledge Policy) - By default, all wireless data transmissions require the sender to - 3Com 3CRWER300-73-US | User Guide - Page 70
68 CHAPTER 5: CONFIGURING THE ROUTER WDS The Router supports WDS (Wireless Distribution System). WDS enables one or more Access Points to rebroadcast received signals to extend range and reach, though this can affect the overall throughput of data. Note that WDS implementation can vary from product - 3Com 3CRWER300-73-US | User Guide - Page 71
Figure 51 Add WDS screen Wireless Settings 69 On the add WDS screen, enter the MAC address of the access point, up to 4 APs can be added to the AP MAC Address table, and click Apply. Here is an example of how to setup two units of 3Com Router over WDS. Note that when setting - 3Com 3CRWER300-73-US | User Guide - Page 72
70 CHAPTER 5: CONFIGURING THE ROUTER Figure 52 First Router add WDS Screen Access the Web UI of the second Router, repeat the above steps to add the first Router to the WDS table (see Figure 53). Figure 53 Second Router add WDS Screen - 3Com 3CRWER300-73-US | User Guide - Page 73
connection. Please note that you should not change this settings unless you are an expert user. There are six parameters that you can configure: Figure 54 Wireless Advanced Setting Screen ■ Beacon Interval: this represents the amount of time between beacon transmissions. ■ DTIM Interval: A DTIM - 3Com 3CRWER300-73-US | User Guide - Page 74
72 CHAPTER 5: CONFIGURING THE ROUTER network and will not be able to communicate with each other. You may want to utilize this feature if you have many guests that frequently connect to your wireless network. - 3Com 3CRWER300-73-US | User Guide - Page 75
Internet Settings 73 Internet Settings You can configure the settings for your WAN port connection. see page 75) ■ PPPoE - PPP over Ethernet, providing routing for multiple PCs (see page 76) ■ PPTP - Point-to-Point Tunneling Protocol (see page 77) ■ L2TP - Layer 2 Tunneling Protocol (see page 78) - 3Com 3CRWER300-73-US | User Guide - Page 76
74 CHAPTER 5: CONFIGURING THE ROUTER Dynamic IP You can configure the Router to obtain an IP address automatically from a DHCP server. Figure 56 Dynamic IP Screen 1 Select Dynamic IP from the Internet sharing protocol drop-down menu. 2 If the ISP requires you to input a Host Name, - 3Com 3CRWER300-73-US | User Guide - Page 77
Internet Settings 75 Static IP If your Service Provider has assigned a fixed IP address, enter the assigned IP address down menu. 2 Enter your IP address in the IP address assigned by your service provider field. 3 Enter the subnet mask in the Subnet Mask field. 4 Enter the default gateway IP address - 3Com 3CRWER300-73-US | User Guide - Page 78
from the Internet sharing protocol drop-down menu. 2 Enter the user name assigned to you by your ISP in the Username field. field. Re-enter your password in the Retype Password field. 3 The Service Name field is optional. 4 Enter the MTU value in the MTU access the Internet again. 6 Click Apply. - 3Com 3CRWER300-73-US | User Guide - Page 79
the Internet connection protocol, setup the details on this screen. Figure 59 PPTP Screen 1 Select PPTP from the Internet sharing protocol drop-down menu. 2 Enter the PPTP Server information. 3 Enter the user ID in the User ID field. And enter the password assigned to you by your ISP in the Password - 3Com 3CRWER300-73-US | User Guide - Page 80
used in Israel. Figure 60 L2TP Connection Screen 1 Select L2TP from the Internet sharing protocol drop-down menu. 2 Enter the L2TP Server information. 3 Enter the User ID and Password required by your ISP. 4 Retype the password. 5 Enter the maximum Idle Timeout for the Internet connection. After - 3Com 3CRWER300-73-US | User Guide - Page 81
79 DNS Domain Name Service (or Server) is an Internet service that translates domain names into IP addresses. Because domain names are alphabetic, they're easier to remember. The Internet however, is really based on IP addresses. Every time you use a domain name, a DNS service must translate the - 3Com 3CRWER300-73-US | User Guide - Page 82
field. or ■ If the computer that you are using is the one that was previously connected directly to the cable modem, click Clone. or ■ To reset the MAC Address to the default, click Reset MAC. 3 Click Apply to save the settings. - 3Com 3CRWER300-73-US | User Guide - Page 83
including Ping of Death (PoD) and Denial of Service (DoS) attacks. You can turn the firewall function completely vulnerable to hacker attacks, but 3Com recommends that you leave the firewall enabled The Intrusion Detection Feature of the Router limits access for incoming traffic at the WAN port. This - 3Com 3CRWER300-73-US | User Guide - Page 84
abnormal network activity occurs, an alerting email will be sent out to you. Enter the following information to receive the email: ■ Your E-mail Address ■ SMTP Server Address ■ User name ■ Password - 3Com 3CRWER300-73-US | User Guide - Page 85
option to configure additional parameters for the firewall. ■ Fragmentation half-open wait - Configures the number of seconds that a packet state structure use by another packet. ■ TCP SYN wait - Defines how long the software will wait for a TCP session to synchronize before dropping the session. ■ - 3Com 3CRWER300-73-US | User Guide - Page 86
CHAPTER 5: CONFIGURING THE ROUTER ■ Total incomplete TCP/UDP sessions HIGH - Defines the rate of new unestablished sessions that will cause the software to start deleting half-open sessions. ■ Total incomplete TCP/UDP sessions LOW - Defines the rate of new unestablished sessions that will cause the - 3Com 3CRWER300-73-US | User Guide - Page 87
ports need to be configured. You can manually enter the port information into the Router. To manually enter the port information: 1 Specify the trigger to be opened up in the firewall for the application to work properly. Also specify whether these ports are TCP or UDP. Note that the range of the - 3Com 3CRWER300-73-US | User Guide - Page 88
Servers The Virtual servers feature allows you to route external (Internet) calls for services such as a web server (port 80), FTP server listed in the drop-down menu, you can manually add the virtual server to the table. To manually configure your virtual servers: 1 Enter the IP address, and the - 3Com 3CRWER300-73-US | User Guide - Page 89
changes for each Virtual Server entry. DMZ If you have a client PC that cannot run an Internet application properly from behind the firewall, you can open the client up to unrestricted two-way Internet access. This may be necessary if the NAT feature is causing problems with an application such - 3Com 3CRWER300-73-US | User Guide - Page 90
WAN IP. We only allow one DMZ server to be accessed by public IPs (Many to 1 NAT). If you have more than one DMZ server, you have to set a second to restrict access to the Internet, email or other network services at specific days and times. Restriction can be set for a single computer, a range of - 3Com 3CRWER300-73-US | User Guide - Page 91
is listed on this screen, to block a particular service, check the appropriate Blocking checkbox. If the service to be restricted is not listed here, you can enter a custom range of ports at the bottom of the screen, under User Defined Blocked Ports. 4 If you want the restriction to apply only - 3Com 3CRWER300-73-US | User Guide - Page 92
90 CHAPTER 5: CONFIGURING THE ROUTER Schedule Rule The Router can be configured to restrict access to the Internet, email or other network services at specific days and times. Define the time in this screen, and define the rules in the PC Privileges screen (see page 88). Figure 71 - 3Com 3CRWER300-73-US | User Guide - Page 93
.somesite.com) and/or keywords you want to filter on your network. For example, entering a keyword of xxx would block access to any URL that contains the string xxx. Figure 73 URL Filter Screen 1 Check the Enable URL Filtering Function checkbox. The rule table will appear. 2 Enter the URL address - 3Com 3CRWER300-73-US | User Guide - Page 94
92 CHAPTER 5: CONFIGURING THE ROUTER Advanced The Advanced section allows you to set additional parameter details for the Router. You can configure: ■ Security ■ VLAN ■ Static Routes ■ RIP ■ DDNS ■ SNMP ■ Syslog ■ Proxy Arp ■ QoS Settings Security Use the Security screen to set the advanced - 3Com 3CRWER300-73-US | User Guide - Page 95
should only be disabled by advanced users, and if your ISP assigns you your network will not be able to access the Internet. Other problems may also occur. ■ IPSec NAT-T LAN-WAN throughput. This Router supports NAT-T draft 2 implementation. ■ properly. This usually requires opening TCP and UDP ports - 3Com 3CRWER300-73-US | User Guide - Page 96
Sharing host computer that uses Point-to-Point Protocol over Ethernet (PPPoE). Message Protocol (ICMP) error to the external server to request that the server negotiate the TCP Maximum Segment Size (MSS). Internet Host, this allows any computer to access the Router remotely. Before you enable this - 3Com 3CRWER300-73-US | User Guide - Page 97
much of their time dealing with moves and changes. If users move to a different IP subnet, the IP addresses of each endstation must be updated manually. With a VLAN setup, if an endstation in VLAN 1 allows you to setup VLAN groups. Note that Wireless LAN is permanently assigned to Default VLAN. - 3Com 3CRWER300-73-US | User Guide - Page 98
96 CHAPTER 5: CONFIGURING THE ROUTER Figure 75 VLAN Screen Click Add VLAN to create a new entry (see Figure 76). Figure 76 VLAN Profile Screen ■ Enter a description for your VLAN in the Description field. ■ Enter the IP Address and subnet mask in the corresponding fields. ■ Select to set the NAT - 3Com 3CRWER300-73-US | User Guide - Page 99
routes in this screen. You can setup a static route that will get all traffic with destination to business network to go through VPN tunnel and the rest outside of the VPN tunnel. Figure 77 Static Routes Screen To add a static route entry to the table, click Add (see Figure 78). To change - 3Com 3CRWER300-73-US | User Guide - Page 100
98 CHAPTER 5: CONFIGURING THE ROUTER ■ Gateway - the Router used to route data to the network specified by the network address. ■ Interface - select the interface. Note that you should only confiqure either the Gateway information or select the Interface. After you have finished making changes to - 3Com 3CRWER300-73-US | User Guide - Page 101
will transmit RIP update information to other RIP-enabled devices. ■ Silent - RIP is enabled, however the Router only receives RIP update messages, it will not transmit any messages itself. 4 In the Version field, select 1 or 2. 3Com recommends that you - 3Com 3CRWER300-73-US | User Guide - Page 102
the Router. Enabling Poison Reverse on your Router allows it to indicate to other RIP-enabled devices that they have both routes that point to each other, preventing data loops. 6 Use the Authentication Required field to choose the mode of authentication: ■ None - Switches off authentication on the - 3Com 3CRWER300-73-US | User Guide - Page 103
Name Server (DDNS) enables you to map a static domain name to a dynamic IP address. This function allows you to create a hostname that points to your Router supports five DDNS providers: ■ DynDNS.org ■ TZO.com ■ Dt DNS.com ■ No-IP.com ■ Zoneedit.com Figure 81 Dynamic Domain Name Server (DDNS - 3Com 3CRWER300-73-US | User Guide - Page 104
the SNMP communication channel. Your SNMP management agent needs to be configured with this name so that it can communicate with your Router. 2 In the Access column, select Read to allow the management agent to collect data (for example, bandwidth usage) from your Router. Select Write to allow the - 3Com 3CRWER300-73-US | User Guide - Page 105
to send status messages to the SNMP management agent if a problem occurs on the network. To configure SNMP traps: 1 In your SNMP management agent supports. The Router supports V1 and V2c trap messaging. Syslog Using third party syslog software, this Syslog Server tool will automatically send the - 3Com 3CRWER300-73-US | User Guide - Page 106
104 CHAPTER 5: CONFIGURING THE ROUTER Proxy ARP Proxy ARP is the technique in which one host, usually a Router, answers ARP requests intended for another machine. By "faking" its identity, the Router accepts responsibility for routing packets to the "real" or intended destination. This heightens - 3Com 3CRWER300-73-US | User Guide - Page 107
, such as VoIP, gaming, and VPN. This QoS function allows you to classify traffic of applications and provides them with differentiated services (Diffserv). Figure 85 QoS Settings Screen Click Apply. Note that once QoS is enabled, a new tab, Traffic mapping, will become visible, see Figure 86. - 3Com 3CRWER300-73-US | User Guide - Page 108
. Figure 87 Edit Traffic Class Screen 1 Define the Rule name. 2 Select the traffic type from drop-down menu. 3 Select the forwarding group from the Map to Forwarding Group drop-down menu. 4 Select the value from the Remark DSCP as drop-down menu. 5 Click the ADVANCED CONFIG button, a more detailed - 3Com 3CRWER300-73-US | User Guide - Page 109
Figure 88 Detailed Edit Traffic Class Screen Advanced 107 Enter the information, then click Apply to make the settings to take effect. - 3Com 3CRWER300-73-US | User Guide - Page 110
access to a PPTP security gateway. It is not as secure as IPSec but is easy to administer. PPTP does not support gateway to gateway connections and is only suitable for connecting remote users. Check that your ISP's routers support this protocol before you use it. Note: Enabling the PPTP Server - 3Com 3CRWER300-73-US | User Guide - Page 111
Figure 89 VPN Screen VPN 109 1 Check the Enable IPsec box, configuration details screen appears. Figure 90 Enable IPSec Screen 2 Enter the Local ID Name of your VPN. (the default is 3ComVPN) 3 Click Add to create a new entry, see Figure 91 - 3Com 3CRWER300-73-US | User Guide - Page 112
be no need to enter the IP address, as any remote server can be used. 4 At the Remote Party ID drop-down list, select either IP_IPV4_ADDR or ID_USER_FQDN. This information must be entered identically on the IPSec software installed on the client's machine. If IP_IPV4_ADDR is selected, then enter - 3Com 3CRWER300-73-US | User Guide - Page 113
VPN 111 Note that if you select IKE Main Mode from the Key Management drop-down menu (see step 6), you must enter IP_IPV4_ADDR here. 5 Select the - 3Com 3CRWER300-73-US | User Guide - Page 114
ROUTER Check the Enable L2TP box, configuration details screen appears, see Figure 92 Figure 92 Enable L2TP Screen 1 Enter the Pre-shared Key for L2TP Server over IPSec Setting. 2 Define the IP Address Pool for L2TP clients, enter the start/end address. 3 Click Add to create a new entry, see Figure - 3Com 3CRWER300-73-US | User Guide - Page 115
VPN 113 1 Set the Tunnel Type to L2TP over IPSec. 2 Enter a descriptive name for the tunnel in the Tunnel Name field. 3 Enter the User name and Password. 4 Enter the Idle Timeout value. 5 Set the L2TP Type Setting to L2TP Server, or L2TP Client. ■ if you set the type as L2TP Client, then set the - 3Com 3CRWER300-73-US | User Guide - Page 116
THE ROUTER Figure 95 Add new PPTP VPN Tunnel Screen 1 Set the Tunnel Type to PPTP. 2 Enter a descriptive name for the tunnel in the Tunnel Name field. 3 Enter the User name and Password. 4 Enter the Idle Timeout value. 5 Set the PPTP Type Setting to PPTP Server, or PPTP Client. ■ if you set the type - 3Com 3CRWER300-73-US | User Guide - Page 117
settings. Click the Restart the Router button to restart the Router. Figure 96 Restart Router Screen Configuration Use this configuration screen to backup, restore or reset the configuration details of the Router. Figure 97 Configuration Screen - 3Com 3CRWER300-73-US | User Guide - Page 118
, click Reset. Note that all of your current configuration will be lost. Upgrade From time to time 3Com may release new versions of the Router's firmware. Firmware updates contain improvements and fixes to problems that may have existed. Figure 98 Upgrade Screen Please download the firmware file to - 3Com 3CRWER300-73-US | User Guide - Page 119
in an area that observes Daylight Saving, then check the Enable Daylight Savings box. The system clock may not update immediately. Allow at least 15 minutes for the Router to contact the time servers on the Internet and get a response. You cannot set the clock yourself. You can specify which NTP - 3Com 3CRWER300-73-US | User Guide - Page 120
118 CHAPTER 5: CONFIGURING THE ROUTER Ping The ping tool is used to test if the network is working properly. Figure 100 Ping Screen 1 Enter the IP address or domain name in the IP Address or Domain Name field, and click Ping. 2 Select from the Number of times to Ping drop-down menu. 3 The Router - 3Com 3CRWER300-73-US | User Guide - Page 121
must pass through to get to its destination. It can help you determine why your connections to a given server might be poor, and can often help you figure out where exactly the problem is. It also shows you how systems are connected to each other, letting you see how your ISP connects - 3Com 3CRWER300-73-US | User Guide - Page 122
120 CHAPTER 5: CONFIGURING THE ROUTER DNS Lookup DNS Lookup is the process of resolving an IP address (i.e. 192.168.11.137) to a host name (i.e. xxxcompany.net). Figure 102 DNS Lookup Screen 1 Enter the IP address or domain name in the IP Address or Domain Name field, and click Dns lookup. 2 The - 3Com 3CRWER300-73-US | User Guide - Page 123
Status and Logs 121 Status and Logs You can use the Status Screen to view version numbers for your Router's software and hardware and check the status of connections to WAN, LAN and WLAN interfaces. Status This screen shows Router status and statistics. ■ Release - use this - 3Com 3CRWER300-73-US | User Guide - Page 124
RIP. Figure 105 Routing Table Screen Logs This screen shows any attempts that have been made to gain access to your network as well as the system activities. Figure 106 Logs Screen ■ Click Help to view the the log (note that all current entries will be erased). ■ Click Refresh to update the record. - 3Com 3CRWER300-73-US | User Guide - Page 125
Status and Logs 123 Traffic Statistics This screen shows the traffic statistics. Use the Refresh button to update the information. Note that the current implementation only shows traffic statistics per forwarding group. Hence if QoS is not enabled, this screen will always show - 3Com 3CRWER300-73-US | User Guide - Page 126
CHAPTER 5: CONFIGURING THE ROUTER Support/Feedback You can use the Support/Feedback screen to obtain support and help, and also provide feedback to 3Com. Support Figure 108 Support Screen This screen shows support information. Feedback To provide feedback to 3Com, please click Provide Feedback - 3Com 3CRWER300-73-US | User Guide - Page 127
6 TROUBLESHOOTING Basic Connection Checks The Router has been designed to aid you when detecting and solving possible problems with your network. These problems are rarely serious; the cause is usually a disconnected or damaged cable, or incorrect configuration. If this section does not solve - 3Com 3CRWER300-73-US | User Guide - Page 128
6: TROUBLESHOOTING Browsing on the LAN Settings button at the bottom. Make sure that the Proxy Server option is unchecked. ■ If you cannot browse to the Router, use IP address of the form 192.168.1.xxx (where xxx is in the range 2-254), the subnet mask is 255.255.255.0, and the default Router is - 3Com 3CRWER300-73-US | User Guide - Page 129
configuration screens but cannot access Web sites on the Internet PPTP user name and password are correct. ■ Ensure that your computers are not configured to use a Web proxy. On Windows computers, this can be found under Control Panel > Internet Options > Connections. Forgotten Password and Reset - 3Com 3CRWER300-73-US | User Guide - Page 130
an Access Point that is designed to operate in Infrastructure mode. Ad Hoc mode is not supported by the Router. ■ If you have a wired and a wireless NIC adversely affecting the connectivity. If this resolves the problem consider relocating the wireless computer or the Router, or trying a different - 3Com 3CRWER300-73-US | User Guide - Page 131
Router to establish whether this problem exists. ■ Most wireless computer adapters will scan the channels for the wireless Router. If a wireless computer has not located the Router then try initiating a search manually if the client software supports this feature or manually set the channel on your - 3Com 3CRWER300-73-US | User Guide - Page 132
Follow the instructions below to upload a new copy of the system software to a Router unit in this state. Ensure that one of your computers has a copy of the new software image file stored on its hard disk or available on CD-ROM. Check on www.3com.com for the latest version firmware. 1 Remove - 3Com 3CRWER300-73-US | User Guide - Page 133
you are using only the 3Com power adapter supplied with the Router. If there is still no power, contact 3Com Technical Support and ask for assistance Caution: your region is: 3Com Number 3C12VUS 3C12VUK or 3C15VUK 3C12VME or 3C15VME 3C12VAA 3C12VSA 3C12VKR 3C12VRA Region US and Canada UK Europe - 3Com 3CRWER300-73-US | User Guide - Page 134
and wireless access points connected to the Router. 3Com wireless access points and hubs and switches provide a simple, reliable means of expanding your network; contact your supplier for more information, or visit: http://www.3com.com/ Does the Router support virtual private networks (VPNs)? The - 3Com 3CRWER300-73-US | User Guide - Page 135
widely known and is a combination of two of the protocols (IP and TCP) working together. TCP/IP is an internationally adopted and supported networking standard that provides connectivity between equipment from many vendors over a wide variety of networking technologies. Managing the Router over the - 3Com 3CRWER300-73-US | User Guide - Page 136
134 APPENDIX A: IP ADDRESSING For your network to work correctly, all devices on the network must have: ■ The same sub-network address. ■ The same subnet mask. The only value that will be different is the specific host device number. This value must always be unique. An example IP address is '192 - 3Com 3CRWER300-73-US | User Guide - Page 137
(Auto-IP Addressing) DHCP Addressing The Router contains a DHCP server, which allows computers on your network to obtain an IP useful for networks with large numbers of users on them. Static Addressing You must enter an IP Address and the subnet mask manually on every device. Using a static - 3Com 3CRWER300-73-US | User Guide - Page 138
.255.0.0). If two devices allocate themselves the same address, the conflict is detected and one of the devices allocates itself a new address. Automatic IP addressing support was introduced by Microsoft in the Windows 98 operating system and is also - 3Com 3CRWER300-73-US | User Guide - Page 139
3Com Wireless 11n Cable/DSL Firewall Router. 3Com Wireless 11n Cable/DSL Firewall Router Interfaces WAN connection - one 10 Mbps/100Mbs dual speed Ethernet port (10BASE-T/100BASE-TX) LAN connection - four 10 Mbps/100 Mbps dual speed Ethernet ports (10BASE-T/100BASE-TX) Antenna : 13 Range up to - 3Com 3CRWER300-73-US | User Guide - Page 140
IEEE 802.11g, Direct Sequence Spread Spectrum (DSSS) Transmission rate: 54 Mbps, automatic fallback to 48, 36, 24, 18, 12, or 6 Mbps Maximum channels: 13 Range up to 304.8m (1000ft) Sensitivity: 6, 12, 18, 24, 36, 48 Mbps: -85 dBm; 54 Mbps -66 dBm typical Modulation: CCK, BPSK, QPSK, OFDM Encryption - 3Com 3CRWER300-73-US | User Guide - Page 141
3Com Wireless 11n Cable/DSL Firewall Router 139 Standards Functional: ISO 8802/3 IEEE 802.3 IEEE 802.11b, 802.11g Safety: EN 60950-1: 2001 UL 60950-1 IEC 60950-1: - 3Com 3CRWER300-73-US | User Guide - Page 142
OS 8.5 or higher ■ Unix Ethernet Performance The Router complies to the IEEE 802.3i, u and x specifications. Cable Specifications The Router supports the following cable types and maximum lengths: ■ Category 3 (Ethernet) or Category 5 (Fast Ethernet or Dual Speed Ethernet) Twisted Pair - shielded - 3Com 3CRWER300-73-US | User Guide - Page 143
The socket outlet must be near to the unit and easily accessible. You can only remove power from the unit by disconnecting user-replaceable fuses or user-serviceable parts inside the Router. If you have a physical problem with the unit that cannot be solved with problem solving actions in this guide - 3Com 3CRWER300-73-US | User Guide - Page 144
nicht gestattet. Erkundigen Sie sich bei den zuständigen Stellen, ob die Verwendung von Funkfrequenz in dem Bereich, in dem der Bluetooth Access Point eingesetzt werden soll, erlaubt ist. VORSICHT: Bei der Installation und beim Ausbau des Geräts ist mit höchster Vorsicht vorzugehen. VORSICHT - 3Com 3CRWER300-73-US | User Guide - Page 145
importantes de sécurité VORSICHT: Es sind keine von dem Benutzer zu ersetzende oder zu wartende Teile in dem Gerät vorhanden. Wenn Sie ein Problem mit dem Router haben, das nicht mittels der Fehleranalyse in dieser Anleitung behoben werden kann, setzen Sie sich mit Ihrem Lieferanten in Verbindung - 3Com 3CRWER300-73-US | User Guide - Page 146
problème physique avec le moyeu qui ne peut pas être résolu avec les actions de la résolution des problèmes dans ce guide, contacter votre fournisseur. AVERTISSEMENT: Débranchez l'adaptateur électrique avant de retirer cet appareil. AVERTISSEMENT: Ports RJ-45. Il s'agit de prises femelles blindées - 3Com 3CRWER300-73-US | User Guide - Page 147
D END USER SOFTWARE LICENSE AGREEMENT 3Com Corporation END USER SOFTWARE LICENSE AGREEMENT YOU SHOULD CAREFULLY READ THE FOLLOWING TERMS AND CONDITIONS BEFORE DOWNLOADING, INSTALLING AND USING THIS PRODUCT, THE USE OF WHICH IS LICENSED BY 3COM CORPORATION ("3COM") TO ITS CUSTOMERS FOR THEIR USE - 3Com 3CRWER300-73-US | User Guide - Page 148
Software; however, this End User Software License Agreement amends such Limited Warranty Card or product manual as follows: 3Com's warranty and warranty disclaimers for the materials runs from 3Com to the purchasing Internet Service any provision of this Agreement is found to be invalid, illegal or - 3Com 3CRWER300-73-US | User Guide - Page 149
147 - 3Com 3CRWER300-73-US | User Guide - Page 150
your product at: http://eSupport.3com.com/ 3Com eSupport services are based on accounts that are created or that you are authorized to access. Solve Problems Online 3Com offers the following support tool: ■ 3Com Knowledgebase - Helps you to troubleshoot 3Com products. This query-based interactive - 3Com 3CRWER300-73-US | User Guide - Page 151
product. Separately orderable software releases and licenses are listed in the 3Com Price List and are available for purchase from your 3Com reseller. Contact Us 3Com offers telephone, internet, and e-mail access to technical support and repair services. To access these services for your region - 3Com 3CRWER300-73-US | User Guide - Page 152
must apply for a user name and password. Telephone numbers are correct at the time of publication. Find a current directory of 3Com resources by region at: http://csoweb4.3com.com/contactus/ Country Telephone Number Country Asia, Pacific Rim - Telephone Technical Support and Repair Australia - 3Com 3CRWER300-73-US | User Guide - Page 153
speakers, enter the URL: http://lat.3com.com/lat/support/form.html ■ Portuguese speakers, enter the URL: http://lat.3com.com/br/support/form.html ■ English speakers in Latin America, send e-mail to: [email protected] US and Canada - Telephone Technical Support and Repair All locations: All - 3Com 3CRWER300-73-US | User Guide - Page 154
152 APPENDIX E: OBTAINING SUPPORT FOR YOUR 3COM PRODUCTS - 3Com 3CRWER300-73-US | User Guide - Page 155
network, the access point monitors Ethernet traffic and forwards appropriate Ethernet messages to the wireless network, while also monitoring wireless client radio traffic and forwarding wireless client messages to the Ethernet LAN. Ad Hoc mode Ad Hoc mode is a configuration supported by most - 3Com 3CRWER300-73-US | User Guide - Page 156
154 GLOSSARY access point. It offers lower performance than infrastructure mode, which is the mode the router uses. (see also Infrastructure mode.) - 3Com 3CRWER300-73-US | User Guide - Page 157
software that assigns IP addresses to workstations on a network. These assignments are made by the DHCP server software that runs on Windows NT Server, and Windows 95 and Windows 98 will call the server to obtain the address. Windows 98 will allocate itself an address if no DHCP server can be found - 3Com 3CRWER300-73-US | User Guide - Page 158
requested (as in typing "3com.com" into your Internet browser), the user is sent to the proper IP address. The DNS server address used by the computers than 40/64 bit. ESSID Extended Service Set Identifier. The ESSID is a unique identifier for your wireless network. You must have the same ESSID - 3Com 3CRWER300-73-US | User Guide - Page 159
and Electronics Engineers. This American organization was founded in 1963 and sets standards for computers and wireless configuration supported by the Router. You will need to ensure all of your clients are set up to use infrastructure mode in order for them to communicate with the Access Point - 3Com 3CRWER300-73-US | User Guide - Page 160
PCs, printers, servers) and network the Router allows you to access the Internet from any computer on Point-to-Point Protocol over Ethernet. Point-to-Point Protocol is a method of data transmission originally created for dial-up connections; PPPoE is for Ethernet connections. PPTP Point-to-Point - 3Com 3CRWER300-73-US | User Guide - Page 161
Servers provide end stations with access to shared network services such as computer files and printer queues. SSID Service Set Identifier. Some vendors of wireless of networks. Originally a UNIX standard, TCP/IP is now supported on almost all platforms, and is the protocol of the Internet - 3Com 3CRWER300-73-US | User Guide - Page 162
to automatically configure some, or all, of their settings and need less user configuration. URL Filter A URL Filter is a feature of a firewall that area network. WDS Wireless Distribution System. WDS enables one or more access points to rebroadcast received signals to extend range and reach, - 3Com 3CRWER300-73-US | User Guide - Page 163
GLOSSARY 161 WLAN Wireless Local Area Network. A WLAN is a group of computers and devices connected together by wireless in a relatively small area (such as a house or office). WPA Wi-Fi Protected Access. A dynamically changing encryption mechanism for wireless networking. Encryption strength is 256 - 3Com 3CRWER300-73-US | User Guide - Page 164
162 GLOSSARY - 3Com 3CRWER300-73-US | User Guide - Page 165
3Com Wireless 11n Cable/DSL Firewall Router (WL-602) must be installed and used in strict accordance with the manufacturer's instructions as described in the user other antenna or transmitter. US FEDERAL COMMUNICATIONS COMMISSION (FCC) EMC COMPLIANCE This equipment has been tested and found to - 3Com 3CRWER300-73-US | User Guide - Page 166
approved by 3Com could void the user's authority to operate this equipment. 3Com Corporation 350 Campus Drive Marlborough, MA 01752-3064, USA (508) 323-5000 Date: April 24, 2008 Declares that the Product: Brand Name: 3Com Corporation Model Number: WL-602 Equipment Type: 3Com Wireless 11n Cable - 3Com 3CRWER300-73-US | User Guide - Page 167
with local regulations, select the country in which the product is installed. Refer to 3CRWER300-73 User Guide. Česky [Czech] Dansk [Danish] Deutsch [German] Eesti [Estonian] English Español [Spanish] Greek] 3Com Coporation tímto prohlašuje, ze tento RLAN device je ve shodě se základními - 3Com 3CRWER300-73-US | User Guide - Page 168
relevante bepalingen van richtlijn 1999/5/EG. Hawnhekk, 3Com Corporation, jiddikjara li dan RLAN device jikkonforma downloaded from the Product Support web page for the 3Com Wireless 11n Cable/DSL Firewall Router at http://www.3Com.com. Also available at http://support.3com.com/doc/WL-602_EU_DOC.pdf - 3Com 3CRWER300-73-US | User Guide - Page 169
or outdoors in all countries of the European Community using the 2.4GHz band: Channels 1 - 13, except where noted below. In Italy the end-user must apply for a license from the national spectrum authority to operate this device outdoors. In Belgium outdoor operation is only permitted using the 2.46 - 3Com 3CRWER300-73-US | User Guide - Page 170
168 - 3Com 3CRWER300-73-US | User Guide - Page 171
WEP Screen 46 1483 Bridge Mode 55 64-bit WEP Screen 47 A Access Control Screen 62 Add PC Screen 63 Add Schedule Rule Screen 65 Addresses 29, 50 Conventions notice icons, About This Guide 8 text, About This Guide 8 D DDNS 70 DHCP 87 DHCP Clients List 42 DHCP server 25, 42 disabling 26 DMZ Screen 67 - 3Com 3CRWER300-73-US | User Guide - Page 172
, 34, 36 W WAN Ping Blocking 68 WDS 49 Web Browser Location Field 27 Web Proxy 26 WiFi Protected Access 45, 48 Wireless networking 81 NIC 14 Wireless Configuration Screen 43 Wireless Settings Screen 31, 32, 33, 35, 36, 43 Wireless WDS Settings Screen 49 WPA (with RADIUS Server) Screen 48 WPA-PSK (no
-
 1
1 -
 2
2 -
 3
3 -
 4
4 -
 5
5 -
 6
6 -
 7
7 -
8
-
9
-
10
-
11
-
12
-
13
-
14
-
15
-
16
-
17
-
18
-
19
-
20
-
21
-
22
-
23
-
24
-
25
-
26
-
27
-
28
-
29
-
30
-
31
-
32
-
33
-
34
-
35
-
36
-
37
-
38
-
39
-
40
-
41
-
42
-
43
-
44
-
45
-
46
-
47
-
48
-
49
-
50
-
51
-
52
-
53
-
54
-
55
-
56
-
57
-
58
-
59
-
60
-
61
-
62
-
63
-
64
-
65
-
66
-
67
-
68
-
69
-
70
-
71
-
72
-
73
-
74
-
75
-
76
-
77
-
78
-
79
-
80
-
81
-
82
-
83
-
84
-
85
-
86
-
87
-
88
-
89
-
90
-
91
-
92
-
93
-
94
-
95
-
96
-
97
-
98
-
99
-
100
-
101
-
102
-
103
-
104
-
105
-
106
-
107
-
108
-
109
-
110
-
111
-
112
-
113
-
114
-
115
-
116
-
117
-
118
-
119
-
120
-
121
-
122
-
123
-
124
-
125
-
126
-
127
-
128
-
129
-
130
-
131
-
132
-
133
-
134
-
135
-
136
-
137
-
138
-
139
-
140
-
141
-
142
-
143
-
144
-
145
-
146
-
147
-
148
-
149
-
150
-
151
-
152
-
153
-
154
-
155
-
156
-
157
-
158
-
159
-
160
-
161
-
162
-
163
-
164
-
165
-
166
-
167
-
168
-
169
-
170
-
171
-
172
 |
 |

Part No. 10016790 Rev. AA
Published July 2008
Wireless 11n Cable/DSL Firewall Router
User Guide
WL-602
3CRWER300-73