AIWA NSX-V70 Operating Instructions
AIWA NSX-V70 Manual
 |
View all AIWA NSX-V70 manuals
Add to My Manuals
Save this manual to your list of manuals |
AIWA NSX-V70 manual content summary:
- AIWA NSX-V70 | Operating Instructions - Page 1
COMPACT DISC STEREO SYSTEM SISTEMA ESTEREO CON REPRODUCTOR DE DISCOS COMPACTOS CHAINE STEREO AVEC LECTEUR DE DISQUES COMPACTS NSX-V70 NSX-V72 (ilTi5i DIGITALAUDIO - AIWA NSX-V70 | Operating Instructions - Page 2
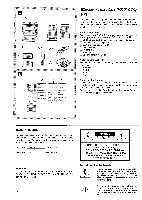
Your system NSX-V70/NSX-V72 is composed of the units ~-~ and supplied with the accessories @)-@ as follows. + u @ CX-NV70/CX-NV72 Compact disc stereo cassette receiver @ SX-NV70 (L,R) Front speakers @ Surround speakers SX-R220 @ Remote control @ FM antenna @AM antenna Q1 Operating Instructions, etc - AIWA NSX-V70 | Operating Instructions - Page 3
manual", que aparece mas arriba, se refiere a la u de la ilustracion. Felicitations pour votre achat d'une chalne stereo Aiwa. La lecture de ce mode d'emploi vous permettra de maltriser I'utilisation et d'optimiser Ies performances de cette chalne. Au sujet de la cha~ne Votre chalne NSX-V70/NSX - AIWA NSX-V70 | Operating Instructions - Page 4
4 - AIWA NSX-V70 | Operating Instructions - Page 5
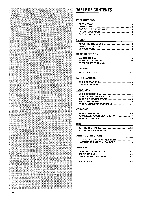
DSP 19 RECEPCION DE LA RADIO SINTONIZACION MANUAL 21 PREAJUSTE DE EMISORAS 23 SINTONIZACION MEDIANTE 65 INDICE DE LAS PARTES 67 PREPARATIONS Precautions 7 D'UNE CASSETTE 37 DUPLICATION DE LA TOTALITE D'UNE CASSETTE,,.. 39 SPECIFICATIONS 61 EN CAS DE PROBLEME .........m 65 NOMENCLATURE r - AIWA NSX-V70 | Operating Instructions - Page 6
cord is plugged in, a small amount of current continues to flow to the system, even when the power is turned off. q (f the AC cord is damaged, contact your dealer or an Aiwa service center for immediate replacement or repair. Should any trouble occur, disconnect the AC cord and contact a qualified - AIWA NSX-V70 | Operating Instructions - Page 7
de circuler clans la chalne meme si I'alimentation est toupee. q Si Ie cordon secteur est endommage, contacter immediaternent Ie revendeur ou un centre de service Aiwa pour Ie "faire remplacer ou reparer, En cas de probleme, debrancher Ie cordon secteur et contacter un technician qualifie. -r / - AIWA NSX-V70 | Operating Instructions - Page 8
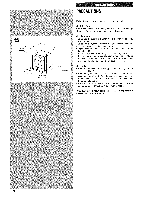
are no differences between between the surround speakers. connected as L (left) or R (right). speakers, antennas, and the front speakers, and Both speakers can be 1 Connect the SX-NV70 right speaker to the unit. Connect the speaker cord to the SPEAKERS R terminals. q The cord with the white stripe - AIWA NSX-V70 | Operating Instructions - Page 9
al terminal @, y el cable negro al terminal ~. 2 Conecte el altavoz izquierdo SX-NV70 a la unidad. Conecte el cable del altavoz a Ios terminals SPEAKERS L de igual forma que en el paso 1. 3 Conecte Ios altavoces de sonido ambiental SXR220, 4 Conecte Ias antenas de AM @ y de FM @ suministradas - AIWA NSX-V70 | Operating Instructions - Page 10
bring the FM antenna near metal objects or curtain rails. q Do not bring the AM antenna near other optional equipment, the stereo system itself, the AC cord or speaker cords, since noise will be picked up. q Do not unwind the AM antenna wire. CONNECTING AN OUTDOOR ANTENNA For better FM reception - AIWA NSX-V70 | Operating Instructions - Page 11
q Ne pas mettre I'antenne AM pres d'un appareil optionnel, c~ela cha!ne stereo proprement dite, du cordon secteur ou des cordons d'enceinte; elle pourrait capter des ~eut surworter son DQ@S. ~ Quand Ie systeme DSP surround sort par Ies enceintes surround. est hors service, aucun scm ne 11 - AIWA NSX-V70 | Operating Instructions - Page 12
. To reenter, press again. Illumination guide Whenever the AC cord is connected or the s CLEAR button while pressing the CD button. To turn back on, repeat stereo standard plug (06.3 mm, 1/4 inch). No sound is output from the speakers while the headphones are plugged in, R6(AA) REMOTE CONTROL - AIWA NSX-V70 | Operating Instructions - Page 13
parte superior de controles remotos (televisores, etc. ) esten siendo utilizados cerca de esta unidad. Pour mettre I'appareil sous tension Appuyer sur une des touches de fonction (TAPE, TUNER, VIDEO/AUX, CD). La lecture du disque ou de la cassette cette touche. Guide par eclairage Chaque stereo - AIWA NSX-V70 | Operating Instructions - Page 14
the unit off. Press the II SET button and carry out steps 1 to 5 above. To display the current time Press the CLOCK button on the remote control. The clock is displayed for 4 seconds. However, the time cannot be displayed during recording. To switch to the 24-hour standard Press the CLOCK button - AIWA NSX-V70 | Operating Instructions - Page 15
, la hors no se podra visualizer El reloj se visualizara durante la grabacion, Para cambiar al modo de 24 horas Pulse el boton CLOCK del control remoto y Iuego pulse el bot6n s antes de que pasen 4 segundos. Repita el mismo procedimiento para reponer el modo de 12 horas. Si la visualization del - AIWA NSX-V70 | Operating Instructions - Page 16
the remote control. BBE SYSTEM + H The BBE system enhances the clarity of high-frequency sound speakers or headphones may be freely varied without affecting the level of the recording. Recording with BBE The desired source can be recorded with the BBE function to enhance the clarity of high-frequency - AIWA NSX-V70 | Operating Instructions - Page 17
aux frequencies elevees. Lors de la lecture d'une cassette enregistree avec BBE, il est conseille de mettre Ie systeme BBE hors service. nuevo el boton seleccionado. Se visualizara "EQ oFF. Par selecciorrar con el control remoto + (3 Pulse repetidamente el boton GEQ hasta que se visualice la curva - AIWA NSX-V70 | Operating Instructions - Page 18
DSP SURROUND -+ E The DSP (Digital Signal Processor) surround circuits can recreate the effect When the music source is monaural Select LIVE mode to obtain a simulated stereo effect. . The sound is not heard from the surround speakers when: -the source is monaural. -the DSP surround is turned off. - AIWA NSX-V70 | Operating Instructions - Page 19
-+ E Los circuitos de sonido ambiental DSP (procesador de seiial digital) pueden crear el efecto de Ios sonidos refiejados por Ias paredes effet stereo simule. q Le son ne sort pas par Ies haut-parleurs surround quand: - la source est monophonique. - Ie systeme DSP surround est hors service, q - AIWA NSX-V70 | Operating Instructions - Page 20
reception is monaural. To restore stereo reception, press the button so that disappears. on the MONO To change the AM tuning interval The default setting of the AM tuning interval is 10 kHz/step. If you use this unit in an area where the frequency allocation system is 9 kHz/step, change the - AIWA NSX-V70 | Operating Instructions - Page 21
SINTONIZACION MANUAL ACCORD MANUEL 1 Pulse repetidamente el boton TUNER/BAND para seleccionar chaque pression sur la touche, la frequence change. Quand une station est repue, "TUNE" est affiche pendant deux secondes. Pendant la reception FM stereo, [1100e1s1t1affiche. Pour rechercher une station - AIWA NSX-V70 | Operating Instructions - Page 22
number from 1 in consecutive order for each band. DISPLAY @ The frequency @ The preset number @ The preset numbers The selected preset number' flashes been stored for all the bands. PRESET NUMBER TUNING + I= Use the remote control to select the preset number directly. 1 Press the TUNER/BAND button - AIWA NSX-V70 | Operating Instructions - Page 23
pas memorisee, ACCORD SLIR UNE STATION MEMORISEE+I= Utilice el control remoto para seleccionar directamente el ntimero de preajuste. 1 Pulse sur Ies touches +10 et O. AFFICHAGE 0 Numero de prereglage @ Frequence Selection d'un numero de prereglage sur I'appareill principal Appuyer sur la touche - AIWA NSX-V70 | Operating Instructions - Page 24
button. To start play when the power is off (Direct Play Function) Press the CD button. The power is turned on and play of the loaded disc(s) begins. To to open the disc compartment. To check the remaining time Press the CD EDIT/CHECK button during play. The amount of time remaining until all tracks - AIWA NSX-V70 | Operating Instructions - Page 25
disques avant la lecture, appuyer sur la touche 4 OPEN/CLOSE pour ouvrir Ie compartment > disques. Pour verifier Ie temps restant Appuyer sur la touche CD EDIT/CHECK pendant la lecture. Le temps restant jusqu'a ce que toutes Ies plages soient Iues eslt affiche. Pour retablir I'affichage du temps de - AIWA NSX-V70 | Operating Instructions - Page 26
. RANDOM PLAY All the tracks on the selected disc or on all the discs can be played randomly. Press the RANDOM button on the remote control. To cancel random play, press again. m q Even if the * button is pressed, a previously played track cannot be skipped. The unit returns to the beginning - AIWA NSX-V70 | Operating Instructions - Page 27
REPETITION DE REPRODUCTION Todas Ias canciones del disco seleccionado o de todos Ios discos podra reproducirse repetidamente. Pulse el bot6n REPEAT del control remoto. Para cancelar la repetition de reproduction, pulse de nuevo el boton. LECTURE ALEATOIRE Toutes Ies plages du disque selectionne ou - AIWA NSX-V70 | Operating Instructions - Page 28
OPERATIONS PROGRAMMED PLAY Up to 30 tracks can be programmed from any of the inserted discs. Use the remote control. 1 Press the PRGM button twice in stop mode. The PRGM indicator flashes on the display. the programmed play, the CD EDIT/CHECK, DISC CHANGE and RANDOM buttons do not function. 28 - AIWA NSX-V70 | Operating Instructions - Page 29
maximo de 30 canciones de cualquiera de Ios discos introducidos. Utilice el control remoto. 7 Pulse dos veces el boton PRGNI estando en el modo Ios pasos de programacion. EEm Durante la reproduction programada, Ios botones CD EDIT/ CHECK, DISC CHANGE y RANDOM no funcionaran. LECTURE PROGRAMMED On - AIWA NSX-V70 | Operating Instructions - Page 30
holder. + u Insert a tape with the exposed side down and with the side to be played first facing the foreground. Push the cassette holder to close. To select a reverse mode (deck 2 only) + u Each time the REV MODE button is pressed, the reverse mode changes. To play one side only, turn on =. To - AIWA NSX-V70 | Operating Instructions - Page 31
sur la touche DOLBY NR pour mettre Ie reducteur de bruit en ou hors service, en fonction de la cassette 5 Iire. Pour Ies cassettes enregistrees avec reducteur de bruit DOLBY, allumer III NR, Pour Ies cassettes enregistrees saris reducteur de bruit DOLBY, eteindre 00 NR. 2 Appuyer sur la touche - AIWA NSX-V70 | Operating Instructions - Page 32
deck to be played back first. 3 Press the REV MODE button to select Z>. 4 Press the button to start playback. Playback continues until the 1 button is ~ressed. About cassette the mechanism. *H DOLBY NR system The Dolby Noise Reduction system reduces tape hiss noise. For optimum performance when playing back - AIWA NSX-V70 | Operating Instructions - Page 33
y 2. 2 Pulse el boton TAPE/DECK 1/2 para seleccionar la platina que vaya Systeme DOLBY NR Le systeme de reduction de bruit Dolby reduit Ie souffle de la bande, Pour des performances optimum Iors de la lecture cl'une cassette enregistree avec Ie systeme DOLBY NR, mettre Ie systeme DOLBY NR en service - AIWA NSX-V70 | Operating Instructions - Page 34
recording. Insert the tape to be recorded on into deck 2. Insert the tape with the side to be recorded source to be recorded. To record from a CD, press the CD button and load the disc(s). To record from press again. To start recording with the remote control First press the ./0 REC/REC MUTE button - AIWA NSX-V70 | Operating Instructions - Page 35
disco compacto, pulse @lboton CD e introduzca el(los) disco la grabacion con el control remoto Pulse primero el boton cassettes normales (type I) et Cr02 (type 11). 1 Inserer la cassette a enregistrer clans Ila platine 2. Inserer la cassette Dolby en ou hors service., Pour enregistrer avec reducteur - AIWA NSX-V70 | Operating Instructions - Page 36
NR 7!? DUBBING THE TAPE MANUALLY Preparation q Wind up the tape to the point where recording will start. q Note that recording will be completed on one side of the tape only. 1 Press the TAPE button. 2 Insert the original tape into deck 1 and the tape to be recorded on into deck 2. Insert each tape - AIWA NSX-V70 | Operating Instructions - Page 37
o grabada hacia la parte delantera. 3 Pulse el boton DOLBY NR para cassette avec la face a Iire ou a enregistrer en premier orientee vers I'avant. 3 Appuyer sur la touche DOLBY NR pour rnettre Ie reducteur de bruit Dolby hors service. 00 NR dispara~t de I'affichage. 4 Appuyer sur la touche TAPE/DECK - AIWA NSX-V70 | Operating Instructions - Page 38
not affect recording. 1 Press the TAPE button. 2 Insert the original tape into deck 1 and the tape to be recorded on into deck 2. Insert each tape with the side to be played back or recorded first facing the recording. In this case, dub each side manually following the procedure in "DUBBING THE TAPE - AIWA NSX-V70 | Operating Instructions - Page 39
con la cara que vaya a ser reproducida o grabada primero hacia la parte delantera. 3 Pulse una o dos veces el boton SYNCHRO DUBBING para iniciar de la cassette dupliquee Appuyer sur la touche DOLBY NR pour mettre Ie r~ducteur de bruit Dolby en ou hors service, en fonction de la cassette originale. - AIWA NSX-V70 | Operating Instructions - Page 40
from the beginning of either side. Use the remote control from steps 3 to 6. 1 Insert the tape into deck 2, and press the DOLBY NR button to turn (side B) starts. To stop recording Press the s button. Recording and CD play stop simultaneously. To clear the edit program Press the Z CLEAR button - AIWA NSX-V70 | Operating Instructions - Page 41
desde el principio de cada cara. Utilice el control remoto desde el paso 3 al 6. 1 grabar en primer Iugar hacia la parte delantera, 2 Pulse el boton CD e introduzca el(los) disco(s). service. Inserer la cassette avec la face a enregistrer en premier orientee vers I'avant. 2 Appuyer sur la touche CD - AIWA NSX-V70 | Operating Instructions - Page 42
40, you can add tracks from other discs in the CD compartment . 1 Press the EDIT/CHECK button to select more tracks. Time on cassette tapes and editing time The cassette recording time is usually either side. Use the remote control from stetx 3 to 8. 1 Insert the tape into deck 2, and press the - AIWA NSX-V70 | Operating Instructions - Page 43
cinta. La cinta debera grabarse desde el principio de ambas caras. Utilice el control remoto desde el Daso 3 al 8, 1 Inserik la cinta en la platina Dolby en ou hors service. Inserer la cassette avec la face a enregistrer en premier orientee vers I'avant. 2 Appuyer sur la touche CD et mettre Ie(s) - AIWA NSX-V70 | Operating Instructions - Page 44
recording starts. After recording on the front (side A) ends, recording on the back (side B) starts, To stop recording Press the s button. Recording and CD play stop simultaneously. To clear the edit program Press the s button twice so that "EDIT" disappears on the display. To change the program - AIWA NSX-V70 | Operating Instructions - Page 45
programadas 6 Repita el paso 5 para el resto de Ias canciones para cd Iado A. Una cancion cuyo tiempo de reproduction sea superior al tiempo restante - AIWA NSX-V70 | Operating Instructions - Page 46
the microphones Set the MIC MIXING and DIGITAL ECHO controls remove the microphones from the MIC jacks. to MIN and m q When a connected microphone is used, the DSP SURROUND system is automatically canceled. q If the microphone is held too near the speakers, a howling sound may be produced. In this - AIWA NSX-V70 | Operating Instructions - Page 47
utilice Ios microfonos Ponga Ios controles MIC MIXING y DIGITAL ECHO en MIN y Ios detalles, para Aiwa Pour chanter avec DIGITAL ECHO sur MIN et debrancher Ies microphones des prises MIC, ~ q C?uand un microphone connecte est utilise, Ie systeme DSF) SURROUND est automatiquement mis hors service - AIWA NSX-V70 | Operating Instructions - Page 48
part on multi audio discs or tapes, so that the accompaniment is output through both speakers. In the AUTO MULTIPLEX function, the MULTIPLEX operates only while there is audio of CDs or tapes. - Those with monaural sound - Those recorded with strong echoes - Those with the vocal part recorded on - AIWA NSX-V70 | Operating Instructions - Page 49
mono - Aquellos/as grabados/as con ecos fuertes - Aquellos/as con la parte vocal grabada en el Iado derecho o izquierdo del sonido. * Mientras la Annulation Disques et cassettes multi audio La fonction MULTIPLEX est tongue pour fonctionner avec Ie disques et cassettes multi audio qui possedent la - AIWA NSX-V70 | Operating Instructions - Page 50
KARAOKE PROGRAM Before or during CD play, you can reserve up to 15 tracks to be played after the current track. Each reservation is cleared when it finishes playing. Use the remote control. 1 Press the PRGM button once. 2 Press one of the DISC DIRECT PLAY buttons to select a disc, and the numeric - AIWA NSX-V70 | Operating Instructions - Page 51
para reproducirlas despues de la cancion que este siendo reproducida, Cada reserva se borrara cuando termine de reproducirse la cancion. Utilice el control remoto. 1 Pulse el boton PRGM una vez. 2 Pulse uno de Ios botones DISC DIRECT PLAY para seleccionar un disco y Ios botones numelricos - AIWA NSX-V70 | Operating Instructions - Page 52
is set correctly. (See page 14.) 1 Press the TIMER button on the remote control once to display 0, and press the II SET button within 4 seconds, O Prepare the source. To listen to a CD, load the disc to be played first on tray 1. To listen to a tape, insert the tape into deck 1 or 2. To listen to the - AIWA NSX-V70 | Operating Instructions - Page 53
corrects. (Consuite la pagina 15). 1 Pulse una vez el boton TIMER dei control remoto para visualizer 0, y pulse e! boton i! SET antes de uue pasen 4 Ie disque a Iire en premier en place clans Ie plateau 1. Pour ecouter une cassette, la mettre en place clans la platine 1 Ou 2. Pour ecouter la radio, - AIWA NSX-V70 | Operating Instructions - Page 54
steps in page 52 from step 2 and insert the tape to be recorded into deck 2 after step 5. SETTING THE SLEEP TIMER The unit can be turned off automatically after a specified time passes. Use the remote control. 1 Press the SLEEP button. "SLEEP" @ lights up, and SLEEP seconds. @ is displayed for - AIWA NSX-V70 | Operating Instructions - Page 55
VI DEO/AUX (con un temporizador externo). Pulse dosi veces el boton TIMER del control remoto para que ~Caparezca en el visualizador, y pulse el boton II SET antes de a partir de I'etape 2 et, apres I'etape 5, inserer la cassette a enregistrer clans la platine 2. REGLAGE DE LA MINUTERIE D'ARRET La - AIWA NSX-V70 | Operating Instructions - Page 56
equipment with the LINE IN (analog input) jacks. CD DIGITAL OUT JACK (NSX-V72 only) This unit can output CD digital sound signals through the jack. I Use an optical cable to connect a digital audio equipment (digital amplifier, DAT decks, MD recorders, etc.). Remove the dust cap (a) from the - AIWA NSX-V70 | Operating Instructions - Page 57
2 Gire el control VI DEO/AUX Aiwa muni d'un amplificateur a egaliseur integre. PRISES LINE OUT Cet appareil peut sortir Ies signaux sonores par ces prises. Utiliser un cable a fiches phono RCA pour connecter un appareil audio muni de prises LINE IN (entree analogique). PRISE CD DIGITAL OUT (NSX - AIWA NSX-V70 | Operating Instructions - Page 58
swab @, wipe the recording/ playback head ~, erasure head (deck 2 only) @, capstans@, and pinchrollers @. After cleaning the heads and tape paths with a liquid head cleaning cassette or a moistened swab, wait until the cleaned parts are completely dried before inserting the tapes, To demagnetize the - AIWA NSX-V70 | Operating Instructions - Page 59
de limpiar Ias cabezas y Ios puntos por donde pasa la cinta con un cassette de Iimpieza de cabezas que emplee l~quido o un pedazo de algodon humedecido en I[quido de Iimpieza, espere hasta que Ias partes Iimpiadas esten completamente secas antes de introducer Ias cintas. Para desimanar Ias cabezas - AIWA NSX-V70 | Operating Instructions - Page 60
Inputs outputs FTC RULE 100 watts per channel, Min. RMS SPEAKERS: accepts speakers of 16 ohms or more PHONES (stereo jack): accepts headphones of 32 ohms or more Cassette deck section Track format Frequency response Signal-to-noise ratio Recording system Heads 4 tracks, 2 channels stereo - AIWA NSX-V70 | Operating Instructions - Page 61
Distortion harmonique totale Entrees Sorties REGLE FTC 100 watts par canal, tnin, RMS a 6 ohms, SPEAKERS: accepte des enceintes de 16 ohms ou plus PHONES (prise sterbo): accepte un casque de 32 ohms ou plus Partie magnetocassette Format de piste Reponse en frequence Rapport signal/bruit Systeme - AIWA NSX-V70 | Operating Instructions - Page 62
SPECIFICATIONS SPEAKER SYSTEM SX-NV70 Cabinet type 3 way, bass reflex (Magnetism sealed type) Speaker WOOfer: 140 mm (55/8 h.) COne type Tweeter: 80 mm (3'/4 in.) cone type Super tweeter: 50 mm (2 in.) ceramic type Impedance 6 ohms Output sound pressure level - AIWA NSX-V70 | Operating Instructions - Page 63
Alimentation electrique Consummation electrique Dimensions de I'appareil principal (Lx H x P) Poids de I'appareil principal 120 V 60 Hz, fixe lIOW 260 x 307,8 x 337 mm 7,8 kg Les specifications et I'aspect exterieur peuvent &re modifies saris preavis en vue d'amelioration du produit, 63 - AIWA NSX-V70 | Operating Instructions - Page 64
q Is a metal tape being used? (+ page 34) High frequency sound is not emitted. q Is a tape recorded without Dolby NR played back with the Dolby NR system operating? (+ page 30) q Is the recording/playback head dirty? (+ page 58) CD PLAYER SECTiON The CD player does not play. q Is the disc correctly - AIWA NSX-V70 | Operating Instructions - Page 65
PROBLEME Si la unidad no funciona como se describe en este manual d'emploi, contrbler Ie guide suivant. GENERALITIES H n'y stereo. q La fonction Karaoke n'est-elle pas en service cassette enregistree saris reducteur de bruit Dolby n'estelle pas Iue avec Ie systeme reducteur de bruit Dolby en service - AIWA NSX-V70 | Operating Instructions - Page 66
PARTS INDEX Main instructions about each part are indicated, - AIWA NSX-V70 | Operating Instructions - Page 67
:, 23 Sensor for remote control Sensor para el control remoto Capteur pour telecommande VOLUME 224: T-BASS 2?, BBE :26 .g7"i ,. 28> .>. ' 29: SURROUND ELECTRONIC GRAPHIC 1%, * TUNING UP MIC MIXING EQUALIZER :30" DIGITAL ECHO 31, " MIC 1, MIC 2 " 'q~ , -44, - TUNING DOWN :33. Deck 2/Platina - AIWA NSX-V70 | Operating Instructions - Page 68
Iicencia de BBE Sound, Inc. . Lexpression "BBE" et Ie symbole deposees de BBE Sound, Inc. Sous Iicence de BBE Sound. Inc. "BBE" sent des marques AIWA CO.,LTDm
-
 1
1 -
 2
2 -
 3
3 -
 4
4 -
 5
5 -
 6
6 -
 7
7 -
8
-
9
-
10
-
11
-
12
-
13
-
14
-
15
-
16
-
17
-
18
-
19
-
20
-
21
-
22
-
23
-
24
-
25
-
26
-
27
-
28
-
29
-
30
-
31
-
32
-
33
-
34
-
35
-
36
-
37
-
38
-
39
-
40
-
41
-
42
-
43
-
44
-
45
-
46
-
47
-
48
-
49
-
50
-
51
-
52
-
53
-
54
-
55
-
56
-
57
-
58
-
59
-
60
-
61
-
62
-
63
-
64
-
65
-
66
-
67
-
68
 |
 |
COMPACT DISC STEREO SYSTEM
SISTEMA
ESTEREO CON REPRODUCTOR
DE DISCOS
COMPACTOS
CHAINE STEREO AVEC LECTEUR
DE DISQUES COMPACTS
NSX-V70
NSX-V72
(ilTi5i
DIGITALAUDIO