Adaptec 5325301728 User Guide - Page 3
Removing the Front Bezel, Hot Swapping (Removing and Replacing) a Failed Disk Drive
 |
UPC - 753253017287
View all Adaptec 5325301728 manuals
Add to My Manuals
Save this manual to your list of manuals |
Page 3 highlights
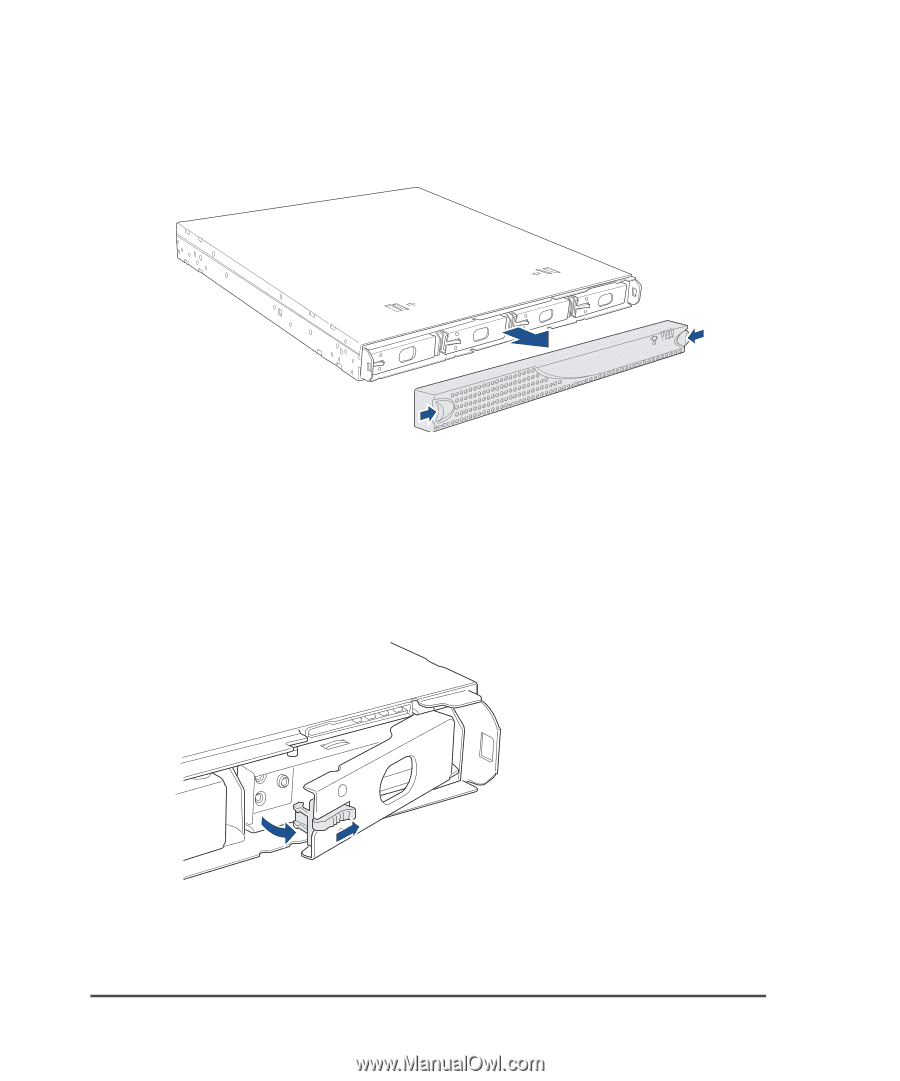
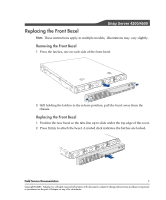
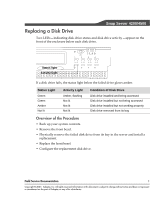
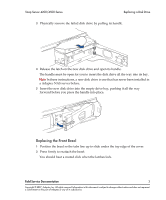
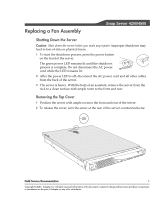
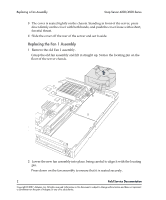
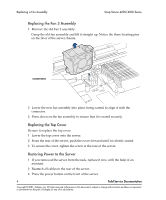
Replacing a Disk Drive Snap Server 4200/4500 Series Removing the Front Bezel 1 Press the latches, one on each side of the front bezel. 2 Still holding the latches in the release position, pull the bezel away from the chassis. Hot Swapping (Removing and Replacing) a Failed Disk Drive 1 Check the LEDs under the disk drive to verify that you are physically removing the failed drive. The left LED should glow amber, and the right LED should not be lit. 2 On the closed handle of the failed disk drive, press the latch to the right. 2 Field Service Documentation Copyright © 2007, Adaptec, Inc. All rights reserved. Information in this document is subject to change without notice and does not represent a commitment on the part of Adaptec or any of its subsidiaries.
-
 1
1 -
 2
2 -
 3
3 -
 4
4 -
 5
5 -
 6
6 -
 7
7 -
 8
8 -
 9
9 -
10
-
11
-
12
-
13
-
14
-
15
-
16
-
17
-
18
-
19
-
20
-
21
-
22
-
23
-
24
-
25
-
26
-
27
-
28
-
29
-
30
-
31
-
32
-
33
-
34
-
35
-
36
-
37
-
38
-
39
-
40
-
41
-
42
 |
 |