Adaptec 5325301728 User Guide - Page 7
Replacing the Fan 2 Assembly, on the floor of the server chassis.
 |
UPC - 753253017287
View all Adaptec 5325301728 manuals
Add to My Manuals
Save this manual to your list of manuals |
Page 7 highlights
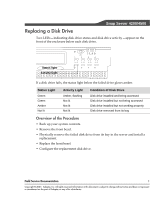
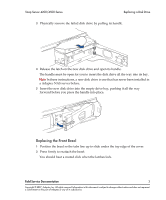
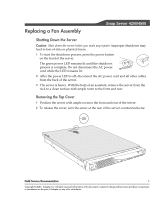
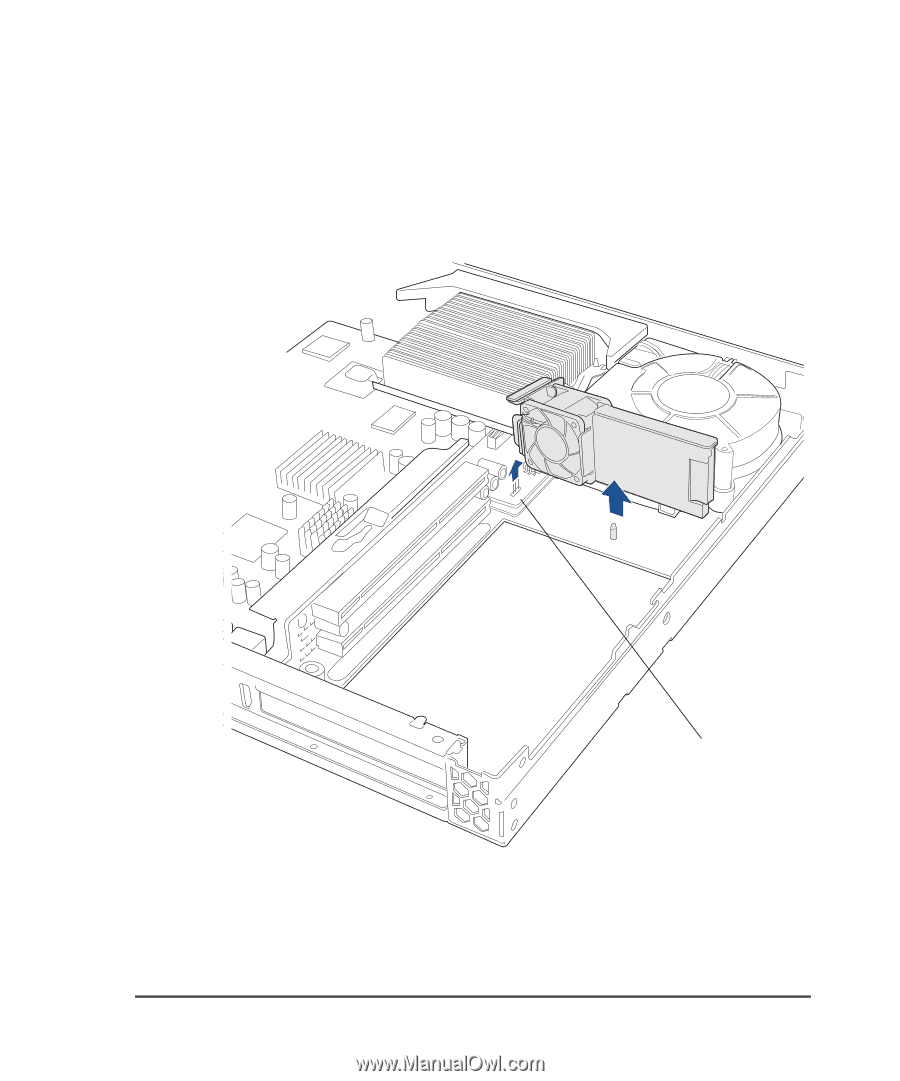
Snap Server 4200/4500 Series Replacing a Fan Assembly Replacing the Fan 2 Assembly 1 Remove the old Fan 2 assembly. Grasp the old fan assembly and lift it straight up. Notice the three locating pins on the floor of the server chassis. Fan assembly locating pins 2 Lower the new fan assembly into place, being careful to align it with the connector. 3 Press down on the fan assembly to ensure that it is seated securely. Field Service Documentation 3 Copyright © 2007, Adaptec, Inc. All rights reserved. Information in this document is subject to change without notice and does not represent a commitment on the part of Adaptec or any of its subsidiaries.
-
 1
1 -
 2
2 -
 3
3 -
 4
4 -
 5
5 -
 6
6 -
 7
7 -
 8
8 -
 9
9 -
 10
10 -
 11
11 -
 12
12 -
13
-
14
-
15
-
16
-
17
-
18
-
19
-
20
-
21
-
22
-
23
-
24
-
25
-
26
-
27
-
28
-
29
-
30
-
31
-
32
-
33
-
34
-
35
-
36
-
37
-
38
-
39
-
40
-
41
-
42
 |
 |
Field Service Documentation
3
Copyright © 2007, Adaptec, Inc. All rights reserved. Information in this document is subject to change without notice and does not represent
a commitment on the part of Adaptec or any of its subsidiaries.
Snap Server 4200/4500 Series
Replacing a Fan Assembly
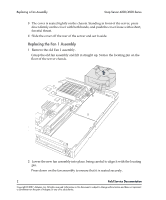
Replacing the Fan 2 Assembly
1
Remove the old Fan 2 assembly.
Grasp the old fan assembly and lift it straight up. Notice the three locating pins
on the floor of the server chassis.
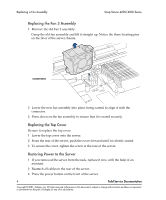
2
Lower the new fan assembly into place, being careful to align it with the
connector.
3
Press down on the fan assembly to ensure that it is seated securely.
Fan assembly
locating pins