Adaptec 5325301728 User Guide - Page 41
Rack Mount Bracket Kit, Rack Mount Kit Inventory, Overview of the Procedure, Shutting Down
 |
UPC - 753253017287
View all Adaptec 5325301728 manuals
Add to My Manuals
Save this manual to your list of manuals |
Page 41 highlights
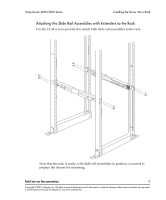
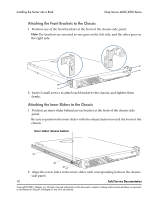
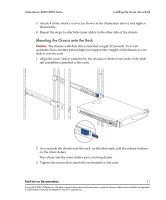
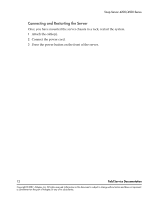
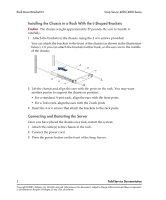
Snap Server 4200/4500 Rack Mount Bracket Kit These instructions explain how to install the L-shaped rack mount brackets. Rack Mount Kit Inventory Before you begin, make sure you have the following items from the package containing the rack mounting kit: • Two (left and right) front slide rail stop bracket assemblies • Six rack ear screws to attach the brackets to the chassis (Snap Server 4400 has four screws) • Four rack mounting screws to attach the brackets to the rack posts • One Phillips screwdriver Overview of the Procedure To install the chassis on a rack with the L-shaped brackets, you perform the following tasks: • Shut down the chassis and disconnect the power cord and Ethernet cable(s) • Attach the brackets to the chassis • Attach the bracket ears to the rack • Connect the cables and power cord and restart the server Shutting Down the Server Caution Shut down the server before you make any repairs. Improper shutdown may lead to loss of data or physical harm. 1 To start the shutdown process, press the power button on the front of the server. The green power LED remains lit until the shutdown process is complete. Do not disconnect the AC power cord while the LED remains lit. 2 After the power LED is off, disconnect the AC power cord(s) and all other cables from the back of the server. 3 The server is heavy. With the help of an assistant, remove the server from the rack to a clean surface with ample room to the front and rear. Field Service Documentation 1 Copyright © 2007, Adaptec, Inc. All rights reserved. Information in this document is subject to change without notice and does not represent a commitment on the part of Adaptec or any of its subsidiaries.
-
 1
1 -
2
-
3
-
4
-
5
-
6
-
7
-
8
-
9
-
10
-
11
-
12
-
13
-
14
-
15
-
16
-
17
-
18
-
19
-
20
-
21
-
22
-
23
-
24
-
25
-
26
-
27
-
28
-
29
-
30
-
31
-
32
-
33
-
34
-
35
-
 36
36 -
 37
37 -
 38
38 -
 39
39 -
 40
40 -
 41
41 -
 42
42
 |
 |
