Asus V8200 T2 T5 ASUS V8200 Series Graphic Card English Version User Manual - Page 14
Method 2: Display Property
 |
View all Asus V8200 T2 T5 manuals
Add to My Manuals
Save this manual to your list of manuals |
Page 14 highlights
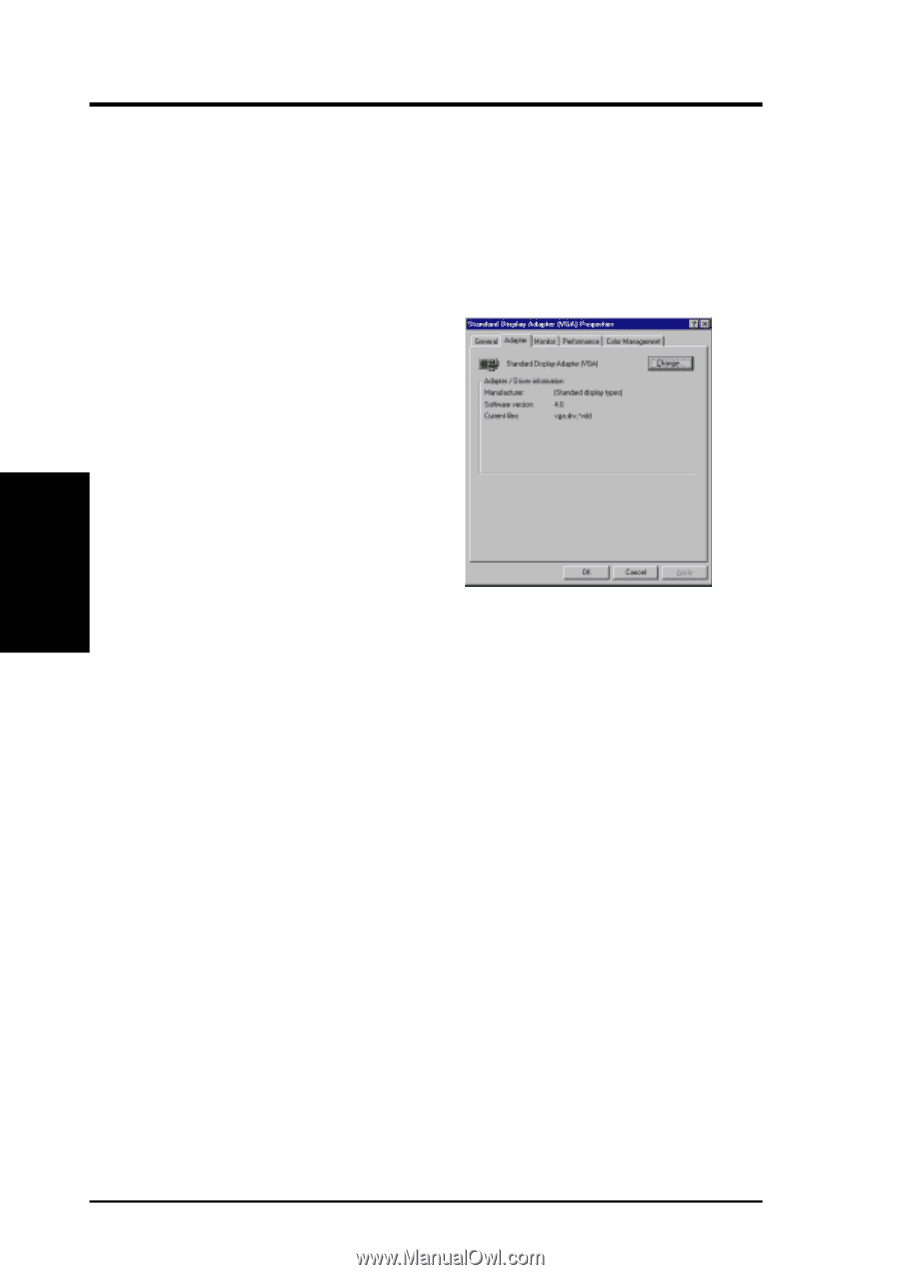
3. S/W Setup Display Drivers 3. Software Setup Method 2: Display Property Page 1. Start Windows. 2. Switch display to Windows' Standard Display Adapter (VGA) mode and then restart Windows. 3. Right-click the Windows desktop and click Properties. 4. Click the Settings tab and then click Advanced. The Standard Display Adapter (VGA) Properties dialog box appears. 5. Click Change on the Adapter tab. The Update Device Driver Wizard dialog box appears. Click Next, click Display a list of all the drivers... and then click Next. 6. Click Show all hardware and then click Have Disk....When the Install From Disk dialog box appears, type the location of the ASUSNV9X.INF file (WIN9X folder) and then proceed to step 9. Otherwise, proceed to the next step. 7. Click Browse to search the CD-ROM drive. In the Drives box of the Open dialog box, select your CD-ROM drive and then click OK. 8. In the Folders box, double-click the WIN9x folder and then select ASUSNV9X.INF in the File name box. 9. Click OK. A list of video cards appears. Select your VGA card type for your operating system and then click OK. 10. The Update Driver Warning box appears. Click Yes to confirm the setting up of the ASUS enhanced display drivers and then follow the onscreen instructions to start the setup. 11. Setup will prompt you when it has finished installing all the necessary files on your computer. Click Finish to close Setup. 12. When you are returned to the Standard Display Adapter (VGA) Properties box, click Close. The Display Properties box appears. Click Close. 13. The system will prompt you to restart your computer. Click Yes to restart your computer and to complete Setup. 14 ASUS V8200 Series User's Manual
-
 1
1 -
2
-
3
-
4
-
5
-
6
-
7
-
8
-
 9
9 -
 10
10 -
 11
11 -
 12
12 -
 13
13 -
 14
14 -
 15
15 -
 16
16 -
 17
17 -
 18
18 -
 19
19 -
20
-
21
-
22
-
23
-
24
-
25
-
26
-
27
-
28
-
29
-
30
-
31
-
32
-
33
-
34
-
35
-
36
-
37
-
38
-
39
-
40
-
41
-
42
-
43
-
44
-
45
-
46
-
47
-
48
-
49
-
50
-
51
-
52
-
53
-
54
-
55
-
56
-
57
-
58
-
59
-
60
-
61
-
62
-
63
-
64
-
65
-
66
-
67
-
68
-
69
-
70
-
71
-
72
-
73
-
74
-
75
-
76
-
77
-
78
-
79
-
80
-
81
-
82
-
83
-
84
-
85
-
86
-
87
-
88
-
89
-
90
-
91
-
92
-
93
-
94
-
95
-
96
-
97
-
98
-
99
-
100
-
101
-
102
-
103
-
104
-
105
-
106
 |
 |