Asus V8200 T2 T5 ASUS V8200 Series Graphic Card English Version User Manual - Page 71
Image File name
 |
View all Asus V8200 T2 T5 manuals
Add to My Manuals
Save this manual to your list of manuals |
Page 71 highlights
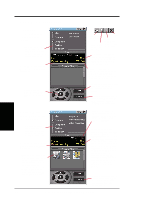
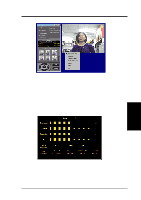
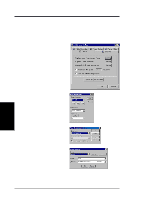
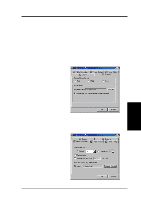
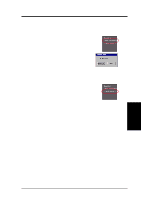
4. Software Reference Preallocate disk space: If you have limited space on your hard disk, you may want to limit the capture file size to a certain size. To do this, click Preallocate disk space and enter the desired maximum file size. Don't ask before starting capture: This lets you start capture without the dialog box prompt. Capture Tip: See Enabling DMA Transfer Mode Adjust Source: This lets you select the video connection and video standard to use in the capture. It also lets you adjust the Brightness, Contrast, Saturation, and Hue of your images. You are now ready to capture video images. SnapShot Setting 1 Click Setup and point to and then click Video SnapShot to select your Capture Picture Format (default: 24 bit), Image Setting and other settings. Under Image Setting, you may set the desired Image File name and path (default: C:\CAPTURE.BMP) and for the filename to be consecutively numbered (Store image use consecutive numbered filename). You are now ready to capture video images. Manual Video Recording Setting 1. Click Setup and point to and then click Manual Recording to select the video recording settings, such as the Frame Rate (fps) (default: 30), Maximum Capture Time (default: 10 seconds) and File name and path (default: C:\CAPTURE.AVI). 4. S/W Reference ASUS Live You are now ready to capture video images. ASUS V8200 Series User's Manual 71
-
 1
1 -
2
-
3
-
4
-
5
-
6
-
7
-
8
-
9
-
10
-
11
-
12
-
13
-
14
-
15
-
16
-
17
-
18
-
19
-
20
-
21
-
22
-
23
-
24
-
25
-
26
-
27
-
28
-
29
-
30
-
31
-
32
-
33
-
34
-
35
-
36
-
37
-
38
-
39
-
40
-
41
-
42
-
43
-
44
-
45
-
46
-
47
-
48
-
49
-
50
-
51
-
52
-
53
-
54
-
55
-
56
-
57
-
58
-
59
-
60
-
61
-
62
-
63
-
64
-
65
-
 66
66 -
 67
67 -
 68
68 -
 69
69 -
 70
70 -
 71
71 -
 72
72 -
 73
73 -
 74
74 -
 75
75 -
 76
76 -
77
-
78
-
79
-
80
-
81
-
82
-
83
-
84
-
85
-
86
-
87
-
88
-
89
-
90
-
91
-
92
-
93
-
94
-
95
-
96
-
97
-
98
-
99
-
100
-
101
-
102
-
103
-
104
-
105
-
106
 |
 |
