Asus V8200 T2 T5 ASUS V8200 Series Graphic Card English Version User Manual - Page 72
Snapshot
 |
View all Asus V8200 T2 T5 manuals
Add to My Manuals
Save this manual to your list of manuals |
Page 72 highlights
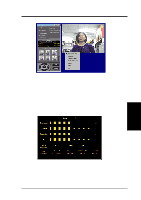
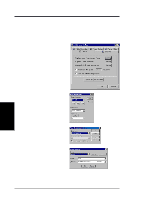
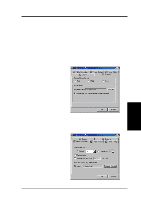
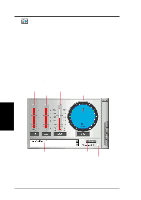
4. Software Reference Scheduled Recording Setting (Windows 98/ME only) NOTE: For Windows NT/2000, refer to 4. Software Reference | Auto Recording. 1. Click Setup and point to and then click Scheduled Recording to select the live pre-recording settings. 4. S/W Reference ASUS Live These settings include the Start Time (Year | Month | Day | Hour | Minute | Second), Stop Time (Year | Month | Day | Hour | Minute | Second), Channel Number, Capture Frame Rate, and options to Add Audio to the recording, View Auto Recording Log, and to Delete one or Delete All the pre-recording settings. 2. Click Add to add your pre-recording setting/s. The video recording will start at the designated date and time. NOTE: The video recording settings assume that you have a video device connected to your ASUS graphics card and that the device is turned on and running. Snapshot Snapshot (hotkey: F5) lets you capture video stream data as single images and then show these images on your desktop almost simultaneously through the default image viewer. It supports any plug-in picture viewer/image processing program to view the captured images (see ASUS Live Control Panel earlier in this section). To begin capturing, do the following: 1. Click Snapshot on the ASUS Live Control Panel or press the F5 key to capture the desired image on ASUS Live Video's display screen. The screen will freeze momentarily and the captured image (saved as a BMP file, using consecutive numbers) will be previewed in the Preview Files window. You may click an image to view that captured image. 2. Repeat Step 1 as necessary. 72 ASUS V8200 Series User's Manual
-
 1
1 -
2
-
3
-
4
-
5
-
6
-
7
-
8
-
9
-
10
-
11
-
12
-
13
-
14
-
15
-
16
-
17
-
18
-
19
-
20
-
21
-
22
-
23
-
24
-
25
-
26
-
27
-
28
-
29
-
30
-
31
-
32
-
33
-
34
-
35
-
36
-
37
-
38
-
39
-
40
-
41
-
42
-
43
-
44
-
45
-
46
-
47
-
48
-
49
-
50
-
51
-
52
-
53
-
54
-
55
-
56
-
57
-
58
-
59
-
60
-
61
-
62
-
63
-
64
-
65
-
66
-
 67
67 -
 68
68 -
 69
69 -
 70
70 -
 71
71 -
 72
72 -
 73
73 -
 74
74 -
 75
75 -
 76
76 -
 77
77 -
78
-
79
-
80
-
81
-
82
-
83
-
84
-
85
-
86
-
87
-
88
-
89
-
90
-
91
-
92
-
93
-
94
-
95
-
96
-
97
-
98
-
99
-
100
-
101
-
102
-
103
-
104
-
105
-
106
 |
 |
