Brother International HL 5280DW Users Manual - English - Page 100
LCD messages, Error message, Action - download
 |
UPC - 012502614456
View all Brother International HL 5280DW manuals
Add to My Manuals
Save this manual to your list of manuals |
Page 100 highlights
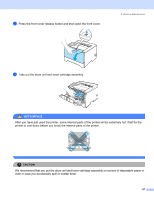
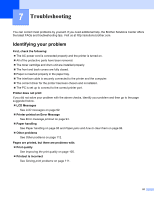
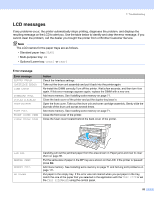
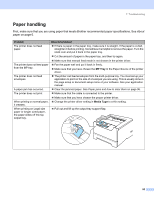
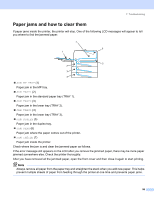
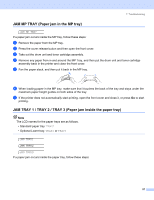
7. Troubleshooting LCD messages If any problems occur, the printer automatically stops printing, diagnoses the problem, and displays the resulting message on the LCD to alert you. Use the table below to identify and clear the error message. If you cannot clear the problem, call the dealer you bought the printer from or Brother Customer Service. Note The LCD names for the paper trays are as follows. • Standard paper tray: TRAY1 • Multi-purpose tray: MP • Optional Lower tray: TRAY2 or TRAY3 Error message Error message BUFFER ERROR CARTRIDGE ERROR DIMM ERROR DOWNLOAD FULL DUPLEX DISABLED DUST ON DRUM FONT FULL FRONT COVER OPEN FUSER COVER OPEN Action Check the Interface settings. Take out the drum unit assembly and put it back into the printer again. Re-install the DIMM correctly.Turn off the printer. Wait a few seconds, and then turn it on again. If this error message appears again, replace the DIMM with a new one. Add more memory. See Installing extra memory on page 71. Close the back cover of the printer and put the duplex tray back in. Open the front cover. Take out the drum unit and toner cartridge assembly. Gently slide the blue tab of the drum unit across several times. Add more memory. See Installing extra memory on page 71. Close the front cover of the printer. Close the fuser cover located behind the back cover of the printer. JAM XXX MANUAL FEED MEMORY FULL NO PAPER Carefully pull out the jammed paper from the area shown in Paper jams and how to clear them on page 96. Put the same size of paper in the MP tray as is shown on the LCD. If the printer is 'paused', press Go. Add more memory. See Installing extra memory on page 71 and Solving print problems on page 111. Put paper in the empty tray. If the error was not cleared when you put paper in the tray, match the size of the paper that you selected in the application with the TRAY SIZE or set the TRAY SIZE to ANY using the control panel. 92
-
 1
1 -
2
-
3
-
4
-
5
-
6
-
7
-
8
-
9
-
10
-
11
-
12
-
13
-
14
-
15
-
16
-
17
-
18
-
19
-
20
-
21
-
22
-
23
-
24
-
25
-
26
-
27
-
28
-
29
-
30
-
31
-
32
-
33
-
34
-
35
-
36
-
37
-
38
-
39
-
40
-
41
-
42
-
43
-
44
-
45
-
46
-
47
-
48
-
49
-
50
-
51
-
52
-
53
-
54
-
55
-
56
-
57
-
58
-
59
-
60
-
61
-
62
-
63
-
64
-
65
-
66
-
67
-
68
-
69
-
70
-
71
-
72
-
73
-
74
-
75
-
76
-
77
-
78
-
79
-
80
-
81
-
82
-
83
-
84
-
85
-
86
-
87
-
88
-
89
-
90
-
91
-
92
-
93
-
94
-
 95
95 -
 96
96 -
 97
97 -
 98
98 -
 99
99 -
 100
100 -
 101
101 -
 102
102 -
 103
103 -
 104
104 -
 105
105 -
106
-
107
-
108
-
109
-
110
-
111
-
112
-
113
-
114
-
115
-
116
-
117
-
118
-
119
-
120
-
121
-
122
-
123
-
124
-
125
-
126
-
127
-
128
-
129
-
130
-
131
-
132
-
133
-
134
-
135
-
136
-
137
-
138
-
139
-
140
-
141
-
142
-
143
-
144
-
145
-
146
-
147
-
148
-
149
-
150
-
151
-
152
 |
 |