Brother International HL 5280DW Users Manual - English - Page 26
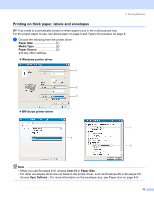
Media Type, Thick Paper, If envelopes get smudged during printing set
 |
UPC - 012502614456
View all Brother International HL 5280DW manuals
Add to My Manuals
Save this manual to your list of manuals |
Page 26 highlights
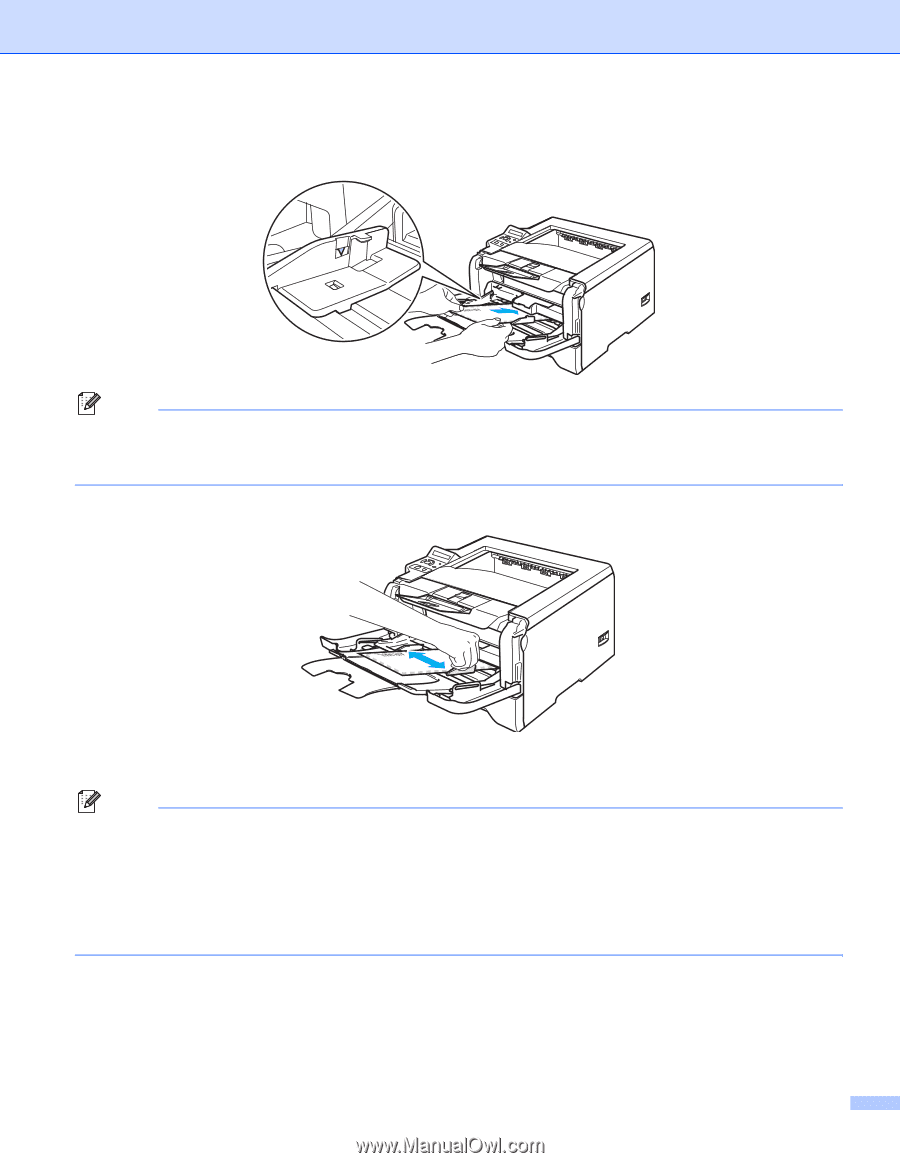
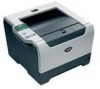
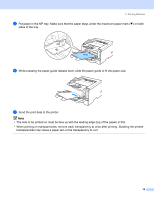
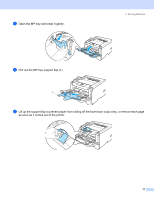
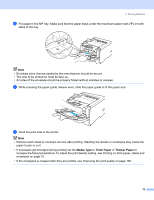
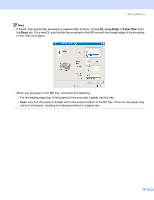
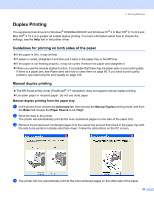
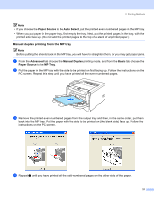
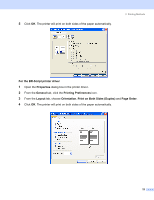
2. Printing Methods e Put paper in the MP tray. Make sure that the paper stays under the maximum paper mark (b) on both sides of the tray. Note • Envelope joints that are sealed by the manufacturer should be secure. • The side to be printed on must be face up. • All sides of the envelope should be properly folded without wrinkles or creases. f While pressing the paper-guide release lever, slide the paper guide to fit the paper size. g Send the print data to the printer. Note • Remove each sheet or envelope at once after printing. Stacking the sheets or envelopes may cause the paper to jam or curl. • If envelopes get smudged during printing set the Media Type to Thick Paper or Thicker Paper to increase the fixing temperature. To adjust the print density setting, see Printing on thick paper, labels and envelopes on page 16. • If the envelopes is creased after they are printed, see Improving the print quality on page 105. 18
-
 1
1 -
2
-
3
-
4
-
5
-
6
-
7
-
8
-
9
-
10
-
11
-
12
-
13
-
14
-
15
-
16
-
17
-
18
-
19
-
20
-
 21
21 -
 22
22 -
 23
23 -
 24
24 -
 25
25 -
 26
26 -
 27
27 -
 28
28 -
 29
29 -
 30
30 -
 31
31 -
32
-
33
-
34
-
35
-
36
-
37
-
38
-
39
-
40
-
41
-
42
-
43
-
44
-
45
-
46
-
47
-
48
-
49
-
50
-
51
-
52
-
53
-
54
-
55
-
56
-
57
-
58
-
59
-
60
-
61
-
62
-
63
-
64
-
65
-
66
-
67
-
68
-
69
-
70
-
71
-
72
-
73
-
74
-
75
-
76
-
77
-
78
-
79
-
80
-
81
-
82
-
83
-
84
-
85
-
86
-
87
-
88
-
89
-
90
-
91
-
92
-
93
-
94
-
95
-
96
-
97
-
98
-
99
-
100
-
101
-
102
-
103
-
104
-
105
-
106
-
107
-
108
-
109
-
110
-
111
-
112
-
113
-
114
-
115
-
116
-
117
-
118
-
119
-
120
-
121
-
122
-
123
-
124
-
125
-
126
-
127
-
128
-
129
-
130
-
131
-
132
-
133
-
134
-
135
-
136
-
137
-
138
-
139
-
140
-
141
-
142
-
143
-
144
-
145
-
146
-
147
-
148
-
149
-
150
-
151
-
152
 |
 |