Brother International MFC-8710DW Software User's Guide - English - Page 262
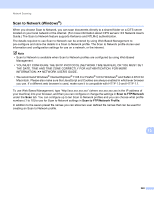
Start, For Touchscreen models, Use PIN for Authentication, Scan to FTP/Network Profile, User Select
 |
View all Brother International MFC-8710DW manuals
Add to My Manuals
Save this manual to your list of manuals |
Page 262 highlights
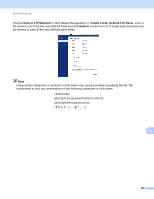
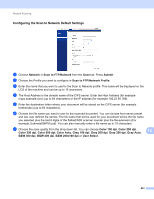
Network Scanning i Press a or b to choose PDF, PDF/A, Secure PDF, Signed PDF, or TIFF. Press OK, and go to step k. Note • If you chose Secure PDF, the machine will ask you to enter a 4 digit password using numbers 0-9 before it starts scanning. • If you choose Signed PDF, you must install and then configure a certificate to your machine using Web Based Management. j Press a or b to choose Small, Medium or Large. Press OK and go to step k. k Do one of the following: If you want to start scanning, press Start. If you want to change the file name, go to step l. l Press a or b to choose a file name you want to use and press OK. Press Start. Note If you want to change the file name manually, go to step m. m Press a or b to choose . Press OK. Enter the file name you want to use (up to 32 characters) and press OK. Press Start. For Touchscreen models 13 a Load your document. b Press Scan. c Press Scan to Network. d Press a or b to choose one of the profiles listed. 13 e If you check Use PIN for Authentication in Scan to FTP/Network Profile of Web Based Management, the LCD will prompts you to enter a PIN number. Enter the 4-digit PIN number and then press OK. If the profile is complete, you will automatically go to step k. If User Select was configured using Web Based Management, you will be prompted to choose the scan quality, file type and file size from the control panel. If the profile is not complete, for instance, the quality or file type are not chosen, you will be prompted to enter any missing information in the following steps. 254
-
 1
1 -
2
-
3
-
4
-
5
-
6
-
7
-
8
-
9
-
10
-
11
-
12
-
13
-
14
-
15
-
16
-
17
-
18
-
19
-
20
-
21
-
22
-
23
-
24
-
25
-
26
-
27
-
28
-
29
-
30
-
31
-
32
-
33
-
34
-
35
-
36
-
37
-
38
-
39
-
40
-
41
-
42
-
43
-
44
-
45
-
46
-
47
-
48
-
49
-
50
-
51
-
52
-
53
-
54
-
55
-
56
-
57
-
58
-
59
-
60
-
61
-
62
-
63
-
64
-
65
-
66
-
67
-
68
-
69
-
70
-
71
-
72
-
73
-
74
-
75
-
76
-
77
-
78
-
79
-
80
-
81
-
82
-
83
-
84
-
85
-
86
-
87
-
88
-
89
-
90
-
91
-
92
-
93
-
94
-
95
-
96
-
97
-
98
-
99
-
100
-
101
-
102
-
103
-
104
-
105
-
106
-
107
-
108
-
109
-
110
-
111
-
112
-
113
-
114
-
115
-
116
-
117
-
118
-
119
-
120
-
121
-
122
-
123
-
124
-
125
-
126
-
127
-
128
-
129
-
130
-
131
-
132
-
133
-
134
-
135
-
136
-
137
-
138
-
139
-
140
-
141
-
142
-
143
-
144
-
145
-
146
-
147
-
148
-
149
-
150
-
151
-
152
-
153
-
154
-
155
-
156
-
157
-
158
-
159
-
160
-
161
-
162
-
163
-
164
-
165
-
166
-
167
-
168
-
169
-
170
-
171
-
172
-
173
-
174
-
175
-
176
-
177
-
178
-
179
-
180
-
181
-
182
-
183
-
184
-
185
-
186
-
187
-
188
-
189
-
190
-
191
-
192
-
193
-
194
-
195
-
196
-
197
-
198
-
199
-
200
-
201
-
202
-
203
-
204
-
205
-
206
-
207
-
208
-
209
-
210
-
211
-
212
-
213
-
214
-
215
-
216
-
217
-
218
-
219
-
220
-
221
-
222
-
223
-
224
-
225
-
226
-
227
-
228
-
229
-
230
-
231
-
232
-
233
-
234
-
235
-
236
-
237
-
238
-
239
-
240
-
241
-
242
-
243
-
244
-
245
-
246
-
247
-
248
-
249
-
250
-
251
-
252
-
253
-
254
-
255
-
256
-
 257
257 -
 258
258 -
 259
259 -
 260
260 -
 261
261 -
 262
262 -
 263
263 -
 264
264 -
 265
265 -
 266
266 -
 267
267 -
268
-
269
-
270
-
271
 |
 |