Brother International MFC-8950DW Basic User's Guide - English - Page 64
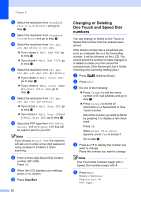
Changing or Deleting One Touch and Speed Dial numbers, e
 |
View all Brother International MFC-8950DW manuals
Add to My Manuals
Save this manual to your list of manuals |
Page 64 highlights
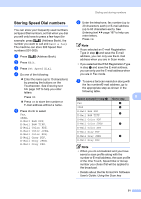
Chapter 8 h Select the resolution from Standard, Fine, S.Fine or Photo and go to step n. i Select the resolution from Standard, Fine or Photo and go to step n. j Select the resolution from 300 dpi, 200 dpi or 200 x 100 dpi. If you chose E-Mail B&W PDF, go to step m. If you chose E-Mail B&W TIFF, go to step n. k Select the resolution from 100 dpi, 200 dpi, 300 dpi, 600 dpi or Auto. If you chose E-Mail Color PDF, go to step m. If you chose E-Mail Color JPEG or E-Mail Color XPS, go to step n. l Select the resolution from 100 dpi, 200 dpi, 300 dpi or Auto. If you chose E-Mail Gray PDF, go to step m. If you chose E-Mail Gray JPEG or E-Mail Gray XPS, go to step n. m Select the PDF type from PDF, PDF/A, Secure PDF or Signed PDF that will be used to send to your PC. Note If you choose Secure PDF, the machine will ask you to enter a four-digit password using numbers 0-9 before it starts scanning. n Enter a three-digit Speed Dial location number (001-300). Press OK. o When the LCD displays your settings, press OK to confirm. p Press Stop/Exit. 52 Changing or Deleting One Touch and Speed Dial numbers 8 You can change or delete a One Touch or Speed Dial number that has already been stored. If the stored number has a scheduled job, such as a delayed fax or a fax forwarding number, it will be dimmed on the LCD. You cannot select the number to make changes or to delete it unless you first cancel the scheduled job. (See Advanced User's Guide: Checking and canceling waiting jobs.) a Press (Address Book). b Press Edit. c Do one of the following: Press Change to edit the name, number or E-mail address and go to step d. Press Delete to delete all information in a Speed Dial or One Touch number. Select the number you want to delete by pressing it to display a red check mark. Press OK. When Erase This Data? appears, press Yes to accept it. Go to step h. d Press a or b to display the number you want to change. Press the number you want to change. Note One Touch Dial numbers begin with l. Speed Dial numbers begin with #. e Press Name: Number/Address: Resolution: or PDF Type:
-
 1
1 -
2
-
3
-
4
-
5
-
6
-
7
-
8
-
9
-
10
-
11
-
12
-
13
-
14
-
15
-
16
-
17
-
18
-
19
-
20
-
21
-
22
-
23
-
24
-
25
-
26
-
27
-
28
-
29
-
30
-
31
-
32
-
33
-
34
-
35
-
36
-
37
-
38
-
39
-
40
-
41
-
42
-
43
-
44
-
45
-
46
-
47
-
48
-
49
-
50
-
51
-
52
-
53
-
54
-
55
-
56
-
57
-
58
-
 59
59 -
 60
60 -
 61
61 -
 62
62 -
 63
63 -
 64
64 -
 65
65 -
 66
66 -
 67
67 -
 68
68 -
 69
69 -
70
-
71
-
72
-
73
-
74
-
75
-
76
-
77
-
78
-
79
-
80
-
81
-
82
-
83
-
84
-
85
-
86
-
87
-
88
-
89
-
90
-
91
-
92
-
93
-
94
-
95
-
96
-
97
-
98
-
99
-
100
-
101
-
102
-
103
-
104
-
105
-
106
-
107
-
108
-
109
-
110
-
111
-
112
-
113
-
114
-
115
-
116
-
117
-
118
-
119
-
120
-
121
-
122
-
123
-
124
-
125
-
126
-
127
-
128
-
129
-
130
-
131
-
132
-
133
-
134
-
135
-
136
-
137
-
138
-
139
-
140
-
141
-
142
-
143
-
144
-
145
-
146
-
147
-
148
-
149
-
150
-
151
-
152
-
153
-
154
-
155
-
156
-
157
-
158
-
159
-
160
-
161
-
162
-
163
-
164
-
165
-
166
-
167
-
168
-
169
-
170
-
171
-
172
-
173
-
174
-
175
-
176
-
177
-
178
-
179
-
180
-
181
-
182
-
183
-
184
-
185
-
186
-
187
-
188
-
189
-
190
-
191
-
192
-
193
-
194
-
195
-
196
-
197
-
198
 |
 |