Brother International PT-580C Users Manual - English and Spanish - Page 103
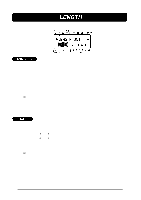
LENGTH, keys until the tape length setting LENGTH is highlighted.
 |
View all Brother International PT-580C manuals
Add to My Manuals
Save this manual to your list of manuals |
Page 103 highlights
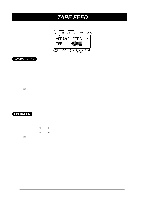
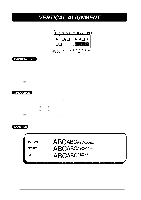
The label length can be set using two different methods. With the size set to AUTO, the machine compares your inputted message with the tape size and automatically adjusts the label length to fit your message. Sometimes, however, you will want to assign a label length regardless of the message's size. The label length can be set from 1.5" (3.8 cm) to 11.3" (28.7 cm). The label lengths are: In inches: AUTO 1.5 1.6 ... 11.3 AUTO... In centimeters: AUTO 3.8 3.9 ... 28.7 AUTO... + The length setting can only be applied to the entire label. It cannot be applied to just part of the text. When a setting other then AUTO is selected for the label length, the message "TOO LONG" is displayed if the text will not fit within the specified length. TO SELECT A TAPE LENGTH: (1) Press the FORMAT key. (2) Press the 4 and 3 keys until the tape length setting (LENGTH) is highlighted. (3) Press the 5 and 6 keys until the setting you wish to use is displayed. Press- ing either key once will change the length by 0.1" (0.1 cm when centimeters are displayed). If a key is held down, the length will continue changing in steps of 1" (1.0 cm) until the key is released. + The default setting (AUTO) can be selected by pressing the SPACE key. (4) Press the RETURN key. 99
-
 1
1 -
2
-
3
-
4
-
5
-
6
-
7
-
8
-
9
-
10
-
11
-
12
-
13
-
14
-
15
-
16
-
17
-
18
-
19
-
20
-
21
-
22
-
23
-
24
-
25
-
26
-
27
-
28
-
29
-
30
-
31
-
32
-
33
-
34
-
35
-
36
-
37
-
38
-
39
-
40
-
41
-
42
-
43
-
44
-
45
-
46
-
47
-
48
-
49
-
50
-
51
-
52
-
53
-
54
-
55
-
56
-
57
-
58
-
59
-
60
-
61
-
62
-
63
-
64
-
65
-
66
-
67
-
68
-
69
-
70
-
71
-
72
-
73
-
74
-
75
-
76
-
77
-
78
-
79
-
80
-
81
-
82
-
83
-
84
-
85
-
86
-
87
-
88
-
89
-
90
-
91
-
92
-
93
-
94
-
95
-
96
-
97
-
 98
98 -
 99
99 -
 100
100 -
 101
101 -
 102
102 -
 103
103 -
 104
104 -
 105
105 -
 106
106 -
 107
107 -
 108
108 -
109
-
110
-
111
-
112
-
113
-
114
-
115
-
116
-
117
-
118
-
119
-
120
-
121
-
122
-
123
-
124
-
125
-
126
-
127
-
128
-
129
-
130
-
131
-
132
-
133
-
134
-
135
-
136
-
137
-
138
-
139
-
140
-
141
-
142
-
143
-
144
-
145
-
146
-
147
-
148
-
149
-
150
-
151
-
152
-
153
-
154
-
155
-
156
-
157
-
158
-
159
-
160
-
161
-
162
-
163
-
164
-
165
-
166
-
167
-
168
-
169
-
170
-
171
-
172
-
173
-
174
-
175
-
176
-
177
-
178
-
179
-
180
-
181
-
182
-
183
-
184
-
185
-
186
-
187
-
188
 |
 |
