Brother International PT-580C Users Manual - English and Spanish - Page 91
MULTI-COLOR PRINTING, ment before closing the compartment cover.
 |
View all Brother International PT-580C manuals
Add to My Manuals
Save this manual to your list of manuals |
Page 91 highlights
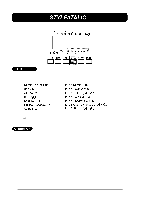
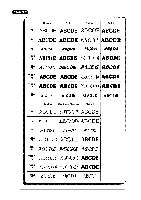
With the multi-color printing function, you can create colorful labels using different ink colors. This function is useful when part of your message must be more noticeable or when color-coded labels are needed. The default color is COLOR1. + When a message is stored in the memory, the order in which the characters will be printed are also saved. The color print settings assigned using this function are the same settings used with the global format C. FRAME and C. CHAR settings. TO ENTER TEXT THAT WILL BE PRINTED WITH A DIFFERENT COLOR: (1) Insert the cursor where you wish to begin using a new color. (2) Press the COLOR key until the color setting you wish to use appears and your desired setting is shown by the indicators above the LCD display. (3) Enter the text to which the chosen color is to be applied. TO APPLY COLOR SETTINGS TO A SELECTED AREA: (1) Decide the color of each part of your label and the order in which the colors will be printed. + Before printing the label, be sure to use the FORMAT key to select the color of the frame or shading (For more information, refer to page 101.) The part of the character that is left blank can also be printed using one the three ink colors. (Refer to page 103 for a detailed explanation.) (2) Open the tape compartment cover and insert the first ink cassette into a multi-color printing tape cassette, then insert them firmly into the compartment before closing the compartment cover. Make sure that the entire back of the cassette contacts the bottom of the compartment. (3) Position the cursor in front of the first character you wish to print using the second ink color and press AREA key. The first character will be highlighted. + All characters will automatically be printed using the first ink color, unless they are assigned a different color number. 87
-
 1
1 -
2
-
3
-
4
-
5
-
6
-
7
-
8
-
9
-
10
-
11
-
12
-
13
-
14
-
15
-
16
-
17
-
18
-
19
-
20
-
21
-
22
-
23
-
24
-
25
-
26
-
27
-
28
-
29
-
30
-
31
-
32
-
33
-
34
-
35
-
36
-
37
-
38
-
39
-
40
-
41
-
42
-
43
-
44
-
45
-
46
-
47
-
48
-
49
-
50
-
51
-
52
-
53
-
54
-
55
-
56
-
57
-
58
-
59
-
60
-
61
-
62
-
63
-
64
-
65
-
66
-
67
-
68
-
69
-
70
-
71
-
72
-
73
-
74
-
75
-
76
-
77
-
78
-
79
-
80
-
81
-
82
-
83
-
84
-
85
-
 86
86 -
 87
87 -
 88
88 -
 89
89 -
 90
90 -
 91
91 -
 92
92 -
 93
93 -
 94
94 -
 95
95 -
 96
96 -
97
-
98
-
99
-
100
-
101
-
102
-
103
-
104
-
105
-
106
-
107
-
108
-
109
-
110
-
111
-
112
-
113
-
114
-
115
-
116
-
117
-
118
-
119
-
120
-
121
-
122
-
123
-
124
-
125
-
126
-
127
-
128
-
129
-
130
-
131
-
132
-
133
-
134
-
135
-
136
-
137
-
138
-
139
-
140
-
141
-
142
-
143
-
144
-
145
-
146
-
147
-
148
-
149
-
150
-
151
-
152
-
153
-
154
-
155
-
156
-
157
-
158
-
159
-
160
-
161
-
162
-
163
-
164
-
165
-
166
-
167
-
168
-
169
-
170
-
171
-
172
-
173
-
174
-
175
-
176
-
177
-
178
-
179
-
180
-
181
-
182
-
183
-
184
-
185
-
186
-
187
-
188
 |
 |
