Brother International PT-P900W Users Guide - Page 167
Printing Problems, Problem, Solution
 |
View all Brother International PT-P900W manuals
Add to My Manuals
Save this manual to your list of manuals |
Page 167 highlights
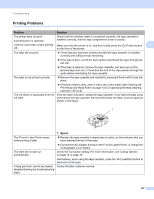
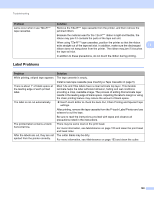
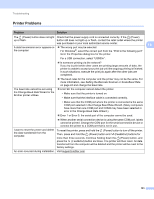
Troubleshooting Printing Problems 18 Problem Solution The printer does not print. Check that the interface cable is connected correctly, the tape cassette is A printing error is received. installed correctly, and the tape compartment cover is closed. I want to cancel the current printing Make sure that the printer is on, and then briefly press the (Power) button 18 job. on the front of the printer. The label did not print. Check that text has been entered and that the tape cassette is installed correctly with sufficient tape remaining. If the tape is bent, cut off the bent section and thread the tape through the exit slot. If the tape is jammed, remove the tape cassette, and then pull out the jammed tape and cut it. Check that the end of the tape passes through the guide before reinstalling the tape cassette. The label is not printed correctly. Remove the tape cassette and reinstall it, pressing it firmly until it locks into place. If the print head is dirty, clean it with a dry cotton swab (see Cleaning the Print Head and Head Roller on page 153) or optional print head cleaning cassette (TZe-CL6). The ink ribbon is separated from the If the ink ribbon is broken, replace the tape cassette. If not, leave the tape uncut ink roller. and remove the tape cassette, then wind the loose ink ribbon onto the spool as shown in the figure. 1 1 Spool The P-touch Label Printer stops while printing a label. Replace the tape cassette if striped tape is visible, as this indicates that you have reached the end of the tape. Connect the AC adapter directly to the P-touch Label Printer, or charge the rechargeable Li-ion battery. The label did not get cut automatically. Check the Cut Option setting. For more information, see Cutting Options on page 14 or page 19. Alternatively, when using the tape cassette, press the (Feed&Cut) button to feed and cut the tape. A tape jam error cannot be cleared Contact Brother customer service. despite following the troubleshooting steps. 157
-
 1
1 -
2
-
3
-
4
-
5
-
6
-
7
-
8
-
9
-
10
-
11
-
12
-
13
-
14
-
15
-
16
-
17
-
18
-
19
-
20
-
21
-
22
-
23
-
24
-
25
-
26
-
27
-
28
-
29
-
30
-
31
-
32
-
33
-
34
-
35
-
36
-
37
-
38
-
39
-
40
-
41
-
42
-
43
-
44
-
45
-
46
-
47
-
48
-
49
-
50
-
51
-
52
-
53
-
54
-
55
-
56
-
57
-
58
-
59
-
60
-
61
-
62
-
63
-
64
-
65
-
66
-
67
-
68
-
69
-
70
-
71
-
72
-
73
-
74
-
75
-
76
-
77
-
78
-
79
-
80
-
81
-
82
-
83
-
84
-
85
-
86
-
87
-
88
-
89
-
90
-
91
-
92
-
93
-
94
-
95
-
96
-
97
-
98
-
99
-
100
-
101
-
102
-
103
-
104
-
105
-
106
-
107
-
108
-
109
-
110
-
111
-
112
-
113
-
114
-
115
-
116
-
117
-
118
-
119
-
120
-
121
-
122
-
123
-
124
-
125
-
126
-
127
-
128
-
129
-
130
-
131
-
132
-
133
-
134
-
135
-
136
-
137
-
138
-
139
-
140
-
141
-
142
-
143
-
144
-
145
-
146
-
147
-
148
-
149
-
150
-
151
-
152
-
153
-
154
-
155
-
156
-
157
-
158
-
159
-
160
-
161
-
 162
162 -
 163
163 -
 164
164 -
 165
165 -
 166
166 -
 167
167 -
 168
168 -
 169
169 -
 170
170 -
 171
171 -
 172
172 -
173
-
174
-
175
-
176
-
177
-
178
-
179
-
180
-
181
-
182
-
183
-
184
-
185
-
186
-
187
-
188
-
189
-
190
-
191
-
192
-
193
-
194
-
195
-
196
-
197
-
198
-
199
-
200
-
201
-
202
-
203
-
204
-
205
-
206
-
207
-
208
-
209
-
210
-
211
-
212
-
213
-
214
-
215
-
216
-
217
-
218
-
219
-
220
-
221
-
222
-
223
-
224
-
225
-
226
-
227
-
228
-
229
-
230
-
231
-
232
-
233
-
234
-
235
-
236
-
237
-
238
-
239
 |
 |
