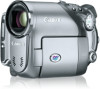
Canon DC40 DC40 Instruction Manual - Page 107
Run the program from the desktop shortcut or from Windows Start - usb cables
 |
UPC - 013803041606
View all Canon DC40 manuals
Add to My Manuals
Save this manual to your list of manuals |
Page 107 highlights
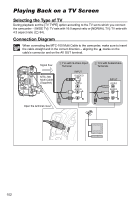
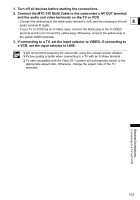
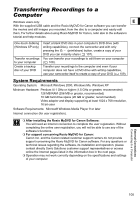
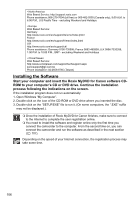
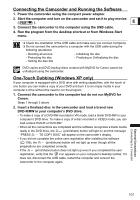
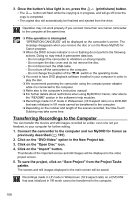
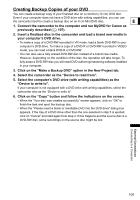
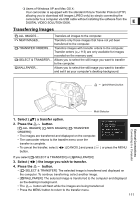
Connecting the Camcorder and Running the Software 1. Power the camcorder using the compact power adapter. 2. Start the computer and turn on the camcorder and set it to play movies ( ). E 3. Connect the camcorder to the computer using the USB cable. 4. Run the program from the desktop shortcut or from Windows Start menu. Check the orientation of the USB cable and make sure you connect it properly. Do not connect the camcorder to a computer with the USB cable during the following operations: - Deleting all scenes - Protecting the disc - Setting the disc title - Initializing the disc - Finalizing or Unfinalizing the disc DVD copies and DVD backup discs created with MyDVD for Canon cannot be unfinalized using the camcorder. One-Touch Dubbing (Windows XP only) If your computer is equipped with a DVD drive with writing capabilities, with the touch of one button you can make a copy of your DVD and burn it to an empty media in your computer's drive without the need to run the program. 1. Connect the camcorder to the computer but do not run MyDVD for Canon. Steps 1 through 3 above. 2. Insert a finalized disc in the camcorder and load a brand new DVD-R/RW in your computer's DVD drive. • To make a copy of a DVD-RW recorded in VR mode, load a blank DVD-RW in your computer's DVD drive. To make a copy of a disc recorded in VIDEO mode, you can load a blank DVD-R or DVD-RW. • When all the connections are completed and the software recognizes a blank media ready in the DVD drive, the (print/share) button will light on and the message "PRESS TO COPY DISC" will appear on the camcorder's display. • If you did not complete the online user registration after installing the software ( 106), the (print/share) button will not light up even though all the preparations are completed correctly. • If the (print/share) button does not light up even if you completed the user registration, verify that the icon appears on your computer's desktop toolbar. If it does not, disconnect the USB cable, restart the computer and connect the camcorder to the computer again. External Connections Connecting to a Computer 107
-
 1
1 -
2
-
3
-
4
-
5
-
6
-
7
-
8
-
9
-
10
-
11
-
12
-
13
-
14
-
15
-
16
-
17
-
18
-
19
-
20
-
21
-
22
-
23
-
24
-
25
-
26
-
27
-
28
-
29
-
30
-
31
-
32
-
33
-
34
-
35
-
36
-
37
-
38
-
39
-
40
-
41
-
42
-
43
-
44
-
45
-
46
-
47
-
48
-
49
-
50
-
51
-
52
-
53
-
54
-
55
-
56
-
57
-
58
-
59
-
60
-
61
-
62
-
63
-
64
-
65
-
66
-
67
-
68
-
69
-
70
-
71
-
72
-
73
-
74
-
75
-
76
-
77
-
78
-
79
-
80
-
81
-
82
-
83
-
84
-
85
-
86
-
87
-
88
-
89
-
90
-
91
-
92
-
93
-
94
-
95
-
96
-
97
-
98
-
99
-
100
-
101
-
 102
102 -
 103
103 -
 104
104 -
 105
105 -
 106
106 -
 107
107 -
 108
108 -
 109
109 -
 110
110 -
 111
111 -
 112
112 -
113
-
114
-
115
-
116
-
117
-
118
-
119
-
120
-
121
-
122
-
123
-
124
-
125
-
126
-
127
-
128
-
129
-
130
-
131
-
132
-
133
-
134
-
135
-
136
-
137
-
138
-
139
-
140
-
141
-
142
-
143
-
144
 |
 |
