Canon DC40 DC40 Instruction Manual - Page 11
About this Manual - camcorder manual
 |
UPC - 013803041606
View all Canon DC40 manuals
Add to My Manuals
Save this manual to your list of manuals |
Page 11 highlights
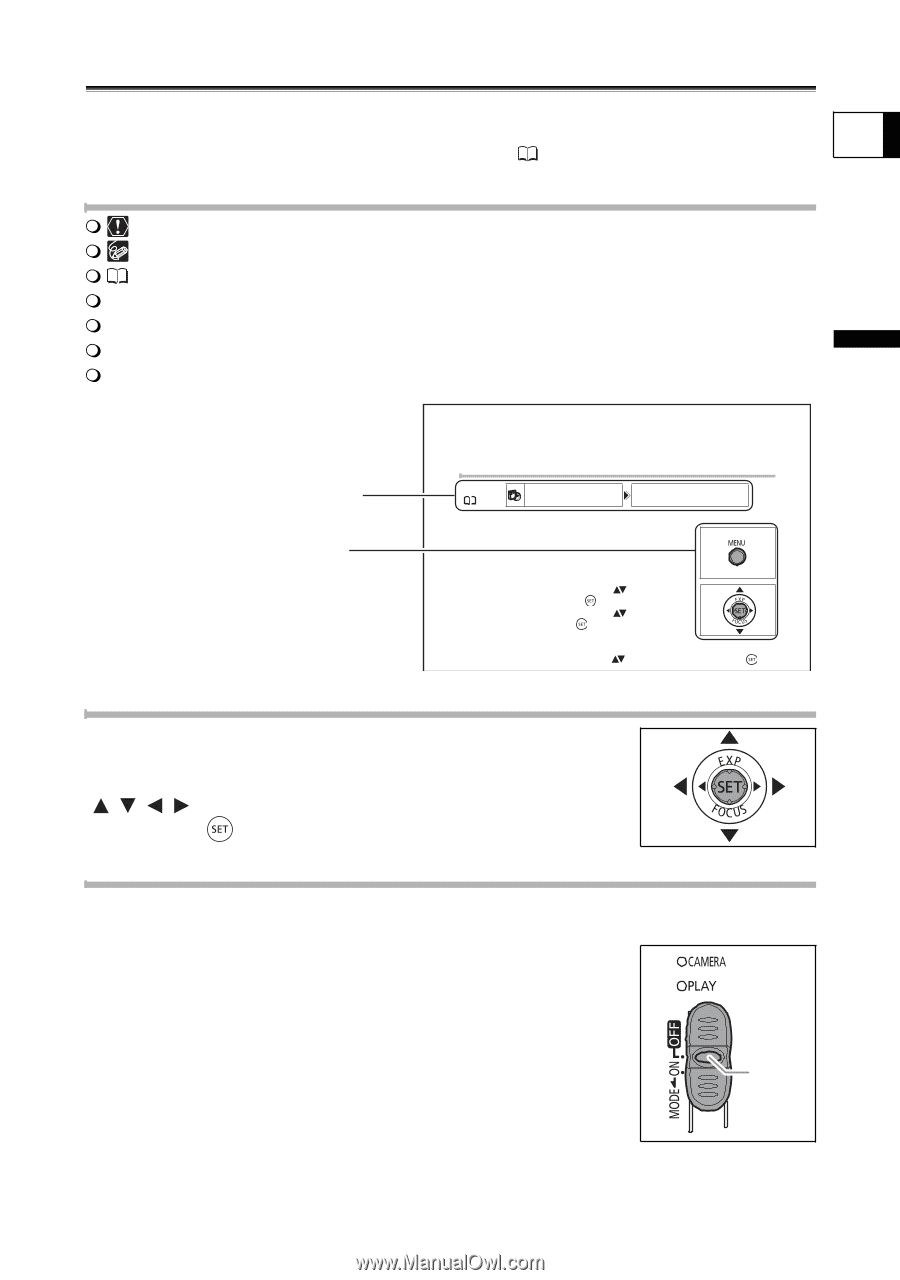
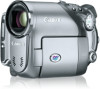
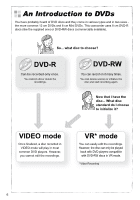
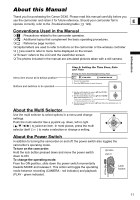
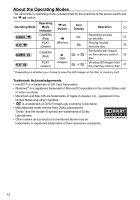
About this Manual Thank you for purchasing the Canon DC40. Please read this manual carefully before you use the camcorder and retain it for future reference. Should your camcorder fail to E operate correctly, refer to the Troubleshooting table ( 122). Conventions Used in the Manual : Precautions related to the camcorder operation. : Additional topics that complement the basic operating procedures. : Reference page number. Capital letters are used to refer to buttons on the camcorder or the wireless controller. [ ] are used to refer to menu items displayed on the screen. "Screen" refers to the LCD and the viewfinder screen. The photos included in the manual are simulated pictures taken with a still camera. Introduction Menu item shown at its default position Buttons and switches to be operated Step 6: Setting the Time Zone, Date and Time Setting the Time Zone/Daylight Saving Time MENU ( 79) D/TIME SETUP T.ZONE/DST NEW YORK 1. Turn on the camcorder. 2. Press the MENU button to open the menu. 3. Use the multi selector to select ( ) the [D/TIME SETUP] menu and press ( ). 4. Use the multi selector to select ( ) the [T.ZONE/ DST] option and press ( ). The time zone setting appears. The default setting is New York or Singapore depending on the region. 5. Use the multi selector to select ( ) your time zone and press ( ) to save the setting. About the Multi Selector Use the multi selector to select options in a menu and change settings. Push the multi selector like a joystick up, down, left or right ( / / / ) to select an item. In most places, press the multi selector itself ( ) to make a selection or change a setting. About the Power Switch In addition to turning the camcorder on and off, the power switch also toggles the camcorder's operating mode. To turn on the camcorder: Hold the lock button pressed down and move the power switch down to ON. To change the operating mode: From the ON position, slide down the power switch momentarily towards MODE and release it. This action will toggle the operating mode between recording (CAMERA - red indicator) and playback Lock button (PLAY - green indicator). 11
-
 1
1 -
2
-
3
-
4
-
5
-
 6
6 -
 7
7 -
 8
8 -
 9
9 -
 10
10 -
 11
11 -
 12
12 -
 13
13 -
 14
14 -
 15
15 -
 16
16 -
17
-
18
-
19
-
20
-
21
-
22
-
23
-
24
-
25
-
26
-
27
-
28
-
29
-
30
-
31
-
32
-
33
-
34
-
35
-
36
-
37
-
38
-
39
-
40
-
41
-
42
-
43
-
44
-
45
-
46
-
47
-
48
-
49
-
50
-
51
-
52
-
53
-
54
-
55
-
56
-
57
-
58
-
59
-
60
-
61
-
62
-
63
-
64
-
65
-
66
-
67
-
68
-
69
-
70
-
71
-
72
-
73
-
74
-
75
-
76
-
77
-
78
-
79
-
80
-
81
-
82
-
83
-
84
-
85
-
86
-
87
-
88
-
89
-
90
-
91
-
92
-
93
-
94
-
95
-
96
-
97
-
98
-
99
-
100
-
101
-
102
-
103
-
104
-
105
-
106
-
107
-
108
-
109
-
110
-
111
-
112
-
113
-
114
-
115
-
116
-
117
-
118
-
119
-
120
-
121
-
122
-
123
-
124
-
125
-
126
-
127
-
128
-
129
-
130
-
131
-
132
-
133
-
134
-
135
-
136
-
137
-
138
-
139
-
140
-
141
-
142
-
143
-
144
 |
 |