Canon DC40 DC40 Instruction Manual - Page 108
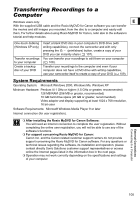
Transferring Recordings to the Computer - video editing software
 |
UPC - 013803041606
View all Canon DC40 manuals
Add to My Manuals
Save this manual to your list of manuals |
Page 108 highlights
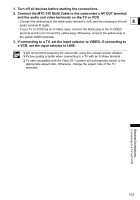
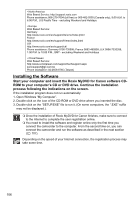
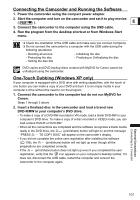
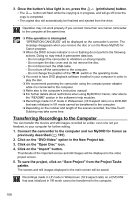
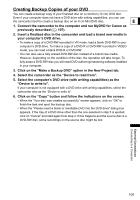
3. Once the button's blue light is on, press the (print/share) button. • The button will flash while the copying is in progress, and will go off once the copy is completed. • The copied disc will automatically be finalized and ejected from the drive. Operation may not work properly if you connect more than one Canon camcorder to the computer at the same time. If the operation is interrupted: "OPERATION CANCELED" will be displayed on the camcorder's screen. The message disappears when you remove the disc or run the Roxio MyDVD for Canon program. When the DISC access indicator is on or flashing do not perform the following actions. Doing so may result in permanent data loss. - Do not subject the camcorder to vibrations or strong impacts. - Do not open the disc cover and do not remove the disc. - Do not disconnect the USB cable. - Do not turn off the camcorder or the computer. - Do not change the position of the / switch or the operating mode. You need to have DVD playback software installed in your computer in order to play the disc. We recommend powering the camcorder using the compact power adapter while it is connected to the computer. Refer also to the computer's instruction manual. For further details about restrictions when using MyDVD for Canon, refer also to the "README" section in the software's help modules. Recordings made in LP mode in Widescreen (16:9 aspect ratio) on a DVD-RW that was initialized in VR mode cannot be transferred to the computer. Depending on the number and length of the scenes recorded, the One-Touch Dubbing may take some time. Transferring Recordings to the Computer You can transfer the movies and still images recorded on a disc, even one not yet finalized, to your computer for further editing. 1. Connect the camcorder to the computer and run MyDVD for Canon as previously described ( 107). 2. Click on the "DVD-Video" option in the New Project tab. 3. Click on the "Open Disc" icon. 4. Click on the "Import" button. Thumbnails of the imported scenes and still images will be displayed in the video project screen. 5. To save the project, click on "Save Project" from the Project Tasks palette. The scenes and still images displayed in the main screen will be saved. Recordings made in LP mode in Widescreen (16:9 aspect ratio) on a DVD-RW that was initialized in VR mode cannot be transferred to the computer. 108
-
 1
1 -
2
-
3
-
4
-
5
-
6
-
7
-
8
-
9
-
10
-
11
-
12
-
13
-
14
-
15
-
16
-
17
-
18
-
19
-
20
-
21
-
22
-
23
-
24
-
25
-
26
-
27
-
28
-
29
-
30
-
31
-
32
-
33
-
34
-
35
-
36
-
37
-
38
-
39
-
40
-
41
-
42
-
43
-
44
-
45
-
46
-
47
-
48
-
49
-
50
-
51
-
52
-
53
-
54
-
55
-
56
-
57
-
58
-
59
-
60
-
61
-
62
-
63
-
64
-
65
-
66
-
67
-
68
-
69
-
70
-
71
-
72
-
73
-
74
-
75
-
76
-
77
-
78
-
79
-
80
-
81
-
82
-
83
-
84
-
85
-
86
-
87
-
88
-
89
-
90
-
91
-
92
-
93
-
94
-
95
-
96
-
97
-
98
-
99
-
100
-
101
-
102
-
 103
103 -
 104
104 -
 105
105 -
 106
106 -
 107
107 -
 108
108 -
 109
109 -
 110
110 -
 111
111 -
 112
112 -
 113
113 -
114
-
115
-
116
-
117
-
118
-
119
-
120
-
121
-
122
-
123
-
124
-
125
-
126
-
127
-
128
-
129
-
130
-
131
-
132
-
133
-
134
-
135
-
136
-
137
-
138
-
139
-
140
-
141
-
142
-
143
-
144
 |
 |