Canon DC40 DC40 Instruction Manual - Page 73
Press the D.EFFECTS button.
 |
UPC - 013803041606
View all Canon DC40 manuals
Add to My Manuals
Save this manual to your list of manuals |
Page 73 highlights
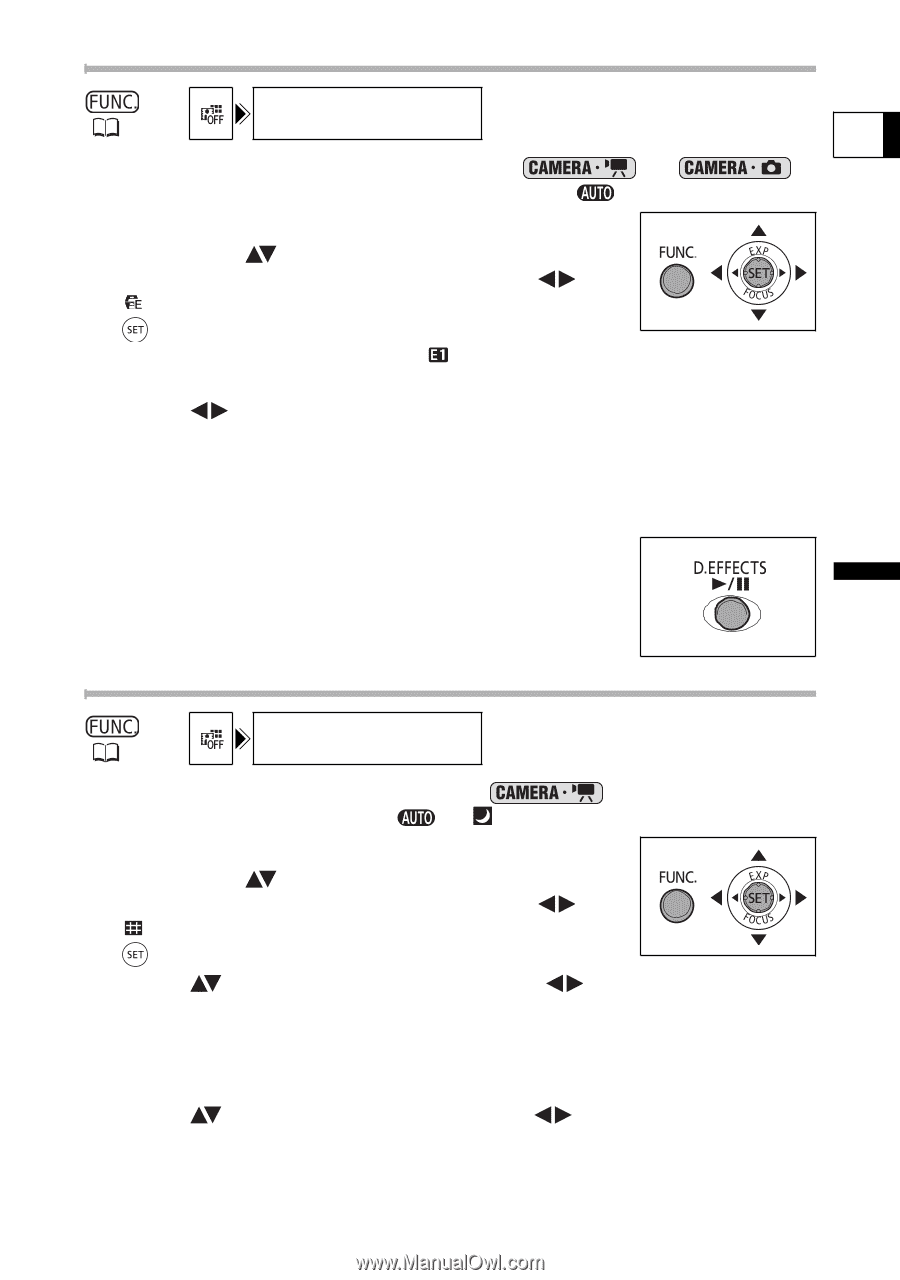
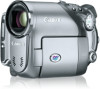
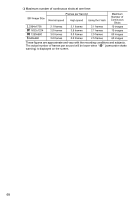
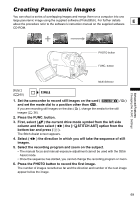
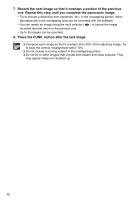
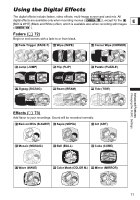
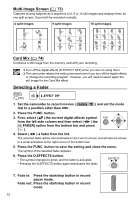
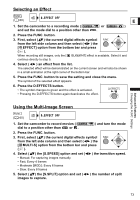
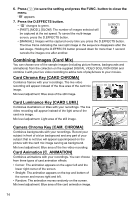
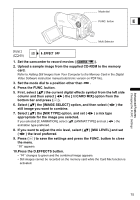
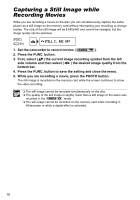
Advanced Features Changing the FUNC. Settings Selecting an Effect D.EFFECT OFF ( 60) E 1. Set the camcorder to a recording mode ( or ) and set the mode dial to a position other than . 2. Press the FUNC. button. 3. First, select ( ) the current digital effects symbol from the left side column and then select ( ) the [ EFFECT] option from the bottom bar and press ( ). When recording still images, only the [ BLK&WHT] effect is available. Select it and continue directly to step 5. 4. Select ( ) an effect from the list. The selected effect will be demonstrated on the current screen and will also be shown in a small animation at the right corner of the bottom bar. 5. Press the FUNC. button to save the setting and close the menu. The symbol of the selected effect appears. 6. Press the D.EFFECTS button. • The symbol changes to green and the effect is activated. • Pressing the D.EFFECTS button again deactivates the effect. Using the Multi-Image Screen ( 60) D.EFFECT OFF 1. Set the camcorder to record movies ( dial to a position other than or . ) and turn the mode 2. Press the FUNC. button. 3. First, select ( ) the current digital effects symbol from the left side column and then select ( ) the [ MULTI-S] option from the bottom bar and press ( ). 4. Select ( ) the [S.SPEED] option and set ( • Manual: For capturing images manually. • Fast: Every 4 frames • Moderate [MOD.]: Every 6 frames • Slow: Every 8 frames ) the transition speed. 5. Select ( ) the [S.SPLIT] option and set ( images to capture. ) the number of split 73
-
 1
1 -
2
-
3
-
4
-
5
-
6
-
7
-
8
-
9
-
10
-
11
-
12
-
13
-
14
-
15
-
16
-
17
-
18
-
19
-
20
-
21
-
22
-
23
-
24
-
25
-
26
-
27
-
28
-
29
-
30
-
31
-
32
-
33
-
34
-
35
-
36
-
37
-
38
-
39
-
40
-
41
-
42
-
43
-
44
-
45
-
46
-
47
-
48
-
49
-
50
-
51
-
52
-
53
-
54
-
55
-
56
-
57
-
58
-
59
-
60
-
61
-
62
-
63
-
64
-
65
-
66
-
67
-
 68
68 -
 69
69 -
 70
70 -
 71
71 -
 72
72 -
 73
73 -
 74
74 -
 75
75 -
 76
76 -
 77
77 -
 78
78 -
79
-
80
-
81
-
82
-
83
-
84
-
85
-
86
-
87
-
88
-
89
-
90
-
91
-
92
-
93
-
94
-
95
-
96
-
97
-
98
-
99
-
100
-
101
-
102
-
103
-
104
-
105
-
106
-
107
-
108
-
109
-
110
-
111
-
112
-
113
-
114
-
115
-
116
-
117
-
118
-
119
-
120
-
121
-
122
-
123
-
124
-
125
-
126
-
127
-
128
-
129
-
130
-
131
-
132
-
133
-
134
-
135
-
136
-
137
-
138
-
139
-
140
-
141
-
142
-
143
-
144
 |
 |