Canon DC40 DC40 Instruction Manual - Page 35
Recording Still Images
 |
UPC - 013803041606
View all Canon DC40 manuals
Add to My Manuals
Save this manual to your list of manuals |
Page 35 highlights
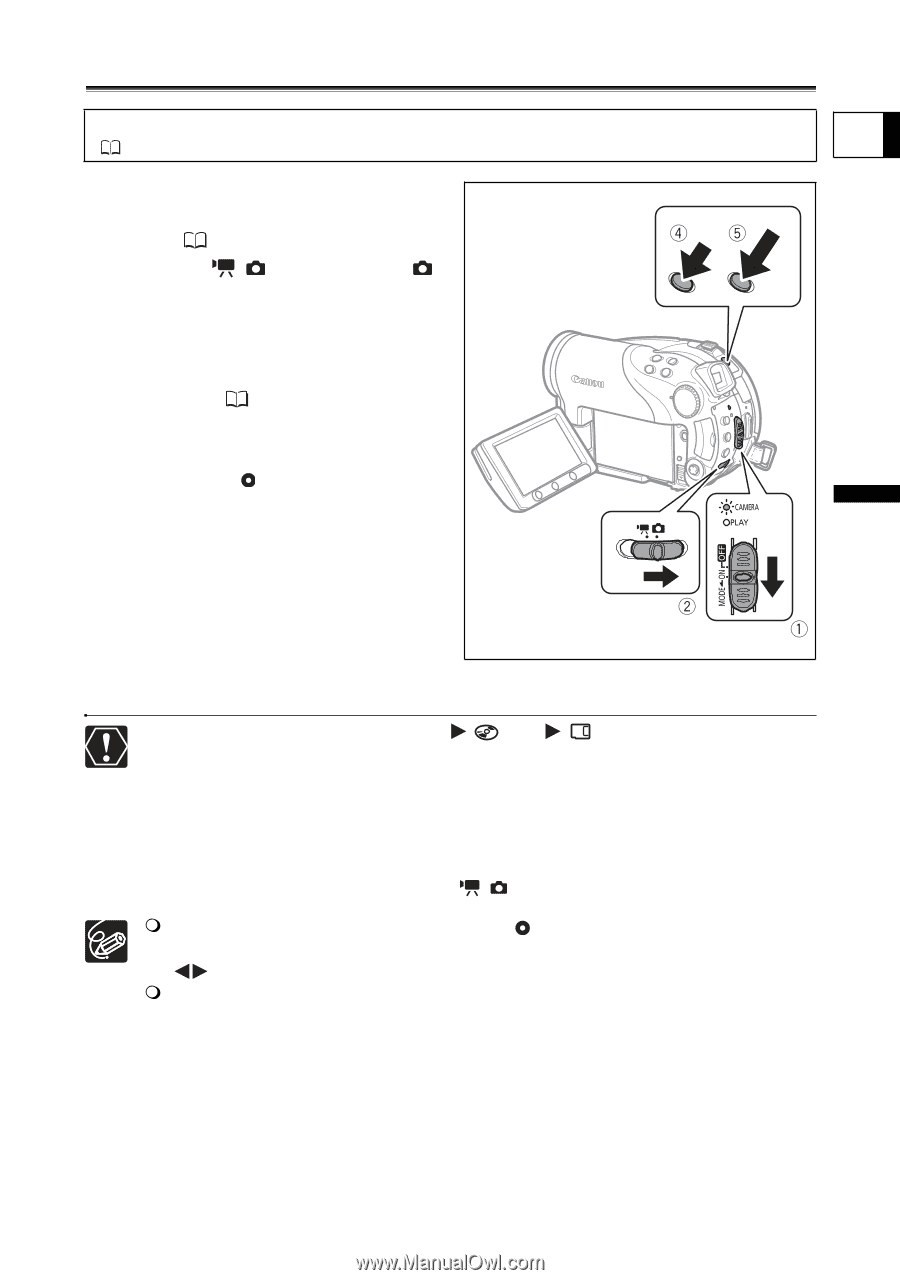
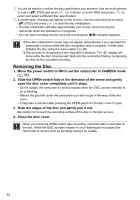
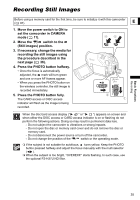
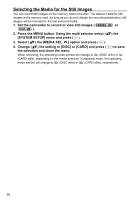
Basic Functions Recording Recording Still Images Before using a memory card for the first time, be sure to initialize it with this camcorder ( 97). E 1. Move the power switch to ON to set the camcorder in CAMERA mode ( 11). 2. Move the / switch to the (Still images) position. 3. If necessary, change the media for recording the still images using the procedure described in the next page ( 36). 4. Press the PHOTO button halfway. • Once the focus is automatically adjusted, the mark will turn green and one or more AF frames appear. • When you press the PHOTO button on the wireless controller, the still image is recorded immediately. 5. Press the PHOTO button fully. The CARD access or DISC access indicator will flash as the image is being recorded. When the disc/card access display (" " or " ") appears on screen and when either the DISC access or CARD access indicator is on or flashing do not perform the following actions. Doing so may result in permanent data loss. - Do not subject the camcorder to vibrations or strong impacts. - Do not open the disc or memory card cover and do not remove the disc or memory card. - Do not disconnect the power source or turn off the camcorder. - Do not change the position of the / switch or the operating mode. If the subject is not suitable for autofocus, turns yellow. Keep the PHOTO button pressed halfway and adjust the focus manually with the multi selector ( ). When the subject is too bright, "OVEREXP." starts flashing. In such case, use the optional FS-H37U ND filter. 35
-
 1
1 -
2
-
3
-
4
-
5
-
6
-
7
-
8
-
9
-
10
-
11
-
12
-
13
-
14
-
15
-
16
-
17
-
18
-
19
-
20
-
21
-
22
-
23
-
24
-
25
-
26
-
27
-
28
-
29
-
 30
30 -
 31
31 -
 32
32 -
 33
33 -
 34
34 -
 35
35 -
 36
36 -
 37
37 -
 38
38 -
 39
39 -
 40
40 -
41
-
42
-
43
-
44
-
45
-
46
-
47
-
48
-
49
-
50
-
51
-
52
-
53
-
54
-
55
-
56
-
57
-
58
-
59
-
60
-
61
-
62
-
63
-
64
-
65
-
66
-
67
-
68
-
69
-
70
-
71
-
72
-
73
-
74
-
75
-
76
-
77
-
78
-
79
-
80
-
81
-
82
-
83
-
84
-
85
-
86
-
87
-
88
-
89
-
90
-
91
-
92
-
93
-
94
-
95
-
96
-
97
-
98
-
99
-
100
-
101
-
102
-
103
-
104
-
105
-
106
-
107
-
108
-
109
-
110
-
111
-
112
-
113
-
114
-
115
-
116
-
117
-
118
-
119
-
120
-
121
-
122
-
123
-
124
-
125
-
126
-
127
-
128
-
129
-
130
-
131
-
132
-
133
-
134
-
135
-
136
-
137
-
138
-
139
-
140
-
141
-
142
-
143
-
144
 |
 |