Canon PowerShot A520 Software Starter Guide Ver.22 - Page 61
Print Window Features
 |
View all Canon PowerShot A520 manuals
Add to My Manuals
Save this manual to your list of manuals |
Page 61 highlights
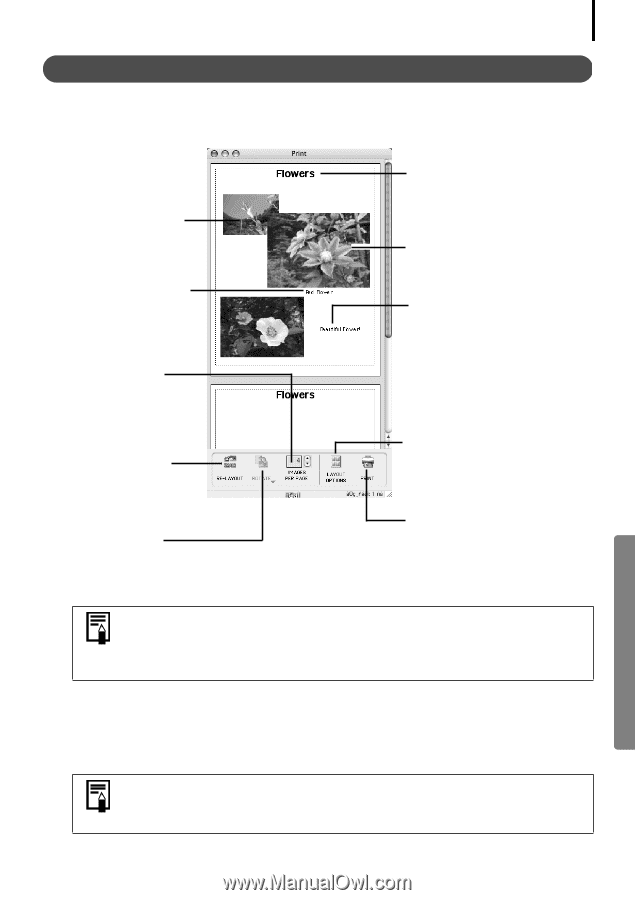
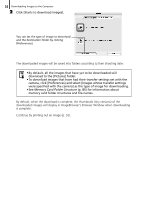
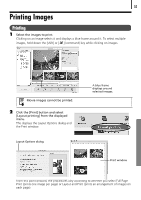
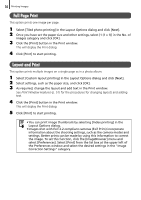
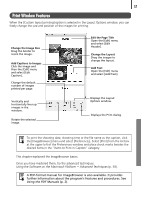
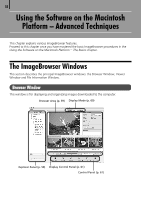
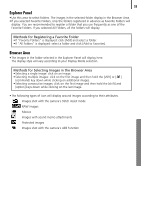
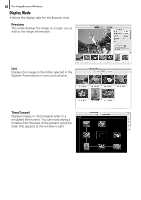
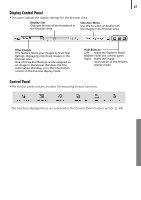
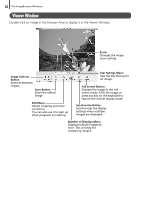
57 Print Window Features When the [Custom layout printing] option is selected in the Layout Options window, you can freely change the size and position of the images for printing. Change the Image Size Drag the border to resize the image. Add Captions to Images Click the image and then the [Edit] menu and select [Edit Caption]. Change the default number of images printed per page. Vertically and horizontally lines up images in the window. Rotate the selected image. Edit the Page Title Open the [Edit] menu and select [Edit Header]. Change the Layout Drag the images to change the layout. Add Text Open the [Edit] menu and select [Add Text]. Displays the Layout Options window. Displays the Print dialog. To print the shooting date, shooting time or the file name as the caption, click the [ImageBrowser] menu and select [Preferences]. Select [Print] from the list box at the upper left of the Preferences window and place check marks besides the desired items in the "Items to Print in Caption" category. This chapter explained the ImageBrowser basics. Once you have mastered them, try the advanced techniques. Using the Software on the Macintosh Platform - Advanced Techniques (p. 58). A PDF-format manual for ImageBrowser is also available. It provides further information about the program's features and procedures. See Using the PDF Manuals (p. 2).
-
 1
1 -
2
-
3
-
4
-
5
-
6
-
7
-
8
-
9
-
10
-
11
-
12
-
13
-
14
-
15
-
16
-
17
-
18
-
19
-
20
-
21
-
22
-
23
-
24
-
25
-
26
-
27
-
28
-
29
-
30
-
31
-
32
-
33
-
34
-
35
-
36
-
37
-
38
-
39
-
40
-
41
-
42
-
43
-
44
-
45
-
46
-
47
-
48
-
49
-
50
-
51
-
52
-
53
-
54
-
55
-
 56
56 -
 57
57 -
 58
58 -
 59
59 -
 60
60 -
 61
61 -
 62
62 -
 63
63 -
 64
64 -
 65
65 -
 66
66 -
67
-
68
-
69
-
70
-
71
-
72
-
73
-
74
-
75
-
76
-
77
-
78
-
79
-
80
-
81
-
82
-
83
-
84
-
85
-
86
-
87
-
88
-
89
-
90
-
91
-
92
-
93
-
94
-
95
-
96
-
97
-
98
-
99
-
100
-
101
-
102
-
103
-
104
-
105
-
106
 |
 |