Canon S750 S750 Quick Start Guide - Page 48
Uninstalling the Printer Driver
 |
View all Canon S750 manuals
Add to My Manuals
Save this manual to your list of manuals |
Page 48 highlights
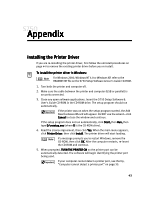
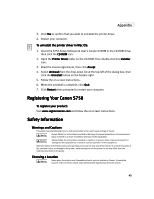
Appendix 6. When the Terminate Installation window appears, click OK. Product Registration will be automatically launched. Follow the on-screen instructions to register you product for future product support. When the registration process is complete, click Exit. 7. Align the printhead. (See "Aligning the Printhead" on page 23.) To install the printer driver in Mac OS: 1. Insert the S750 Setup Software & User's Guide CD-ROM in the CD-ROM drive. 2. Open the Printer Driver folder on the CD-ROM, then double-click the Installer icon. 3. Read the License Agreement, then click Accept. 4. Click Install. The printer driver will load automatically. If the message "No other applications can be running..." displays, click Continue. 5. When the Installation Was Successful screen appears, click Restart. 6. TURN THE PRINTER ON, then click the Apple menu, then click Chooser. 7. Click the S750 icon in the Chooser. To use the BJ Print Monitor, click the Backgrounding button to the On position. For instructions on using this feature, see the S750 User's Guide on the Setup Software & User's Guide CD-ROM. 8. Close the Chooser. 9. Align the printhead. (See "Aligning the Printhead" on page 23.) Uninstalling the Printer Driver To uninstall the printer driver in Windows: 1. Click Start, Programs, then Canon S750. For Windows XP, click Start, then click All Programs, then click Canon S750, then click Uninstall. Restart your computer when prompted. 2. Click Uninstall. 44
-
 1
1 -
2
-
3
-
4
-
5
-
6
-
7
-
8
-
9
-
10
-
11
-
12
-
13
-
14
-
15
-
16
-
17
-
18
-
19
-
20
-
21
-
22
-
23
-
24
-
25
-
26
-
27
-
28
-
29
-
30
-
31
-
32
-
33
-
34
-
35
-
36
-
37
-
38
-
39
-
40
-
41
-
42
-
 43
43 -
 44
44 -
 45
45 -
 46
46 -
 47
47 -
 48
48 -
 49
49 -
 50
50 -
 51
51 -
 52
52 -
 53
53 -
54
-
55
-
56
-
57
-
58
 |
 |
