Canon VIXIA HF R50 Instruction Manual - Page 105
Saving Recordings on a Computer, Saving AVCHD Movies (Windows only)
 |
View all Canon VIXIA HF R50 manuals
Add to My Manuals
Save this manual to your list of manuals |
Page 105 highlights
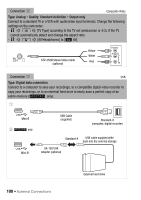
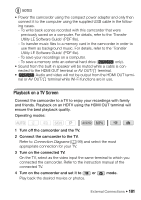
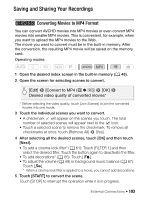
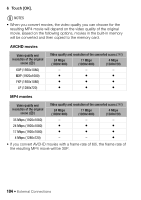
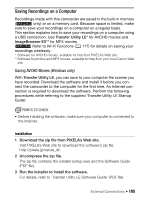
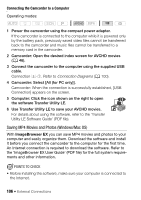
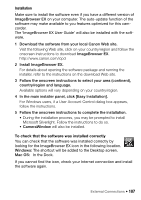
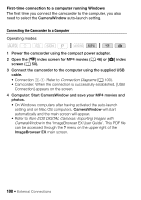
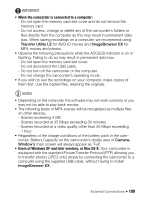
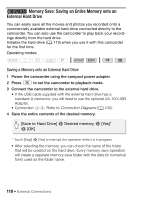
Saving Recordings on a Computer Recordings made with this camcorder are saved in the built-in memory (B only) or on a memory card. Because space is limited, make sure to save your recordings on a computer on a regular basis. This section explains how to save your recordings on a computer using a USB connection. Use Transfer Utility LE* for AVCHD movies and ImageBrowser EX** for MP4 movies. B Refer to Wi-Fi Functions (A 117) for details on saving your recordings wirelessly. * Software for AVCHD movies, available for free from PIXELA's Web site. ** Software for photos and MP4 movies, available for free from your local Canon Web site. Saving AVCHD Movies (Windows only) With Transfer Utility LE, you can save to your computer the scenes you have recorded. Download the software and install it before you connect the camcorder to the computer for the first time. An Internet connection is required to download the software. Perform the following procedures while referring to the supplied 'Transfer Utility LE Startup Guide'. POINTS TO CHECK • Before installing the software, make sure your computer is connected to the Internet. Installation 1 Download the zip file from PIXELA's Web site. Visit PIXELA's Web site to download the software's zip file. http://pixela.jp/cetule_dl/ 2 Uncompress the zip file. The zip file contains the installer (setup.exe) and the Software Guide (PDF file). 3 Run the installer to install the software. For details, refer to 'Transfer Utility LE Software Guide' (PDF file). External Connections Š 105
-
 1
1 -
2
-
3
-
4
-
5
-
6
-
7
-
8
-
9
-
10
-
11
-
12
-
13
-
14
-
15
-
16
-
17
-
18
-
19
-
20
-
21
-
22
-
23
-
24
-
25
-
26
-
27
-
28
-
29
-
30
-
31
-
32
-
33
-
34
-
35
-
36
-
37
-
38
-
39
-
40
-
41
-
42
-
43
-
44
-
45
-
46
-
47
-
48
-
49
-
50
-
51
-
52
-
53
-
54
-
55
-
56
-
57
-
58
-
59
-
60
-
61
-
62
-
63
-
64
-
65
-
66
-
67
-
68
-
69
-
70
-
71
-
72
-
73
-
74
-
75
-
76
-
77
-
78
-
79
-
80
-
81
-
82
-
83
-
84
-
85
-
86
-
87
-
88
-
89
-
90
-
91
-
92
-
93
-
94
-
95
-
96
-
97
-
98
-
99
-
 100
100 -
 101
101 -
 102
102 -
 103
103 -
 104
104 -
 105
105 -
 106
106 -
 107
107 -
 108
108 -
 109
109 -
 110
110 -
111
-
112
-
113
-
114
-
115
-
116
-
117
-
118
-
119
-
120
-
121
-
122
-
123
-
124
-
125
-
126
-
127
-
128
-
129
-
130
-
131
-
132
-
133
-
134
-
135
-
136
-
137
-
138
-
139
-
140
-
141
-
142
-
143
-
144
-
145
-
146
-
147
-
148
-
149
-
150
-
151
-
152
-
153
-
154
-
155
-
156
-
157
-
158
-
159
-
160
-
161
-
162
-
163
-
164
-
165
-
166
-
167
-
168
-
169
-
170
-
171
-
172
-
173
-
174
-
175
-
176
-
177
-
178
-
179
-
180
-
181
-
182
-
183
-
184
-
185
-
186
-
187
-
188
-
189
-
190
-
191
-
192
-
193
-
194
-
195
-
196
-
197
-
198
-
199
-
200
 |
 |