Canon VIXIA HF R50 Instruction Manual - Page 15
Introduction, Operating Modes, Using the Menus, Menu Options Lists
 |
View all Canon VIXIA HF R50 manuals
Add to My Manuals
Save this manual to your list of manuals |
Page 15 highlights
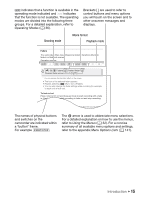
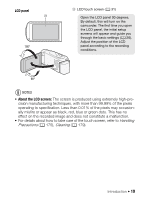
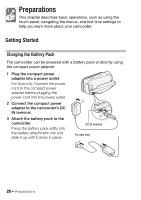
indicates that a function is available in the operating mode indicated and indicates that the function is not available. The operating modes are divided into the following three groups. For a detailed explanation, refer to Operating Modes (A 36). Brackets [ ] are used to refer to control buttons and menu options you will touch on the screen and to other onscreen messages and displays. Shooting mode Movie format Playback mode Faders The camcorder offers two professional looking transition effects to fade-in or fade-out scenes. Operating modes: SCN [2] > [R Faders] > Desired fader* > Desired fade screen color* > [X] * You can preview the transition effect on the screen. • The icon of the selected fader appears. • Repeat, selecting [j Off], to turn off faders. • You can also change the fader settings while recording (for example, to apply only a fade out). To fade in/out Press Y in record pause mode to start recording with a fade in. Press Y while recording to fade out and stop recording. NOTES • When you apply a fader, not only the picture but also the sound will fade i t The names of physical buttons and switches on the camcorder are indicated within a "button" frame. For example Y. The > arrow is used to abbreviate menu selections. For a detailed explanation on how to use the menus, refer to Using the Menus (A 32). For a concise summary of all available menu options and settings, refer to the appendix Menu Options Lists (A 141). Introduction Š 15
-
 1
1 -
2
-
3
-
4
-
5
-
6
-
7
-
8
-
9
-
 10
10 -
 11
11 -
 12
12 -
 13
13 -
 14
14 -
 15
15 -
 16
16 -
 17
17 -
 18
18 -
 19
19 -
 20
20 -
21
-
22
-
23
-
24
-
25
-
26
-
27
-
28
-
29
-
30
-
31
-
32
-
33
-
34
-
35
-
36
-
37
-
38
-
39
-
40
-
41
-
42
-
43
-
44
-
45
-
46
-
47
-
48
-
49
-
50
-
51
-
52
-
53
-
54
-
55
-
56
-
57
-
58
-
59
-
60
-
61
-
62
-
63
-
64
-
65
-
66
-
67
-
68
-
69
-
70
-
71
-
72
-
73
-
74
-
75
-
76
-
77
-
78
-
79
-
80
-
81
-
82
-
83
-
84
-
85
-
86
-
87
-
88
-
89
-
90
-
91
-
92
-
93
-
94
-
95
-
96
-
97
-
98
-
99
-
100
-
101
-
102
-
103
-
104
-
105
-
106
-
107
-
108
-
109
-
110
-
111
-
112
-
113
-
114
-
115
-
116
-
117
-
118
-
119
-
120
-
121
-
122
-
123
-
124
-
125
-
126
-
127
-
128
-
129
-
130
-
131
-
132
-
133
-
134
-
135
-
136
-
137
-
138
-
139
-
140
-
141
-
142
-
143
-
144
-
145
-
146
-
147
-
148
-
149
-
150
-
151
-
152
-
153
-
154
-
155
-
156
-
157
-
158
-
159
-
160
-
161
-
162
-
163
-
164
-
165
-
166
-
167
-
168
-
169
-
170
-
171
-
172
-
173
-
174
-
175
-
176
-
177
-
178
-
179
-
180
-
181
-
182
-
183
-
184
-
185
-
186
-
187
-
188
-
189
-
190
-
191
-
192
-
193
-
194
-
195
-
196
-
197
-
198
-
199
-
200
 |
 |
