Canon Vistura Vistura Instruction Manual - Page 12
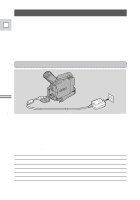
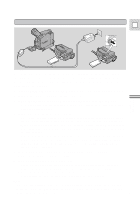
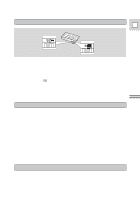
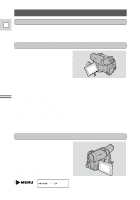
Press the start/stop button again to pause recording., Turn the standby lever to LOCK.
 |
UPC - 009322161444
View all Canon Vistura manuals
Add to My Manuals
Save this manual to your list of manuals |
Page 12 highlights
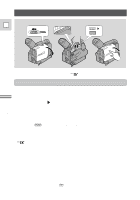
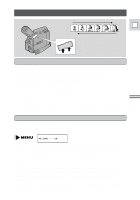
4. Press the start/stop button again to pause recording. • The camera returns to record pause mode and PAUSE reappears in the E display. • You can stop and restart recording as often as you like by pressing the start/stop button. 5. Turn the standby lever to LOCK. • As long as the POWER switch is set to [ or P (see p. 12), you can use the standby lever to turn the camera on and off. This makes it easy to save battery power, and prevents accidental operation of the start/stop button. It is also useful when you want the camera to remember your manual settings, such as white balance and shutter speed. Mastering the Basics When you have finished recording • Replace the lens cap. • Return the LCD screen flush to the camera body. • Unload the cassette. • Set the POWER switch to OFF. • Disconnect the power source. Notes: • In addition to [ (Easy Recording), the camera has six other recording programs. Turn the POWER switch to the P position to give you access to these recording programs (p. 39) and also to the digital effects (p. 43). • To check that the camera is recording correctly, make a test recording first. • Before making important recordings, clean the video heads using a Canon DVM-CL Digital Video Head Cleaning Cassette or a commercially available digital video head cleaning cassette. • You cannot monitor the sound from the speaker when recording, you can use headphones instead. • For tips on how to make better videos, see page 24. 13
-
 1
1 -
2
-
3
-
4
-
5
-
6
-
 7
7 -
 8
8 -
 9
9 -
 10
10 -
 11
11 -
 12
12 -
 13
13 -
 14
14 -
 15
15 -
 16
16 -
 17
17 -
18
-
19
-
20
-
21
-
22
-
23
-
24
-
25
-
26
-
27
-
28
-
29
-
30
-
31
-
32
-
33
-
34
-
35
-
36
-
37
-
38
-
39
-
40
-
41
-
42
-
43
-
44
-
45
-
46
-
47
-
48
-
49
-
50
-
51
-
52
-
53
-
54
-
55
-
56
-
57
-
58
-
59
-
60
-
61
-
62
-
63
-
64
-
65
-
66
-
67
-
68
-
69
-
70
-
71
-
72
-
73
-
74
-
75
-
76
-
77
-
78
-
79
-
80
-
81
-
82
-
83
-
84
-
85
-
86
-
87
-
88
-
89
-
90
-
91
-
92
-
93
-
94
-
95
-
96
-
97
-
98
-
99
 |
 |
