Canon i475D i475D Quick Start Guide - Page 37
Printing Maintenance, Start Print Head Cleaning. - problem
 |
View all Canon i475D manuals
Add to My Manuals
Save this manual to your list of manuals |
Page 37 highlights
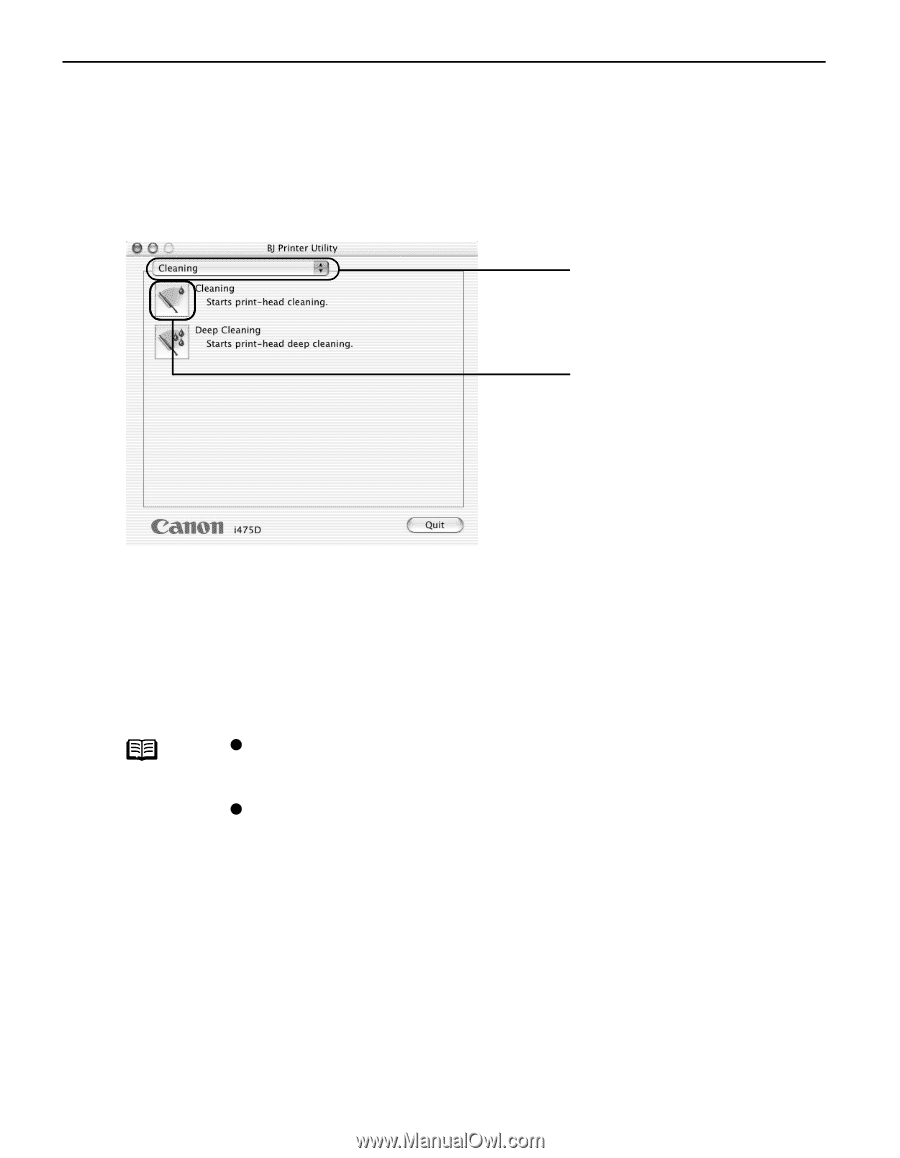
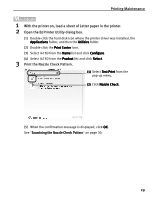
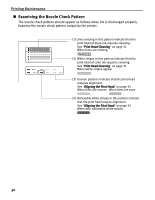
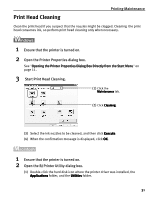
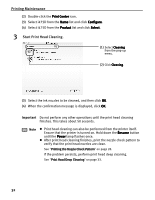
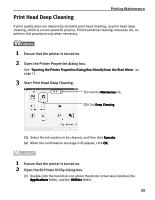
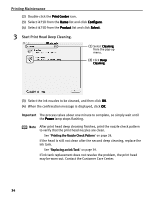
Printing Maintenance (2) Double-click the Print Center icon. (3) Select i475D from the Name list and click Configure. (4) Select i475D from the Product list and click Select. 3 Start Print Head Cleaning. (1) Select Cleaning from the pop-up menu. (2) Click Cleaning. (3) Select the ink nozzles to be cleaned, and then click OK. (4) When the confirmation message is displayed, click OK. Important Do not perform any other operations until the print head cleaning finishes. This takes about 50 seconds. Note z Print head cleaning can also be performed from the printer itself. Ensure that the printer is turned on. Hold down the Resume button until the Power lamp flashes once. z After print head cleaning finishes, print the nozzle check pattern to verify that the print head nozzles are clean. See "Printing the Nozzle Check Pattern" on page 28. If the problem persists, perform print head deep cleaning. See "Print Head Deep Cleaning" on page 33. 32
-
 1
1 -
2
-
3
-
4
-
5
-
6
-
7
-
8
-
9
-
10
-
11
-
12
-
13
-
14
-
15
-
16
-
17
-
18
-
19
-
20
-
21
-
22
-
23
-
24
-
25
-
26
-
27
-
28
-
29
-
30
-
31
-
 32
32 -
 33
33 -
 34
34 -
 35
35 -
 36
36 -
 37
37 -
 38
38 -
 39
39 -
 40
40 -
 41
41 -
 42
42 -
43
-
44
-
45
-
46
-
47
-
48
-
49
-
50
-
51
-
52
-
53
-
54
-
55
-
56
-
57
-
58
-
59
-
60
-
61
-
62
-
63
-
64
-
65
-
66
-
67
-
68
-
69
-
70
 |
 |