Canon i475D i475D Quick Start Guide - Page 46
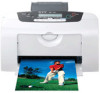
Important, Message Prompting Confirmation of Ink Tank Replacement
 |
View all Canon i475D manuals
Add to My Manuals
Save this manual to your list of manuals |
Page 46 highlights
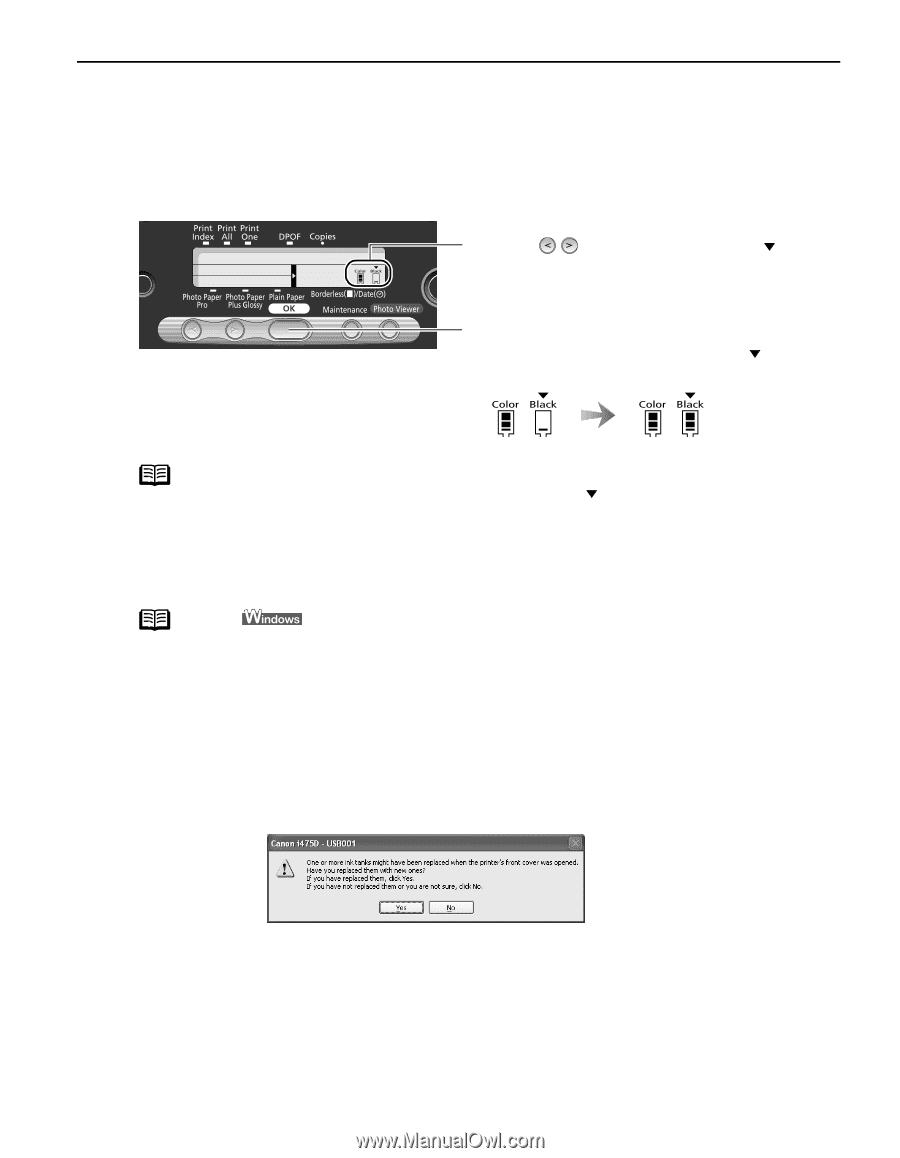
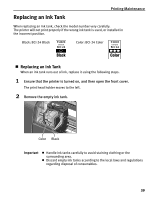
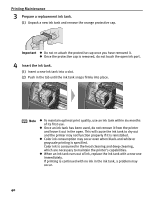
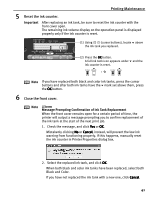
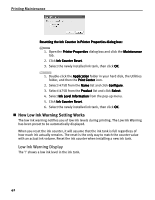
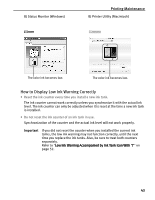
Printing Maintenance 5 Reset the ink counter. Important After replacing an ink tank, be sure to reset the ink counter with the front cover open. The remaining ink volume display on the operation panel is displayed properly only if the ink counter is reset. (1) Using (cursor buttons), locate above the ink tank you replaced. (2) Press the OK button. A full ink tank icon appears under and the ink counter is reset. Note If you have replaced both black and color ink tanks, press the cursor buttons and after both ink tanks have the mark set above them, press the OK button. 6 Close the front cover. Note Message Prompting Confirmation of Ink Tank Replacement When the front cover remains open for a certain period of time, the printer will output a message prompting you to confirm replacement of the ink tank at the start of the next print job. 1. Check the message, and click Yes or OK. Mistakenly clicking No or Cancel, instead, will prevent the low ink warning from functioning properly. If this happens, manually reset the ink counter in Printer Properties dialog box. 2. Select the replaced ink tank, and click OK. When both black and color ink tanks have been replaced, select both Black and Color. If you have not replaced the ink tank with a new one, click Cancel. 41
-
 1
1 -
2
-
3
-
4
-
5
-
6
-
7
-
8
-
9
-
10
-
11
-
12
-
13
-
14
-
15
-
16
-
17
-
18
-
19
-
20
-
21
-
22
-
23
-
24
-
25
-
26
-
27
-
28
-
29
-
30
-
31
-
32
-
33
-
34
-
35
-
36
-
37
-
38
-
39
-
40
-
 41
41 -
 42
42 -
 43
43 -
 44
44 -
 45
45 -
 46
46 -
 47
47 -
 48
48 -
 49
49 -
 50
50 -
 51
51 -
52
-
53
-
54
-
55
-
56
-
57
-
58
-
59
-
60
-
61
-
62
-
63
-
64
-
65
-
66
-
67
-
68
-
69
-
70
 |
 |