Canon i475D i475D Quick Start Guide - Page 42
Align the Print Head.
 |
View all Canon i475D manuals
Add to My Manuals
Save this manual to your list of manuals |
Page 42 highlights
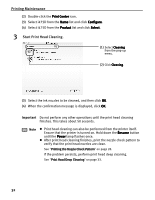
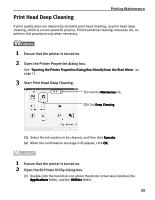
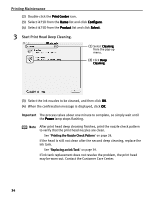
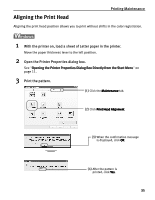
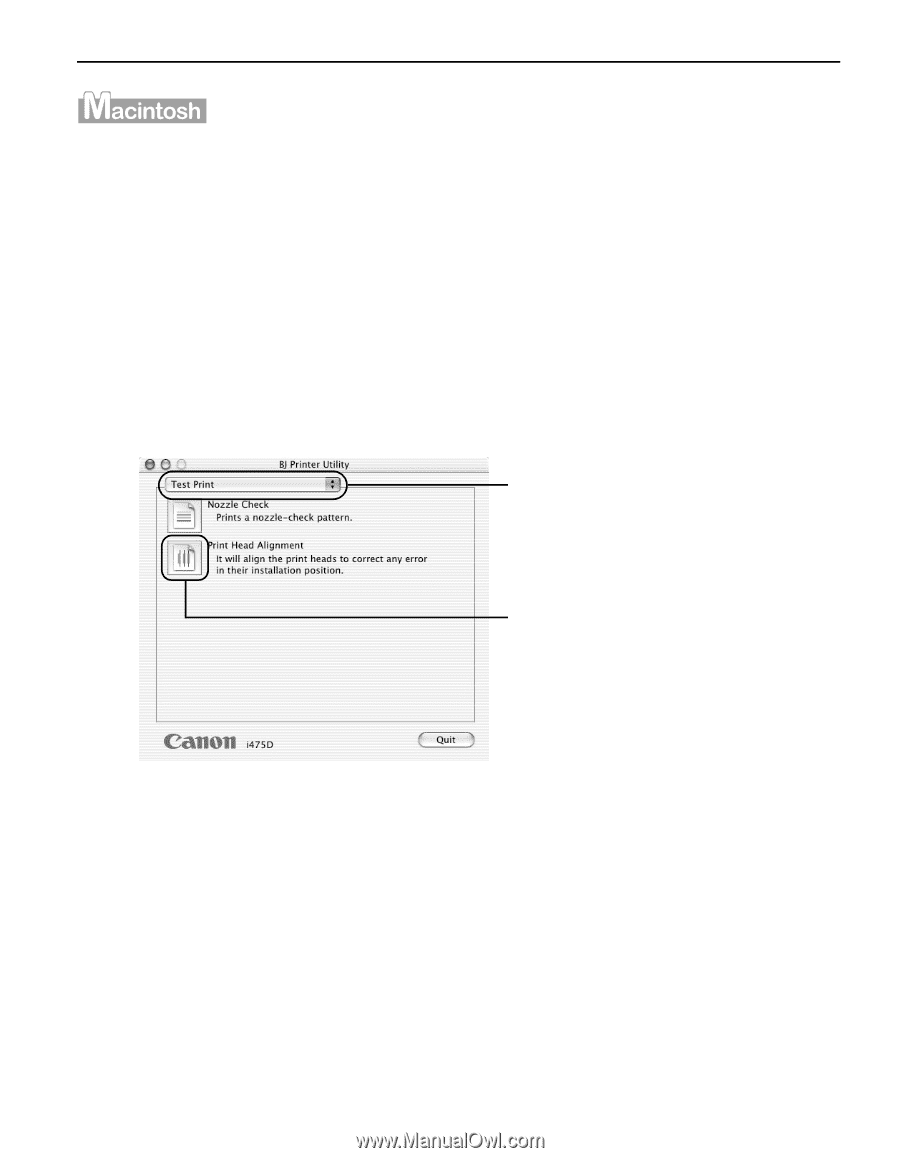
Printing Maintenance 1 With the printer on, load a sheet of Letter paper in the printer. Move the paper thickness lever to the left position. 2 Open the BJ Printer Utility dialog box. (1) Double-click the hard disk icon where the printer driver was installed, the Applications folder, and the Utilities folder. (2) Double-click the Print Center icon. (3) Select i475D from the Name list and click Configure. (4) Select i475D from the Product list and click Select. 3 Print the pattern. (1) Select Test Print from the pop-up menu. (2) Click Print Head Alignment. (3) When the confirmation message is displayed, click OK. 4 Align the Print Head. 37
-
 1
1 -
2
-
3
-
4
-
5
-
6
-
7
-
8
-
9
-
10
-
11
-
12
-
13
-
14
-
15
-
16
-
17
-
18
-
19
-
20
-
21
-
22
-
23
-
24
-
25
-
26
-
27
-
28
-
29
-
30
-
31
-
32
-
33
-
34
-
35
-
36
-
 37
37 -
 38
38 -
 39
39 -
 40
40 -
 41
41 -
 42
42 -
 43
43 -
 44
44 -
 45
45 -
 46
46 -
 47
47 -
48
-
49
-
50
-
51
-
52
-
53
-
54
-
55
-
56
-
57
-
58
-
59
-
60
-
61
-
62
-
63
-
64
-
65
-
66
-
67
-
68
-
69
-
70
 |
 |
Printing Maintenance
37
1
With the printer on, load a sheet of Letter paper in the printer.
Move the paper thickness lever to the left position.
2
Open the BJ Printer Utility dialog box.
(1)
Double-click the hard disk icon where the printer driver was installed, the
Applications
Applications
Applications
Applications folder, and the Utilities
Utilities
Utilities
Utilities folder.
(2)
Double-click the Print Center
Print Center
Print Center
Print Center icon.
(3)
Select i475D from the Name
Name
Name
Name list and click Configure
Configure
Configure
Configure.
(4)
Select i475D from the Product
Product
Product
Product list and click Select
Select
Select
Select.
3
Print the pattern.
(3)
When the confirmation message is displayed, click OK
OK
OK
OK.
4
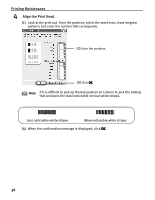
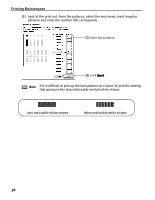
Align the Print Head.
(1)
(1)
(1)
(1)
Select Test Print
Test Print
Test Print
Test Print from
the pop-up menu.
(2)
(2)
(2)
(2)
Click Print Head Alignment
Print Head Alignment
Print Head Alignment
Print Head Alignment.