Canon i475D i475D Quick Start Guide - Page 38
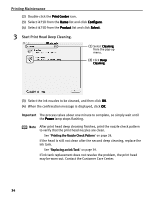
Print Head Deep Cleaning
 |
View all Canon i475D manuals
Add to My Manuals
Save this manual to your list of manuals |
Page 38 highlights
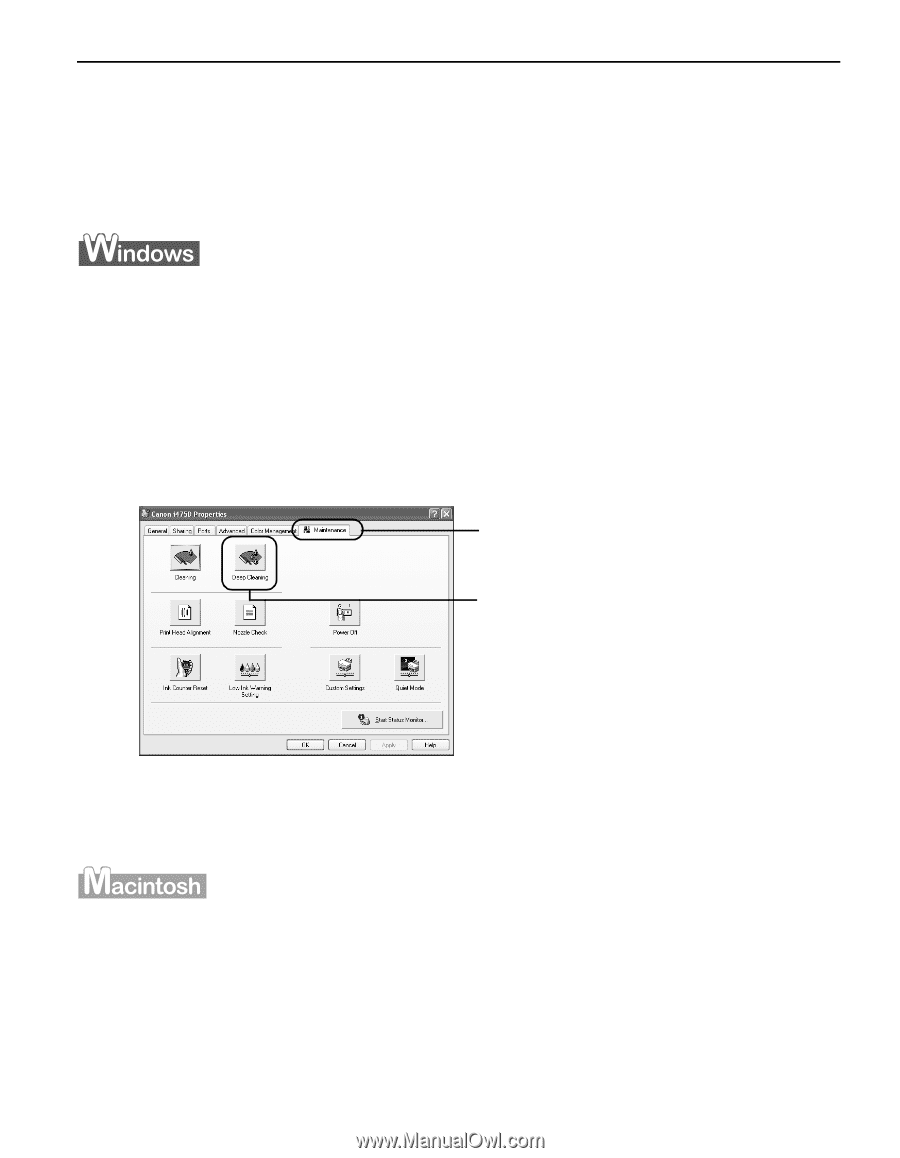
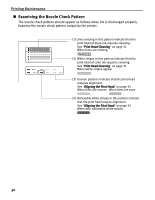
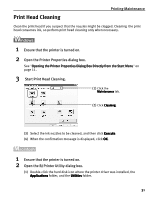
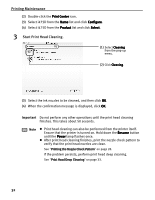
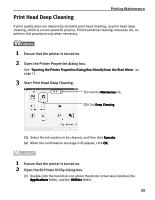
Print Head Deep Cleaning Printing Maintenance If print quality does not improve by standard print head cleaning, try print head deep cleaning, which is a more powerful process. Print head deep cleaning consumes ink, so perform this procedure only when necessary. 1 Ensure that the printer is turned on. 2 Open the Printer Properties dialog box. See "Opening the Printer Properties Dialog Box Directly from the Start Menu" on page 11. 3 Start Print Head Deep Cleaning. (1) Click the Maintenace tab. (2) Click Deep Cleaning. (3) Select the ink nozzles to be cleaned, and then click Execute. (4) When the confirmation message is displayed, click OK. 1 Ensure that the printer is turned on. 2 Open the BJ Printer Utility dialog box. (1) Double-click the hard disk icon where the printer driver was installed, the Applications folder, and the Utilities folder. 33
-
 1
1 -
2
-
3
-
4
-
5
-
6
-
7
-
8
-
9
-
10
-
11
-
12
-
13
-
14
-
15
-
16
-
17
-
18
-
19
-
20
-
21
-
22
-
23
-
24
-
25
-
26
-
27
-
28
-
29
-
30
-
31
-
32
-
 33
33 -
 34
34 -
 35
35 -
 36
36 -
 37
37 -
 38
38 -
 39
39 -
 40
40 -
 41
41 -
 42
42 -
 43
43 -
44
-
45
-
46
-
47
-
48
-
49
-
50
-
51
-
52
-
53
-
54
-
55
-
56
-
57
-
58
-
59
-
60
-
61
-
62
-
63
-
64
-
65
-
66
-
67
-
68
-
69
-
70
 |
 |