Canon i475D i475D Quick Start Guide - Page 47

How Low Ink Warning Setting Works

Page 47 highlights

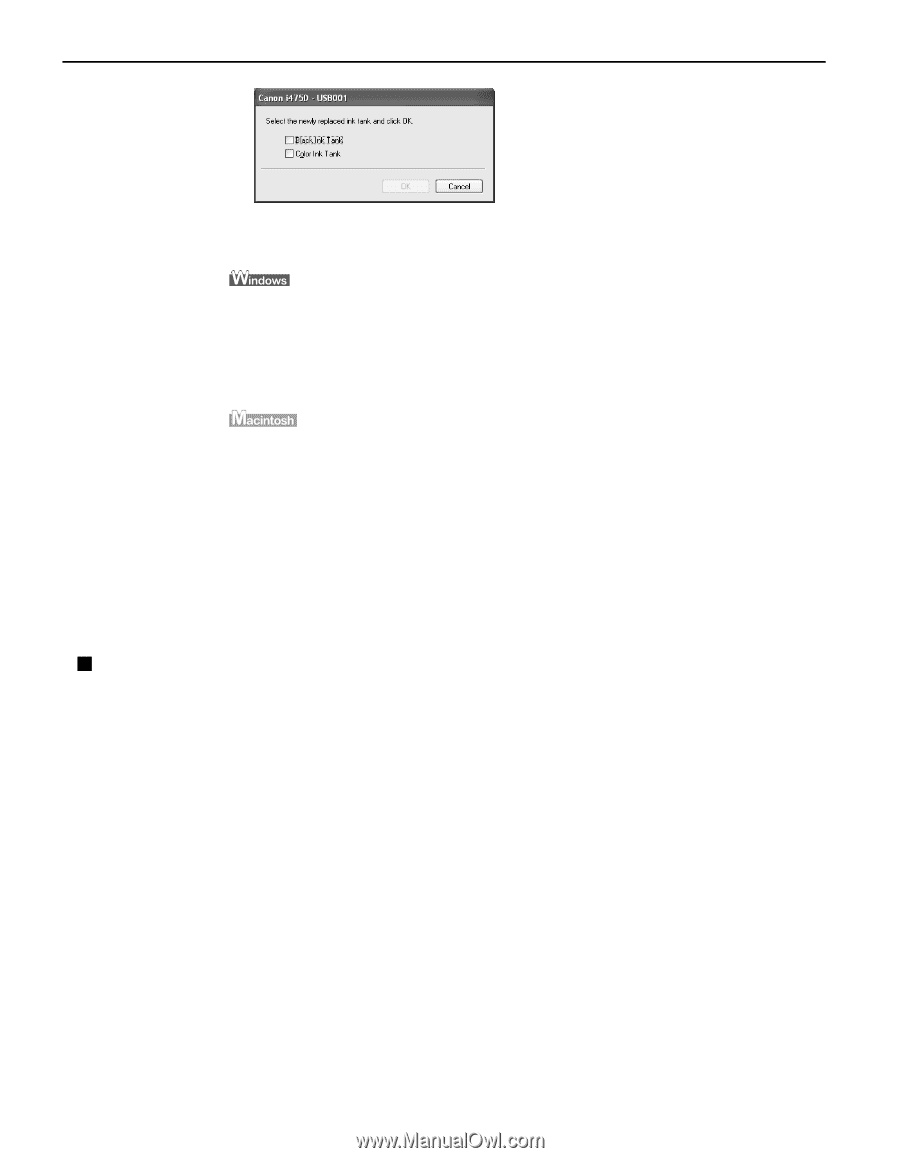
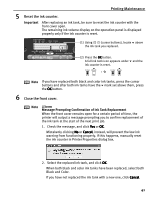
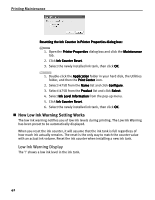
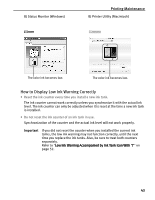
Printing Maintenance Resetting the Ink Counter in Printer Properties dialog box: 1. Open the Printer Properties dialog box and click the Maintenance tab. 2. Click Ink Counter Reset. 3. Select the newly installed ink tank, then click OK. 1. Double-click the Application folder in your hard disk, the Utilities folder, and then the Print Center icon. 2. Select i475D from the Name list and click Configure. 3. Select i475D from the Product list and click Select. 4. Select Ink Level Information from the pop-up menu. 5. Click Ink Counter Reset. 6. Select the newly installed ink tank, then click OK. „ How Low Ink Warning Setting Works The low ink warning notifies you of low ink levels during printing. The Low Ink Warning has been preset to be automatically displayed. When you reset the ink counter, it will assume that the ink tank is full regardless of how much ink actually remains. The reset is the only way to match the counter value with an actual ink volume. Reset the ink counter when installing a new ink tank. Low Ink Warning Display The '!' shows a low ink level in the ink tank. 42

  • 1
  • 2
  • 3
  • 4
  • 5
  • 6
  • 7
  • 8
  • 9
  • 10
  • 11
  • 12
  • 13
  • 14
  • 15
  • 16
  • 17
  • 18
  • 19
  • 20
  • 21
  • 22
  • 23
  • 24
  • 25
  • 26
  • 27
  • 28
  • 29
  • 30
  • 31
  • 32
  • 33
  • 34
  • 35
  • 36
  • 37
  • 38
  • 39
  • 40
  • 41
  • 42
  • 43
  • 44
  • 45
  • 46
  • 47
  • 48
  • 49
  • 50
  • 51
  • 52
  • 53
  • 54
  • 55
  • 56
  • 57
  • 58
  • 59
  • 60
  • 61
  • 62
  • 63
  • 64
  • 65
  • 66
  • 67
  • 68
  • 69
  • 70

Printing Maintenance
42
How Low Ink Warning Setting Works
The low ink warning notifies you of low ink levels during printing. The Low Ink Warning
has been preset to be automatically displayed.
When you reset the ink counter, it will assume that the ink tank is full regardless of
how much ink actually remains. The reset is the only way to match the counter value
with an actual ink volume. Reset the ink counter when installing a new ink tank.
Low Ink Warning Display
The '!' shows a low ink level in the ink tank.
Resetting the Ink Counter in Printer Properties dialog box:
1.
Open the Printer Properties
Printer Properties
Printer Properties
Printer Properties dialog box and click the Maintenance
Maintenance
Maintenance
Maintenance
tab.
2.
Click Ink Counter Reset
Ink Counter Reset
Ink Counter Reset
Ink Counter Reset.
3.
Select the newly installed ink tank, then click OK
OK
OK
OK.
1.
Double-click the Application
Application
Application
Application folder in your hard disk, the Utilities
folder, and then the Print Center
Print Center
Print Center
Print Center icon.
2.
Select i475D from the Name
Name
Name
Name list and click Configure
Configure
Configure
Configure.
3.
Select i475D from the Product
Product
Product
Product list and click Select
Select
Select
Select.
4.
Select Ink Level Information
Ink Level Information
Ink Level Information from the pop-up menu.
5.
Click Ink Counter Reset
Ink Counter Reset
Ink Counter Reset
Ink Counter Reset.
6.
Select the newly installed ink tank, then click OK
OK
OK
OK.