Canon i475D i475D Quick Start Guide - Page 9
Basic Printing, Prepare to load paper., Load the paper.
 |
View all Canon i475D manuals
Add to My Manuals
Save this manual to your list of manuals |
Page 9 highlights
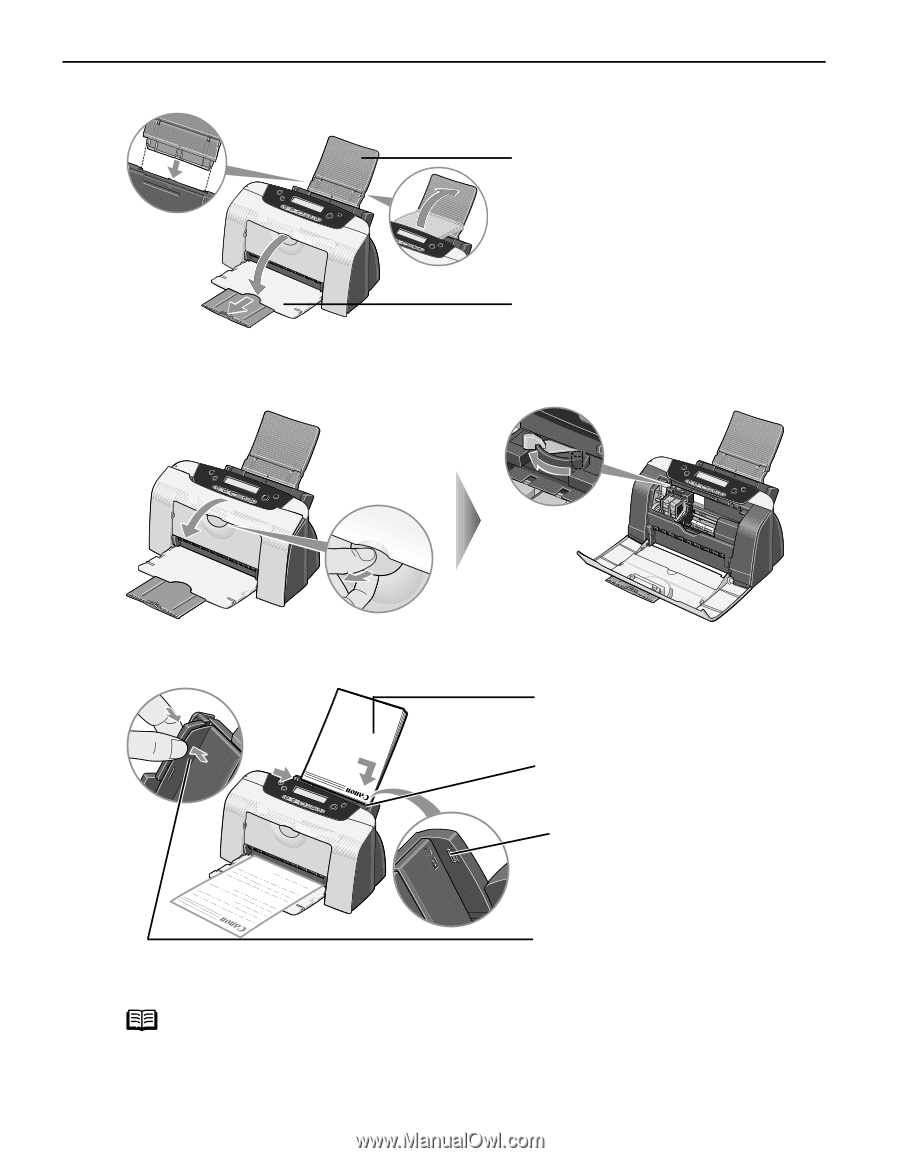
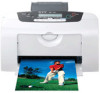
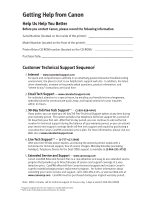
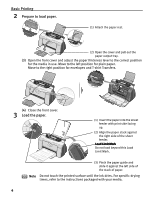
Basic Printing 2 Prepare to load paper. (1) Attach the paper rest. (2) Open the cover and pull out the paper output tray. (3) Open the front cover and adjust the paper thickness lever to the correct position for the media in use. Move to the left position for plain paper. Move to the right position for envelopes and T-shirt Transfers. (4) Close the front cover. 3 Load the paper. (1) Insert the paper into the sheet feeder with print side facing up. (2) Align the paper stack against the right side of the sheet feeder. Load Limit Mark Do not load beyond this Load Limit Mark. (3) Pinch the paper guide and slide it against the left side of the stack of paper. Note Do not touch the printed surface until the ink dries. For specific drying times, refer to the instructions packaged with your media. 4
-
 1
1 -
2
-
3
-
 4
4 -
 5
5 -
 6
6 -
 7
7 -
 8
8 -
 9
9 -
 10
10 -
 11
11 -
 12
12 -
 13
13 -
 14
14 -
15
-
16
-
17
-
18
-
19
-
20
-
21
-
22
-
23
-
24
-
25
-
26
-
27
-
28
-
29
-
30
-
31
-
32
-
33
-
34
-
35
-
36
-
37
-
38
-
39
-
40
-
41
-
42
-
43
-
44
-
45
-
46
-
47
-
48
-
49
-
50
-
51
-
52
-
53
-
54
-
55
-
56
-
57
-
58
-
59
-
60
-
61
-
62
-
63
-
64
-
65
-
66
-
67
-
68
-
69
-
70
 |
 |