Canon i475D i475D Quick Start Guide - Page 39
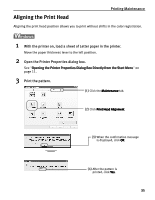
Printing Maintenance, Start Print Head Deep Cleaning.
 |
View all Canon i475D manuals
Add to My Manuals
Save this manual to your list of manuals |
Page 39 highlights
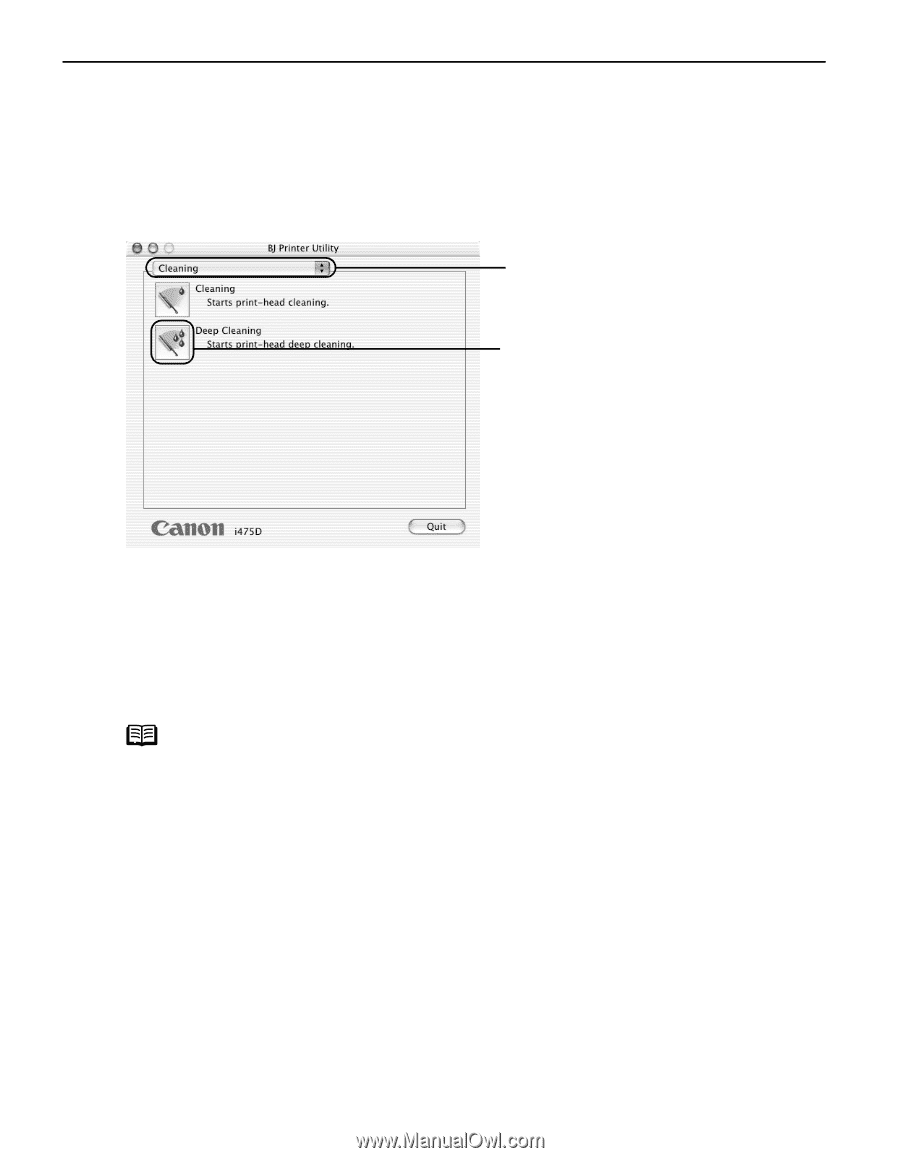
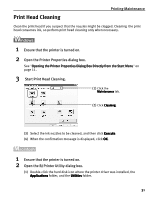
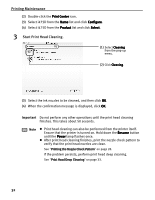
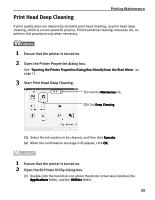
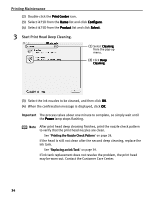
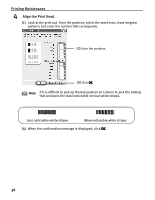
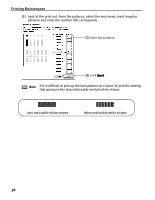
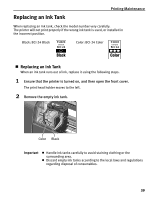
Printing Maintenance (2) Double-click the Print Center icon. (3) Select i475D from the Name list and click Configure. (4) Select i475D from the Product list and click Select. 3 Start Print Head Deep Cleaning. (1) Select Cleaning from the pop-up menu. (2) Click Deep Cleaning. (3) Select the ink nozzles to be cleaned, and then click OK. (4) When the confirmation message is displayed, click OK. Important The process takes about one minute to complete, so simply wait until the Power lamp stops flashing. Note After print head deep cleaning finishes, print the nozzle check pattern to verify that the print head nozzles are clean. See "Printing the Nozzle Check Pattern" on page 28. If the head is still not clean after the second deep cleaning, replace the ink tank. See "Replacing an Ink Tank" on page 39. If ink tank replacement does not resolve the problem, the print head may be worn out. Contact the Customer Care Center. 34
-
 1
1 -
2
-
3
-
4
-
5
-
6
-
7
-
8
-
9
-
10
-
11
-
12
-
13
-
14
-
15
-
16
-
17
-
18
-
19
-
20
-
21
-
22
-
23
-
24
-
25
-
26
-
27
-
28
-
29
-
30
-
31
-
32
-
33
-
 34
34 -
 35
35 -
 36
36 -
 37
37 -
 38
38 -
 39
39 -
 40
40 -
 41
41 -
 42
42 -
 43
43 -
 44
44 -
45
-
46
-
47
-
48
-
49
-
50
-
51
-
52
-
53
-
54
-
55
-
56
-
57
-
58
-
59
-
60
-
61
-
62
-
63
-
64
-
65
-
66
-
67
-
68
-
69
-
70
 |
 |