Canon i70 i70 Quick Start Guide - Page 54
Handling Error Messages - battery
 |
View all Canon i70 manuals
Add to My Manuals
Save this manual to your list of manuals |
Page 54 highlights
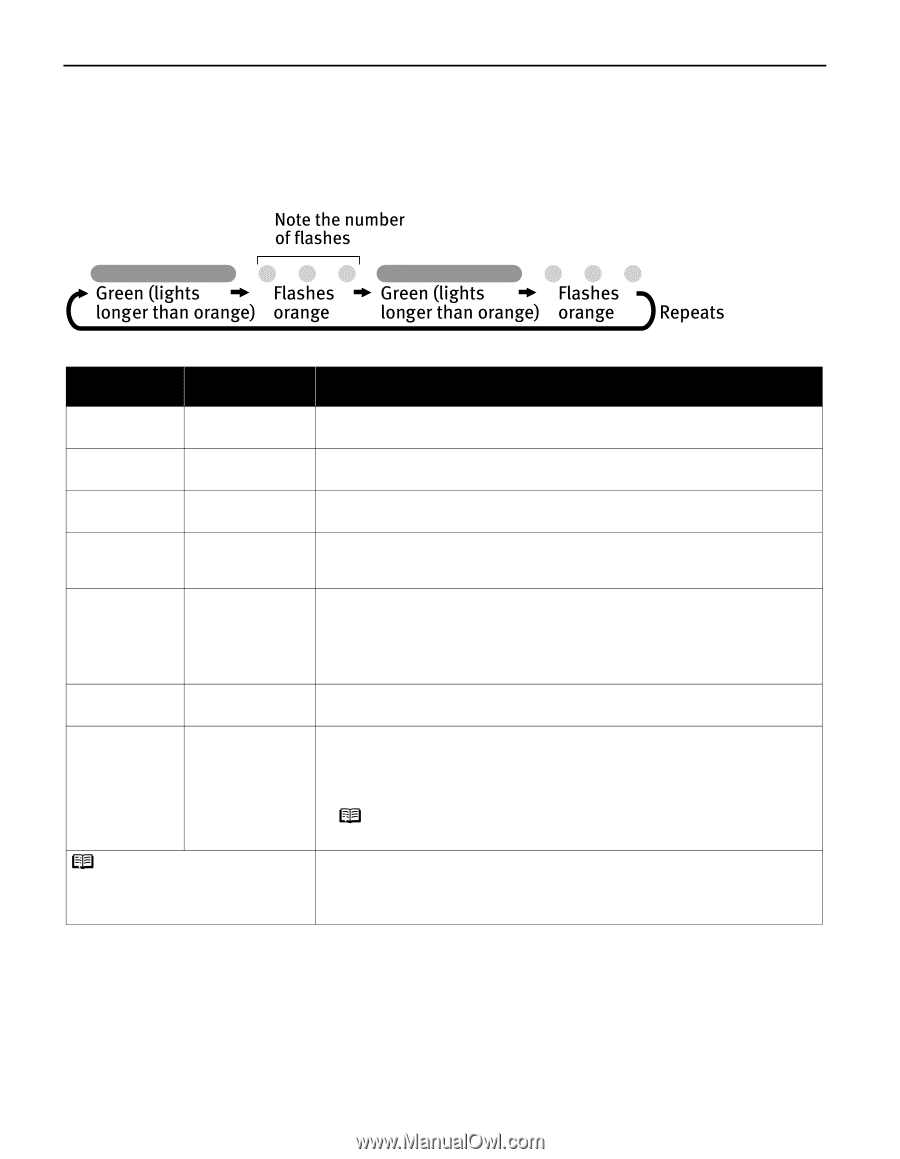
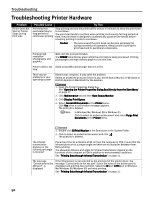
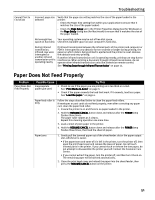
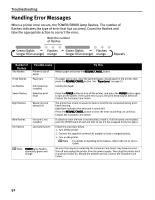
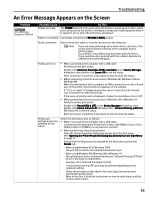
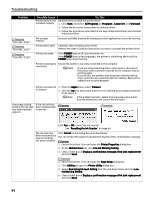
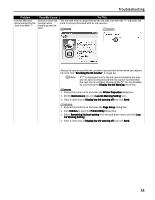
Troubleshooting Handling Error Messages When a printer error occurs, the POWER/ERROR lamp flashes. The number of flashes indicates the type of error that has occurred. Count the flashes and take the appropriate action to correct the error. Number of Flashes Two flashes Possible Cause Try This Printer is out of paper Reload paper and press the RESUME/CANCEL button. Three flashes Paper jam If a paper jam occurs, clear the jammed paper, reload paper in the printer, then press the RESUME/CANCEL button. See "Paper Jams" on page 51. Six flashes Print head not installed Install print head. Seven flashes Defective print head Press the POWER button to turn off the printer, and press the POWER button again to turn on the printer. If the same error occurs, the print head may be defective. Contact the Customer Care Center. Eight flashes Waste ink tank almost full The printer has a built-in waste ink tank to hold the ink consumed during print head cleaning. Eight flash indicates that this tank is nearly full. Press the RESUME/CANCEL button to clear the error so printing can continue. Contact the Customer Care Center. Nine flashes Ink tank is not installed If a black or color ink tank is not installed, install it. If all ink tanks are installed, push the [PUSH] mark of each ink tank to see if it has snapped firmly into place. Ten flashes Low battery level Follow the procedure below. 1. Turn off the printer. 2. Connect the supplied universal AC adapter or load a charged battery. 3. Turn on the printer. Note For details on handling of the battery, refer to the LK-51 User's Guide. Note POWER lamp flashes alternately green and orange An error that requires contacting the Customer Care Center may have occurred. Turn off and unplug the printer from the power supply. Then plug the printer back in and turn it back on. Should the problem persist, contact the Customer Care Center. 52
-
 1
1 -
2
-
3
-
4
-
5
-
6
-
7
-
8
-
9
-
10
-
11
-
12
-
13
-
14
-
15
-
16
-
17
-
18
-
19
-
20
-
21
-
22
-
23
-
24
-
25
-
26
-
27
-
28
-
29
-
30
-
31
-
32
-
33
-
34
-
35
-
36
-
37
-
38
-
39
-
40
-
41
-
42
-
43
-
44
-
45
-
46
-
47
-
48
-
 49
49 -
 50
50 -
 51
51 -
 52
52 -
 53
53 -
 54
54 -
 55
55 -
 56
56 -
 57
57 -
 58
58 -
 59
59 -
60
-
61
-
62
-
63
-
64
-
65
-
66
-
67
-
68
-
69
-
70
-
71
 |
 |