Craftsman 10872 Operation Manual - Page 16
L_warning, Z_warning
 |
View all Craftsman 10872 manuals
Add to My Manuals
Save this manual to your list of manuals |
Page 16 highlights
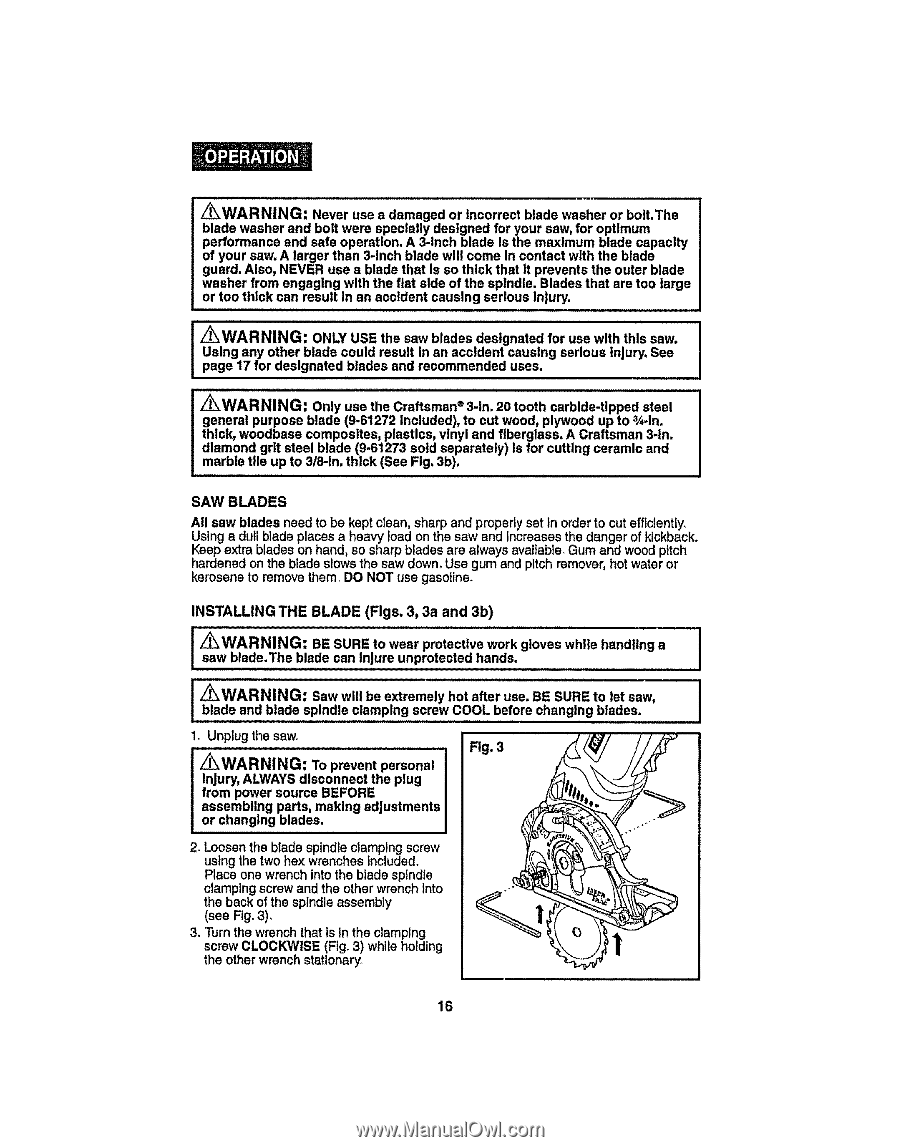
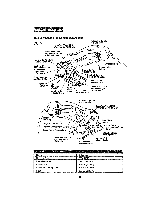
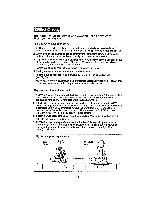
_WARNING: Never use a damaged or Incorrect blade washer or bolt.The blade washer and bolt were specially designed for your saw, for optimum performance and safe operation. A 3-Inch blade Is the maximum blade capacity of your saw. A larger than 3-Inch blade will come In contact with the blade guard. Also, NEVER use a blade that Is so thick that it prevents the outer blade washer from engaging with the flat side of the spindle. Blades that are too large or too thick can result In an accident causing serious Injury. i, _WARNING: ONLY USE the saw blades designated for use with this saw. Using any other blade could result In an accident causing serious Injury. See page 17 for designated blades and recommended uses. _WARNING: Only use the Craftsman ® 3-In. 20 tooth carbide-tipped steel general purpose blade (9-61272 Included), to cut wood, plywood up to _-ln. thick, woodbase composites, plastics, vinyl and fiberglass. A Craftsman 3-In. diamond grit steel blade (9-61273 sold separately) Is for cutting ceramic and marble tile up to 3/8-1n. thlck (See Fig. 3b). SAW BLADES All saw blades need to be kept clean, sharp and properlyset in orderto cutefficiently. Using a dull blade places a heavy load on the saw and Increases the danger of kickback. Keep extra blades on hand, so sharp blades are always avaiIable_Gum and wood pitch hardened on the blade slows the saw down, Use gum and pitch remover, hot water or kerosene to remove them, DO NOT use gasotlne_ INSTALLING THE BLADE (Figs. 3, 3a and 3b) ,/_WARNING: BE SURE to wear protective work gloves while handling a saw blade.The blade can Injure unprotected hands. L_WARNING: Saw wiU be extremely hot after use. BE SURE to let saw, blade and blade spindle clamping screw COOL before changing blades. l, ,,,, ,, , , 1oUnplugthe saw. Fig. 3 z_WARNING: Topreventpersonal Injury, ALWAYSdisconnect the plug from power source BEFORE assembling parts, making adjustments or changing blades. 2. Loosen the blade spindle clamping screw usingthe two hex wrenches Included. Place one wrench intothe blade spindle clamping screw and the other wrench Into the back of the spindle assembly (see Fig. 3), 3. Turn the wrench that Is fn the clamping screw CLOCKWISE (Fig. 3) while holding the other wrench stationary. 16
-
 1
1 -
2
-
3
-
4
-
5
-
6
-
7
-
8
-
9
-
10
-
 11
11 -
 12
12 -
 13
13 -
 14
14 -
 15
15 -
 16
16 -
 17
17 -
 18
18 -
 19
19 -
 20
20 -
 21
21 -
22
-
23
-
24
-
25
-
26
-
27
-
28
-
29
-
30
-
31
-
32
-
33
-
34
-
35
-
36
-
37
-
38
-
39
-
40
-
41
-
42
-
43
-
44
-
45
-
46
-
47
-
48
-
49
-
50
-
51
-
52
-
53
-
54
-
55
-
56
-
57
-
58
-
59
-
60
-
61
-
62
-
63
-
64
-
65
-
66
-
67
-
68
-
69
-
70
-
71
-
72
-
73
-
74
-
75
-
76
-
77
-
78
-
79
-
80
 |
 |