Craftsman 10872 Operation Manual - Page 24
of Gut
 |
View all Craftsman 10872 manuals
Add to My Manuals
Save this manual to your list of manuals |
Page 24 highlights
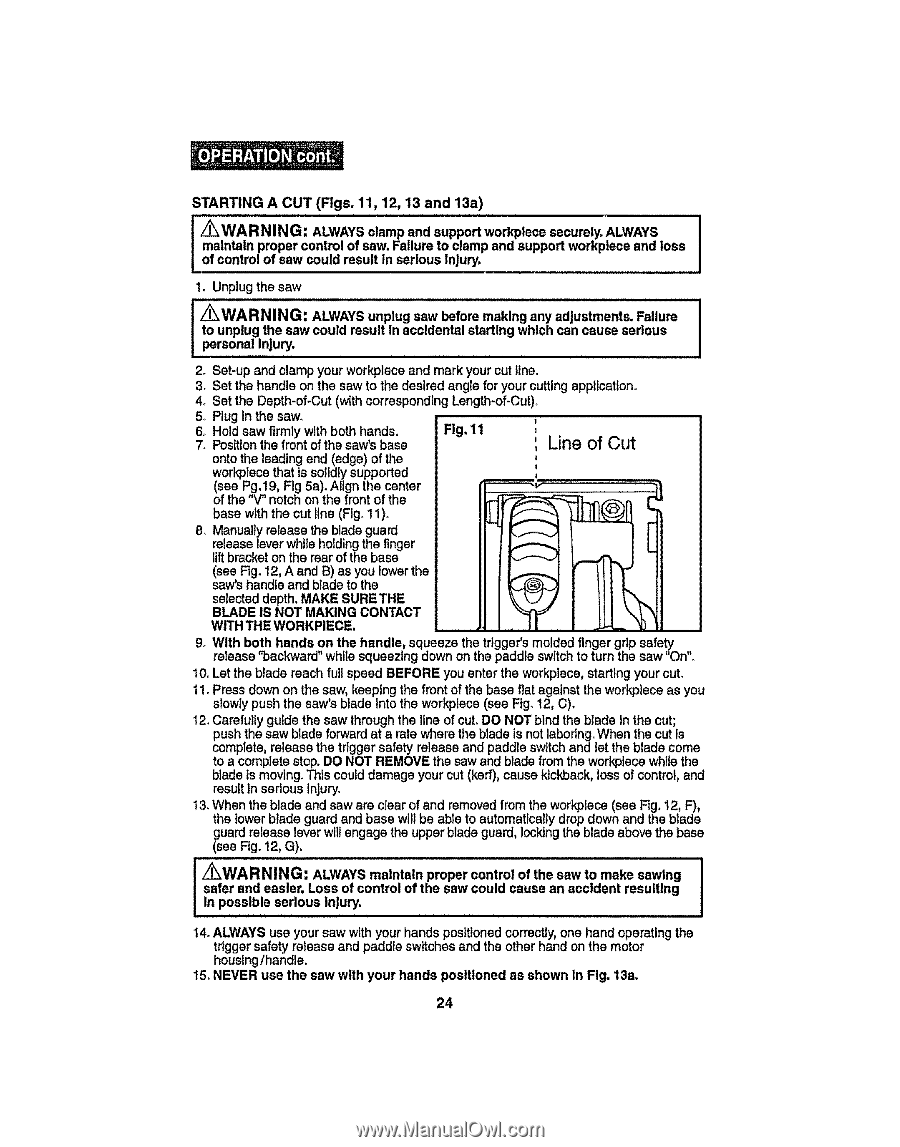
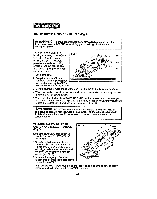
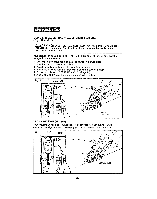
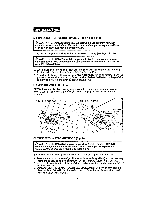
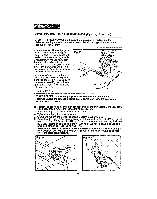
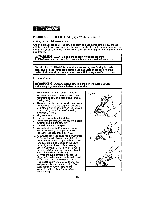
STARTING A CUT (Figs. 11, 12, 13 and 13a) /_ WA R NI NG: ALWAYSclampand supportworkplecesecurelyA, LWAYS maintain proper control of saw. Failureto clamp and support workplece and loss of controlof saw could result in serious injury. 1o Unplug the saw to unplug the saw could result in accidental starting which can cause serious _p_eWrsAonRaNl IInNjuGr:y, ALWAYSunplug saw before making any adjustments.Failure 2_ Set-up and clamp your workplaceand mark your cutline. 3. Set the handle on the saw to the desired angle for your cutting application. 4. Set the Depth-of-Cut (with corresponding Length-of-Cut). 5. Plug In the saw° 6o Hold saw firmly with both hands. 7_ Positionthe front of the saw's base Fig, 11 Line of Gut onto the leading end (edge) of the workplace that is solidlysupported (see Pg.19, Ffg 5a)oAlign the center of the "V" notch on the front of the base with the cut line (Fig° 11)o 8. Manually releasethe blade guard release leverwhile holdingthe finger lift bracketon the rear of the base (see Rgo12, A and 13)as you lowerthe saw's handle and blade to the selected depth, MAKE SURETHE BLADE IS NOT MAKINGCONTACT WITH THE WORKPIECE. 9_ With both hands on the handle, squeezethe tdgger'smoldedfingergripsafety release "backward" whilesqueezing down onthe paddle switch to turnthe saw "On". I0o Let the blade reach fulI speed BEFORE you enter the workplace, starting your cut. t !o Press down on the saw, keepingthe front of the base flat against the workplece as you slowly pushthe saws blade intothe workplace(sea Fig. 12, C). 12.Carefully guide the saw through the lineof cut. DO NOT bind the blade In the cut; push the saw blade forward at a rate where the blade is not laboring.When the cut Is comptets, release the trigger safety release end paddle switchand let the blade come to a complete stop.DO NOT REMOVEthe saw and blade from the workplace while the blade is moving.This could damage your cut (kerf), cause kickback, loss of control, and result in serious injury. t3. When the blade and saw are clear of and removed from the workplace (see Fig. 12, F), the lower blade guard and base will be abte to automatically drop down and the blade guard release leverwilt engage the upper blade guard, locking the blade abovethe base (see Fig. 12, G). _WARNING: ALWAYS maintain proper control of the saw to make sawing I safer and easier. Loss of control of the sew could cause an accident resulting In possible serious injury, I i i i i i ii ii ii 14. ALWAYSuse yoursaw withyour handspositionedcorrectlyo, ne hand operatingthe triggersafetyrelease and paddle switches and the otherhandon the motor housing/handle, 15. NEVER use the saw with your hands positioned as shown In Fig, 13a, 24
-
 1
1 -
2
-
3
-
4
-
5
-
6
-
7
-
8
-
9
-
10
-
11
-
12
-
13
-
14
-
15
-
16
-
17
-
18
-
 19
19 -
 20
20 -
 21
21 -
 22
22 -
 23
23 -
 24
24 -
 25
25 -
 26
26 -
 27
27 -
 28
28 -
 29
29 -
30
-
31
-
32
-
33
-
34
-
35
-
36
-
37
-
38
-
39
-
40
-
41
-
42
-
43
-
44
-
45
-
46
-
47
-
48
-
49
-
50
-
51
-
52
-
53
-
54
-
55
-
56
-
57
-
58
-
59
-
60
-
61
-
62
-
63
-
64
-
65
-
66
-
67
-
68
-
69
-
70
-
71
-
72
-
73
-
74
-
75
-
76
-
77
-
78
-
79
-
80
 |
 |