Craftsman 10872 Operation Manual - Page 17
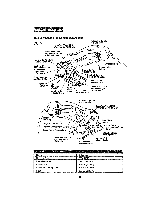
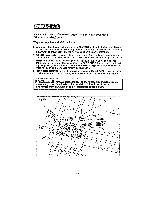
INSTALLING, THEBLADEFigs,3and3aconL
 |
View all Craftsman 10872 manuals
Add to My Manuals
Save this manual to your list of manuals |
Page 17 highlights
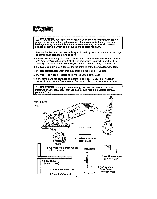
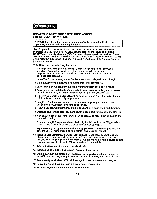
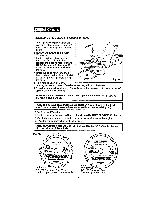
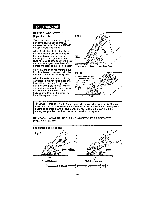
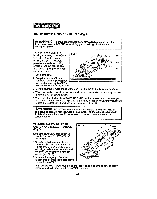
INSTALLINTGHEBLADE(Figs,3 and3a)conL 4. After the screw ts loose, place the saw on s fiat surfaceand continue to unscrew the blade spindle clamping 5osRceremv_o, ve the screw and the outer "D" washer. 6. Set the depth-of-cut scale to the maximum depth of 7!8-incheso Release the blade release lever and RAISE the base with the finger lift bracket to expose the blade below the base. 7. Grasp the blade with your gloved hand and remove the blade, or install the blade, throughthe blade slot tn the base. Fig. 3a 8. Put a drop of oil onto the Inner bushing washer and outer "D" washer where they will touch the blade° 9. Place the new saw blade through the blade slot in the base and onto the spindle shaft against the Inner"D" bushtng. i, u, ,, , NOTE:The teeth of the blade should point upward at the front of the saw as shown In (Fig, 3a and 3b). NOTE:The warning copy and the Blade Rotation Arrow shown on the blade should face outward towards the operator so It can be viewed (Fig. 3b). 10.Replace the "D" washer. 11. Replace the spindle screwand hand tightenit in a COUNTERCLOCKWISE direction. 12. Use the two hex wrenches to tlghten the spindle clamptngscrew thoroughly. 13.PEacethe two hex wrenches back in the case. I wNiOthTEth:eNEflaVtEsRiduesoefsthbelasdpeinthdalet ,Is too thick to allow the "D" washer to engage Fig. 3b Included: 9-61272 Craftsman 3-In. 20 tooth carbide tipped general purpose blade Sold separately 9-61273 Craftsman 3-1n. Diamond grit steel blade 17
-
 1
1 -
2
-
3
-
4
-
5
-
6
-
7
-
8
-
9
-
10
-
11
-
 12
12 -
 13
13 -
 14
14 -
 15
15 -
 16
16 -
 17
17 -
 18
18 -
 19
19 -
 20
20 -
 21
21 -
 22
22 -
23
-
24
-
25
-
26
-
27
-
28
-
29
-
30
-
31
-
32
-
33
-
34
-
35
-
36
-
37
-
38
-
39
-
40
-
41
-
42
-
43
-
44
-
45
-
46
-
47
-
48
-
49
-
50
-
51
-
52
-
53
-
54
-
55
-
56
-
57
-
58
-
59
-
60
-
61
-
62
-
63
-
64
-
65
-
66
-
67
-
68
-
69
-
70
-
71
-
72
-
73
-
74
-
75
-
76
-
77
-
78
-
79
-
80
 |
 |
