Craftsman 10872 Operation Manual - Page 21
Makingdepth-of-cut, Adjustments, Fig.6
 |
View all Craftsman 10872 manuals
Add to My Manuals
Save this manual to your list of manuals |
Page 21 highlights
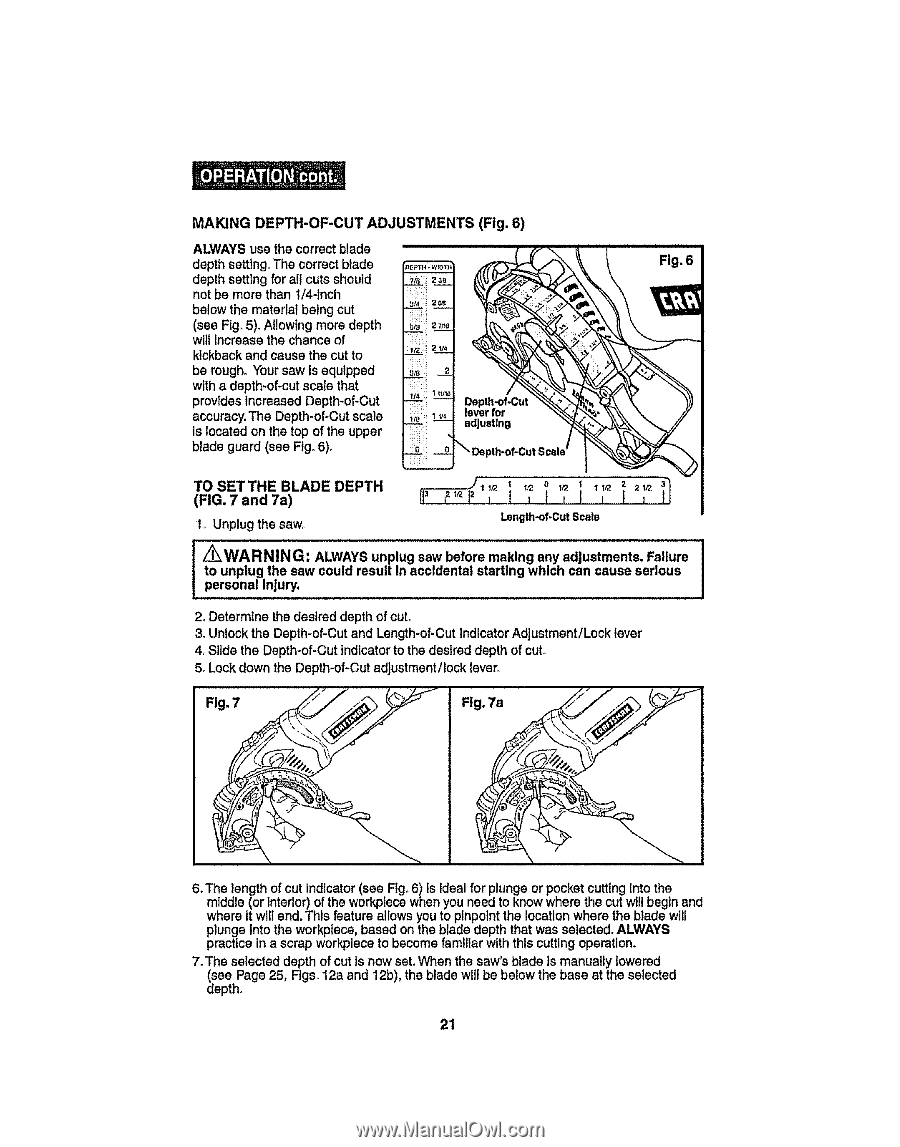
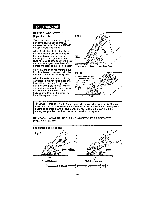
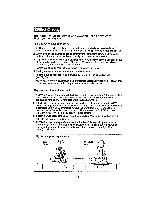
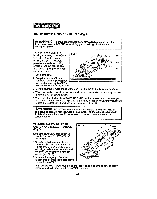
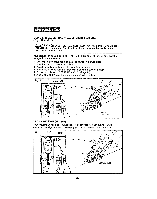
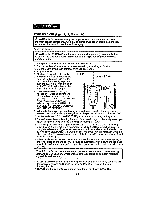
MAKINGDEPTH-OF-CUATDJUSTMENT(SFig.6) ALWAYSuse the correct blade depth setting. The correct blade depth setting for all cutsshould not be more than 1/4-Inch below the material being cut (see Fig. 5). Allowing more depth wilt increase the chance of kickback and cause the cut to be rough. Your saw is equipped with a depth-of-cut scale that provtdesincreasedDepth-of-Cut accuracy.The Depth-of*Cutscale Is located on the top ofthe upper blade guard (see Fig.6). TO SETTHE BLADE DEPTH (FIG. 7 and 7a) 1o Unplug the saw , t , I , t , Hl Length-of.CSutcald [ tpo_eWrusnAopnRluaNlgIiNnthjGuer:sya. wAcLoWulAdYreSsuunlpt lIungascacwidebnetfaolrsetmaratiknigngwahnicyhacdajunsctmauesnetss.eFraioiluusre 2. Determine the desired depth of cut, 3. Unlockthe Depth-of-Cut and Length-of-Cut IndicatorAdjustment/Lock lever 4. Slide the Depth-of-Cut indicatorto the deslred depth of cut. 5. Lock down the Depth-of-Cut adjustment/lock lever. Fig, 7 Fig. 7a (, 6. The length of cut indicator(see Fig. 6) ts idealfor plungeor pocket cutting Into the m]ddle (or interior) of the workpfecewhen youneed to knowwhere the cutwillbegin and where it willend.This feature allows youto pinpointthe locationwhere the blade will plungeInto the workplace,based on the blade depththat wasselected.ALWAYS practicein a scrap workplaceto becomefamiliar with this cuttingoperation. 7_The selecteddepth of cut is now set.When the saw'sblade is manually lowered dSeePage 25, Figs. t2a and 12b), the blade will be below the base at the selected epth. 21
-
 1
1 -
2
-
3
-
4
-
5
-
6
-
7
-
8
-
9
-
10
-
11
-
12
-
13
-
14
-
15
-
 16
16 -
 17
17 -
 18
18 -
 19
19 -
 20
20 -
 21
21 -
 22
22 -
 23
23 -
 24
24 -
 25
25 -
 26
26 -
27
-
28
-
29
-
30
-
31
-
32
-
33
-
34
-
35
-
36
-
37
-
38
-
39
-
40
-
41
-
42
-
43
-
44
-
45
-
46
-
47
-
48
-
49
-
50
-
51
-
52
-
53
-
54
-
55
-
56
-
57
-
58
-
59
-
60
-
61
-
62
-
63
-
64
-
65
-
66
-
67
-
68
-
69
-
70
-
71
-
72
-
73
-
74
-
75
-
76
-
77
-
78
-
79
-
80
 |
 |