Craftsman 10872 Operation Manual - Page 9
THIS SAW See Figs. 4 and 4e. - depth
 |
View all Craftsman 10872 manuals
Add to My Manuals
Save this manual to your list of manuals |
Page 9 highlights
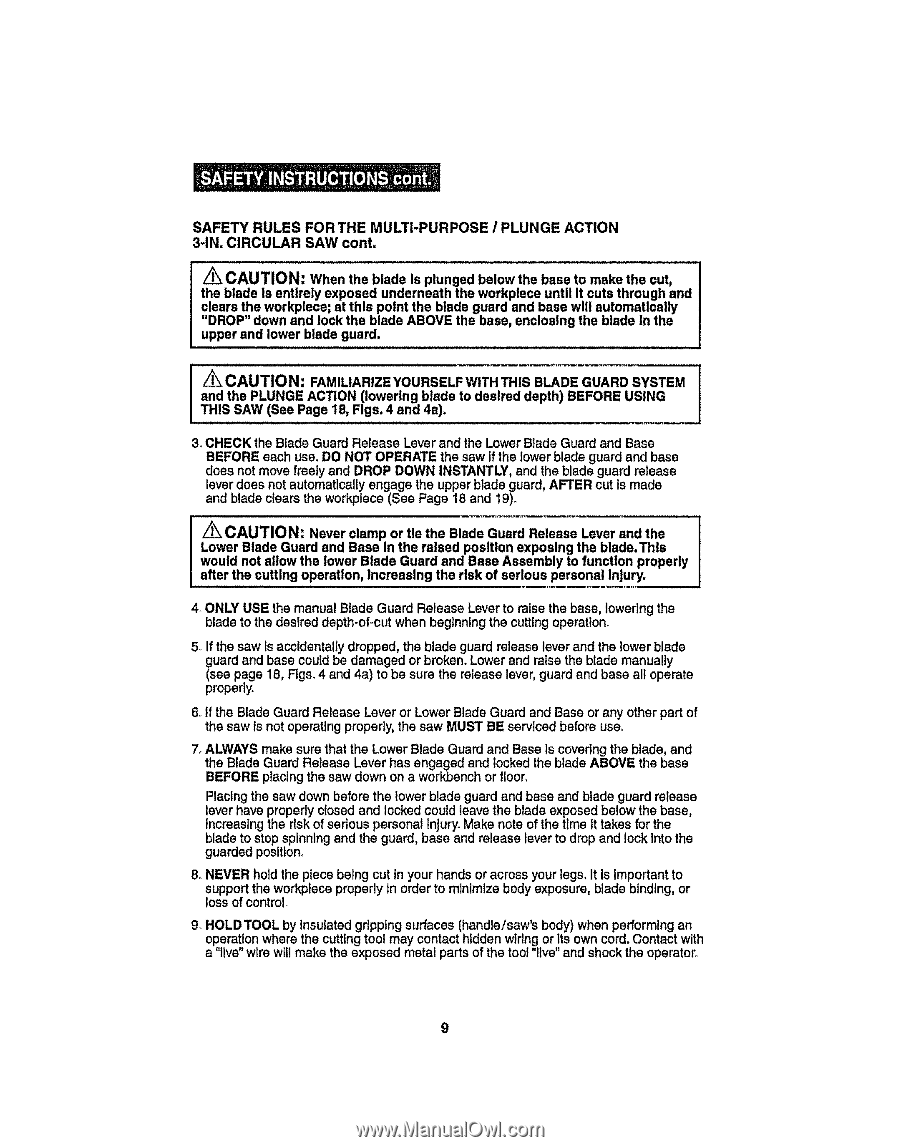
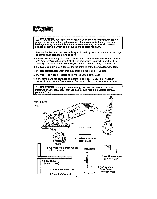
SAFETY RULES FOR THE MULTI-PURPOSE / PLUNGE ACTION 3-IN. CIRCULAR SAW cont. /_ CAUTION: When the blade Is plunged below the base to make the cut, the blade Is entirely exposed underneath the workplace until It cuts through and clears the workplece; at this point the blade guard and base wilt automatically "DROP" down and lock the blade ABOVE the base, enclosing the blade In the upper and lower blade guard. CAUTION: FAMILIARIZEYOURSELF WITH THIS BLADE GUARD SYSTEM and the PLUNGE ACTION (lowering blade to desired depth) BEFORE USING THIS SAW (See Page 18, Figs. 4 and 4e). 3_CHECK the Blade Guard Release Leverand the LowerBlade Guardand Base BEFORE each use, DO NOT OPERATE the saw if the }owerblade guard and base does not move freely and DROP DOWN INSTANTLY, and the blade guard release lever does net automatically engage the upperblade guard, AFTER cut Is made and blade c{ears the workptece(See Page 18 and 19). Lower Blade Guard and Base in the raised position exposing the blade.This I wz_ouCldAnUoTt aIOlloNw: thNeelvoewrecrlaBmlapdeorGtuieatrhdeanBdlaBdaesGeuAasrdseRmeblelyastoe Lfuenvcetrioanndptrhoeperly after the cutting operation, Increasing the risk of serious personal Injury. 4. ONLY USE the manual Blade Guard Release Lever to false the base, lowering the blade to the desired depth-of-cut when beginning the cuttingoperatlon_ 5_If the saw Is accidentally dropped, the blade guard release lever and the lower blade guard and base could be damaged or broken. Lower and raise the blade manually (see page 18, Figs.4 and 4a) to be sure the release lever, guard and base all operate properly. 6otf the Blade Guard Release Lever or LowerBlade Guard and Base or any other part of the saw is not operating properly, the saw MUST BE serviced before use. 7. ALWAYSmake sure that the Lower Blade Guard and Base ts covering the blade, and the Blade Guard Release Lever has engaged and locked the blade ABOVE the base BEFORE placing the saw down on a workbench or floor, Placing the saw down before the lower blade guard and base and blade guard release lever have properly closed and locked could leave the blade exposed below the base, Increasingthe risk of seriouspersonal Injury. Make note of the time It takes for the blade to stopsplnnlng and the guard, base and release lever to drop and lock intothe guarded position, 8. NEVER hold the piece being cut In your hands or across your legs, It isimportantto support the workplace propedy tn order to minimize body exposure, blade binding, or loss of control 9- HOLDTOOL by Insulated gripping surfaces (handle/saw's body) when performing an operation where the cutting tool may contact hidden wiring or Its own cord. Contactwith a "llve" wire wLllmake the exposed metal parts of the tool "live" and shockthe operator.
-
 1
1 -
2
-
3
-
 4
4 -
 5
5 -
 6
6 -
 7
7 -
 8
8 -
 9
9 -
 10
10 -
 11
11 -
 12
12 -
 13
13 -
 14
14 -
15
-
16
-
17
-
18
-
19
-
20
-
21
-
22
-
23
-
24
-
25
-
26
-
27
-
28
-
29
-
30
-
31
-
32
-
33
-
34
-
35
-
36
-
37
-
38
-
39
-
40
-
41
-
42
-
43
-
44
-
45
-
46
-
47
-
48
-
49
-
50
-
51
-
52
-
53
-
54
-
55
-
56
-
57
-
58
-
59
-
60
-
61
-
62
-
63
-
64
-
65
-
66
-
67
-
68
-
69
-
70
-
71
-
72
-
73
-
74
-
75
-
76
-
77
-
78
-
79
-
80
 |
 |