Dell XPS M1210 MXC062 XPS M1210 Service Manual - Page 44
Replacing the System Board, Flashing the BIOS, Back to Contents
 |
View all Dell XPS M1210 MXC062 manuals
Add to My Manuals
Save this manual to your list of manuals |
Page 44 highlights
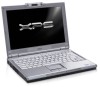
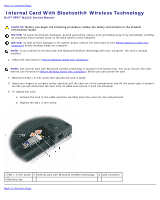
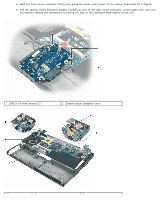
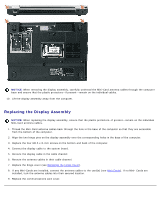
1 modem cable connector on system board 2 system board 3 computer base 4 system board connector for the internal card with Bluetooth wireless technology 5 cable connector for the internal card with Bluetooth wireless technology Replacing the System Board 1. Replace in reverse order all of the components that you removed in Removing the System Board. NOTICE: Before turning on the computer, replace all screws and ensure that no stray screws remain inside the computer. Failure to do so may result in damage to the computer. 2. Turn on the computer. NOTE: If you use a BIOS update program CD to flash the BIOS, press before inserting the CD so that you can set up the computer to boot from a CD this one time only. Otherwise, you must enter the system setup program to change the default boot order. 3. Insert the flash BIOS update program CD that accompanied the replacement system board into the optical drive. Follow the instructions that appear on the screen. See Flashing the BIOS for further information. 4. Enter the system setup program to update the BIOS on the new system board with the computer Service Tag. Back to Contents Page
-
 1
1 -
2
-
3
-
4
-
5
-
6
-
7
-
8
-
9
-
10
-
11
-
12
-
13
-
14
-
15
-
16
-
17
-
18
-
19
-
20
-
21
-
22
-
23
-
24
-
25
-
26
-
27
-
28
-
29
-
30
-
31
-
32
-
33
-
34
-
35
-
36
-
37
-
38
-
 39
39 -
 40
40 -
 41
41 -
 42
42 -
 43
43 -
 44
44 -
 45
45 -
 46
46 -
 47
47 -
 48
48 -
 49
49 -
50
-
51
-
52
-
53
-
54
-
55
-
56
-
57
 |
 |