Epson ES-300C User Manual - TWAIN
Epson ES-300C Manual
 |
View all Epson ES-300C manuals
Add to My Manuals
Save this manual to your list of manuals |
Epson ES-300C manual content summary:
- Epson ES-300C | User Manual - TWAIN - Page 1
Scanner Utility for Epson TWAIN User's Guide - Epson ES-300C | User Manual - TWAIN - Page 2
Scanner Utility for Epson TWAIN User's Guide This manual is printed on recycled paper and is 100% recyclable. @ - Epson ES-300C | User Manual - TWAIN - Page 3
IMPORTANT NOTICE DISCLAIMER OF WARRANTY Epson America makes no representations or warranties, either express or implied, by or with respect to anything in this manual, and shall not be liable for any implied warranties of merchantability and fitness for a particular purpose or for any indirect, - Epson ES-300C | User Manual - TWAIN - Page 4
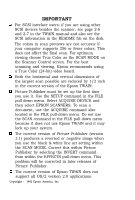
users: if you are using other SCSI devices besides the scanner, see page 2-6 and 2-7 in the TWAIN manual and also see the SCSI information in the README file on the disk. 0 The colors in scan previews are not accurate if your computer supports 256 or fewer colors. This does not affect the final - Epson ES-300C | User Manual - TWAIN - Page 5
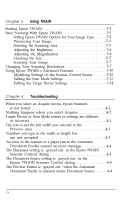
Your Epson Scanner Utility Diskette 1 What You Need to Use Epson TWAIN 2 Computer 2 Scanner 3 Interface 3 How to Use This Manual 4 Epson TWAIN Starting the Epson TWAIN Setup Program 2-2 Installing Epson TWAIN for Bidirectional Support 2-3 Installing EpsonTWAIN for Adaptec SCSI Support - Epson ES-300C | User Manual - TWAIN - Page 6
Control Screen . . . . . 3-10 Editing the Scan Mode Settings 3-11 Editing the Target Device Settings 3-14 Chapter 4 Troubleshooting When you select an Acquire device, Epson Scanners is not listed 4-2 Nothing happens when you select Acquire 4-2 Target Device or Scan Mode names or settings are - Epson ES-300C | User Manual - TWAIN - Page 7
When you scan Black and White Line Art, Black and White Halftone, or other monochrome image, the scanned image is reversed like a negative image 4-4 The predefined Scan Mode and Target Device settings don't meet your specific scanning requirements 4-5 Sometimes the halftone or dither settings you - Epson ES-300C | User Manual - TWAIN - Page 8
can use TWAIN to scan the image and place it in your document. Epson" TWAIN is a set of drivers designed to take advantage of your Epson scanner's advanced features with any software application that supports TWAIN, providing you with a sophisticated, high-speed scanning solution. What is on Your - Epson ES-300C | User Manual - TWAIN - Page 9
Setup program for Windows installs everything you need. Just follow the instructions in Chapter 3 for installing Epson TWAIN. If you do not have Windows, you can still install the Epson Scanner Utility to support the bidirectional parallel or Adaptec SCSI adapters using the INSTALL program from - Epson ES-300C | User Manual - TWAIN - Page 10
to store your scanned images Cl TWAIN-compliant software; check with your software publisher to see if your application supports TWAIN. Scanner Epson TWAIN supports the following Epson scanners: 0 ES-800C tl ES-600C 0 ES-300C. Interface Epson TWAIN supports the following interface options: Cl - Epson ES-300C | User Manual - TWAIN - Page 11
Manual This User's Guide contains information you need to install and use Epson TWAIN with your Epson scanner and your applications that support between your scanner and computer. Chapter 3 describes how to use Epson TWAIN. Chapter 4 contains troubleshooting tips. At the end of this guide, you'll - Epson ES-300C | User Manual - TWAIN - Page 12
Where to Get Help Epson America provides local customer support and service through a nationwide network of authorized Epson dealers and Service Centers. Epson also provides the following support services through the Epson Consumer Resource Center at (800) 922-8911: Assistance in locating your - Epson ES-300C | User Manual - TWAIN - Page 13
Chapter 1 Installing the Interface Card Removing the Cover 1-3 Checking the Jumper Setting 1-3 Installing the Card 1-6 Replacing the Cover 1-6 Connecting the Cable 1-7 Connecting the Bidirectional Parallel Cable 1-7 Connecting the SCSI Cable 1-7 Checking Your SCSI Device Settings 1-8 - Epson ES-300C | User Manual - TWAIN - Page 14
your Epson scanner to your computer: Ll Epson b&directional parallel adapter @3808011), or 3 Adaptec AHA-1510 AT-to-SCSI host adapter. Note Epson TWAIN supports the to refer to your computer's documentation for more complete instructions on installing option cards. This chapter contains the following - Epson ES-300C | User Manual - TWAIN - Page 15
the keyboard cable. 3. Remove the cover. (If you need instructions, see your computer manual.) 4. Before you touch any of the components, touch an . Checking the Jumper Setting One of the jumpers on your Epson bidirectional parallel adapter card identifies the port address for your bidirectional - Epson ES-300C | User Manual - TWAIN - Page 16
2. Locate jumper J1 on the card. (Ignore the J2 jumper.) J1 A jumper's setting is determined by where the jumper is placed on the pins. It connects either the left pin and the middle pin or the right pin and the middle pin, as shown below. LPT1 LPT2 1-4 Installing the interface Card - Epson ES-300C | User Manual - TWAIN - Page 17
probably want to leave the jumper at the factory setting so that it supports the LPT2 address for your scanner. Note The TWAIN installation program requires that you identify your J1 jumper setting on the Epson bidirectional parallel adapter card as part of the installation process. Make sure you - Epson ES-300C | User Manual - TWAIN - Page 18
card in any available slot. See your computer manual for detailed installation instructions or follow these general steps: 1. Remove any and make sure the connector points down. 3. Insert the card into the slot, guiding it straight down. Once the connector reaches the slot, push the card down firmly - Epson ES-300C | User Manual - TWAIN - Page 19
Bi-directional Parallel Cable Follow these steps to connect the cable to your bidirectional adapter card. This cable came in your Epson Scanner Interface kit. 1. Make sure both the scanner and computer are turned off. 2. Connect the 25-pin end of the cable to the computer, then tighten the screws on - Epson ES-300C | User Manual - TWAIN - Page 20
the terminator switch to on or install an external terminator on one of the two SCSI connectors on your scanner if the scanner is the last device in the chain. See your scanner documentation for more information on terminators. If you have additional SCSI devices, make sure only the last device in - Epson ES-300C | User Manual - TWAIN - Page 21
ES-800C 2. Set the switch to the desired number. e Caution Do not set the SCSI ID to 8 or 9, and do not set the ID number to an ID already assigned to another device. The computer, scanner, and other devices will notfunction properly. You are now ready to install Epson TWAIN. Installing the - Epson ES-300C | User Manual - TWAIN - Page 22
Chapter 2 Installing Epson TWAIN Starting the Epson TWAIN Setup Program 2-2 Installing Epson TWAIN for Bi-directional Support 2-3 Installing Epson TWAIN for Adaptec SCSI Support 2-5 Running SCANTEST 2-8 Installing Epson TWAIN 2-1 - Epson ES-300C | User Manual - TWAIN - Page 23
TWAIN with TWAIN-compliant applications, including: U Epson TWAIN 0 Epson Scanner DOS Device Driver. If you are using an Adaptec SCSI adapter, the Setup program also prompts you to insert the Adaptec ASPI DOS Manager diskette and installs the SCSI support software from that diskette. If you change - Epson ES-300C | User Manual - TWAIN - Page 24
You see the Epson Scanner Utility Setup welcome screen. If you decide to stop installing Epson TWAIN at any point, select Exit. The either the PS/2 or Epson bi-directional interface first, and then for the Adaptec SCSI adapter. Installing Epson TWAIN for Bi-directional Support Setup screens for the - Epson ES-300C | User Manual - TWAIN - Page 25
parallel option: Bi-directional Parallel Adapter Support 5. Select Continue. You see Epson Adapter J1-LPT2: - Address 02F8h Most PS/2 Models - Address 038Ch Select J1-LPT1 J1-LPT2 PS/2 *default option If The jumper on your bidirectional card is set to LPT1 and you want to use LPT1 as your scanner - Epson ES-300C | User Manual - TWAIN - Page 26
for Windows, such as: C:\WINDOWS\ 11. Select Continue. As Setup installs Epson TWAIN, it displays what percent of the installation is complete. Then it displays Reboot your computer. Installing Epson TWAIN for Adaptec SCSI Support Setup screens for Adaptec SCSI adapter support include: 0 Welcome - Epson ES-300C | User Manual - TWAIN - Page 27
Continue. You see the Interface Options screen. 4. Select the SCSI support option: ASPI Manager SCSI Support 5. Select Continue. You see the SCSI Interface Options screen. Epson SCSI Support Software Use Existing SCSI Support Software If you are installing your first Adaptec SCSI adapter, select the - Epson ES-300C | User Manual - TWAIN - Page 28
support software. 6. Select Continue. You see the Enter Scanner SCSI ID screen. 7. Check the back of the scanner for the Scanner SCSI ID number. If it is not 2, type the new value in the Scanner SCSI the Setup program prompts you to insert the Epson TWAIN diskette in your diskette drive. Installing - Epson ES-300C | User Manual - TWAIN - Page 29
Epson Scanner Utility diskette in your diskette drive. As Setup installs Epson that bypasses any other software program to test just the physical connection to the scanner. You can run SCANTEST in Windows). If your scanner, interface, and drivers are working properly, the scanner scans the image and - Epson ES-300C | User Manual - TWAIN - Page 30
If you have problems scanning an image using SCANTEST, check that the scanner is turned on and connected with the correct cable. See your scanner manual for troubleshooting information. Now you are ready to use Epson TWAIN. Installing Epson TWAIN 2-9 - Epson ES-300C | User Manual - TWAIN - Page 31
Adjusting the Magnification 3-6 Checking the Size 3-7 Scanning Your Image 3-7 Changing Your Scanning Resolutions 3-7 Using Epson TWAIN's Advanced Features 3-10 Modifying Settings on the Scanner Control Screen . . . . 3-10 Editing the Scan Mode Settings 3-11 Editing the Target Device Settings - Epson ES-300C | User Manual - TWAIN - Page 32
for selecting the TWAIN acquire device. Check your application software for how to select the TWAIN acquire device. Note You may have already installed application device drivers for other scanners. To use TWAIN, make sure you use Epson Scanners in the Acquire device setting instead. 3-2 Using TWAIN - Epson ES-300C | User Manual - TWAIN - Page 33
's File menu. You'll see the Epson TWAIN Scanner Control screen. Note If you do not see this screen, you may have selected a scanning option other than Acquire. Make sure you select Acquire to use TWAIN. Basic Scanning With Epson TWAIN Epson TWAIN provides some predefined settings that allow - Epson ES-300C | User Manual - TWAIN - Page 34
in your computer for the best results. Follow these steps to select the Epson TWAIN options that are best for the type of image you are scanning. line art. If you need more information on these image types, see your scanner manual. 2. Use the chart below to identify the scan mode for your image - Epson ES-300C | User Manual - TWAIN - Page 35
1. Place the image you want to scan face down on the scanner. 2. Select Preview. After several seconds, the rectangle on the right of the Scanner Control screen shows the image. Note that the preview colors may not be accurate unless you have a true color (24-bit) video card. Wait until - Epson ES-300C | User Manual - TWAIN - Page 36
or too light, you can adjust the Brightness scroll bar on the Epson TWAIN Scanner Control screen to make your image lighter or darker. Brightness values range from your image, you can use the Magnification scroll bar on the Epson TWAIN Scanner Control screen to select sizes from 50% to 200% of the - Epson ES-300C | User Manual - TWAIN - Page 37
the Scanner Control have adjusted the Epson TWAIN settings to suit your needs, you can scan the by selecting Scan. After several seconds, Epson TWAIN places the scanned image in your for you to consider. Your scanner manual also provides detailed information on resolutions - Epson ES-300C | User Manual - TWAIN - Page 38
If you need to scan images at resolutions above 72 DPI, follow these steps to modify your resolution settings. 1. From the Epson TWAIN Scanner Control screen, select Target Device from the Edit pull-down menu. You see the Edit Target Device screen. larget Device Target Device Setting Name VGA - Epson ES-300C | User Manual - TWAIN - Page 39
Note Make sure you select Add and not Modify or OK or Epson TWAIN modifies the existing target device rather than creating a new one. 6. Select OK to return to the Epson TWAIN Scanner Control screen. To scan an image at the resolution you have just identified, follow the procedures in the section " - Epson ES-300C | User Manual - TWAIN - Page 40
on the Epson TWAIN Scanner Control screen. Use these options to modify the settings used to scan your image. Scanner Control Screen of target devices. Select the type of document feed on scanners that support this feature, such as manual feed, the optional automatic document feed, and the optional - Epson ES-300C | User Manual - TWAIN - Page 41
Photograph Color Chart &el Depth Color Halftone Color Photograph True Color True Cdor . iI. m Halftone To Add a Scan Mode Rather than modifying the Epson-supplied scan modes, you will probably want to create your own definitions. Follow these steps to add a scan mode: 1. Select a scan mode - Epson ES-300C | User Manual - TWAIN - Page 42
in the following table. These options are described in detail in your scanner manual. USe Pixel Depth To Select the form of the image data. let your image editing software or the output device perform the halftoning. The selections you see vary depending on the scanner you are using. Possible - Epson ES-300C | User Manual - TWAIN - Page 43
your changes or Cancel to discard them. Use the following table if you need to reset the defaults of your Epson-supplied scan modes once you have modified them. Epson-supplied Scan Mode Defaults Scan Mode Pixel Depth Black & White Line Art Black and White Black &White Halftone Black and - Epson ES-300C | User Manual - TWAIN - Page 44
Editing the Target Device Settings Epson TWAIN provides several target device definitions you image using the VGA target device option, you get the best quality scan. Your image editing software can then provide the output settings appropriate for your output device. If you are scanning a color image - Epson ES-300C | User Manual - TWAIN - Page 45
Cglor Correction CRT D isplay Resolution 72 DPI To Add a Target Device Rather than modifying the Epson-supplied target devices, you will probably want to create your own definitions. Follow these steps to table. These options are described in more detail in your scanner manual. Using TWAIN 3-15 - Epson ES-300C | User Manual - TWAIN - Page 46
Dot Thermal Transfer Ink Jet Select minimum to maximum dots per inch (DPI) defined by the scanner. Values are: 50 DPI 60 DPI' 72 DPI 75 DPI 80 DPI 90 DPI 100 DPI DPI 133 DPI' 144 DPI 150 DPI 160 DPI 'Not available on some scanners, 175 DPI' 180 DPI 200 DPI 216 DPI' 240 DPI 300 DPI 320 DPI 360 - Epson ES-300C | User Manual - TWAIN - Page 47
Note Make sure you select Add and not Modify or OK or Epson TWAIN modifies the existing target device rather than creating a new one. 5. Select OK to accept your changes or Cancel to discard them. To Modify a Target - Epson ES-300C | User Manual - TWAIN - Page 48
Use the following table if you need to reset the defaults of your Epson-supplied target devices once you have modified them. Epson-supplied Target Device Defaults Target Device Gamma Correction Color Correction FX Printer Low Density Printer Impact Dot LQ Printer High Density Printer - Epson ES-300C | User Manual - TWAIN - Page 49
Chapter 4 Troubleshooting When you select an Acquire device, Epson Scanners is not listed 4-2 Nothing happens when you select Acquire 4-2 Target Device or Scan Mode names or settings are different or incorrect 4-3 The scan is not - Epson ES-300C | User Manual - TWAIN - Page 50
rebooted your computer after you installed Epson TWAIN. Reboot your computer and try again. The Epson Scanner DOS Device Driver, the Epson TWAIN Data Source (ESTWAIN.DS) file, or the SCSI support software may not be installed correctly. Reinstall Epson TWAIN using the Setup program within Windows - Epson ES-300C | User Manual - TWAIN - Page 51
software installation instructions in the adapter user manual. Then run the Epson TWAIN Setup program and select Use Existing SCSI Support Software your new scanner's capabilities. The scan is not the full width you selected in the Preview area. The Epson ES-300C scanner restricts Troubleshooting 4-3 - Epson ES-300C | User Manual - TWAIN - Page 52
Epson TWAIN Scanner Control dialog. You are using a scanner that does not support the Sharpness feature. The Document Source setting is "grayed out" in the Epson TWAIN Scanner the scanner data. Check with your software application publisher for an updated version of the software. 4-4 Troubleshooting - Epson ES-300C | User Manual - TWAIN - Page 53
settings using the instructions in Chapter 3 of this manual. Sometimes the halftone or dither settings you select in Scan Mode seem to be ignored. Halftone and dither settings on most Epson scanners are only and White or 8 colors for scanning with halftone or dither settings. Troubleshooting 4-5 - Epson ES-300C | User Manual - TWAIN - Page 54
screen. device A piece of equipment that is part of a computer system and performs a specific task, such as a disk drive, a monitor, a printer, or a scanner. Also called a peripheral. device driver A file containing instructions that allow your computer to recognize and control a device. Glossary 1 - Epson ES-300C | User Manual - TWAIN - Page 55
dithering A process in which software or an output device simulates continuous tones with groups of dots. dpi Short for dots per inch. A unit of measurement for resolution. The higher the - Epson ES-300C | User Manual - TWAIN - Page 56
also define your own scan mode settings. scanning area The physical size of the image that can be scanned by the scanner. Short for small computer system interface. Epson TWAIN can use the Adaptec AHA-1510 SCSI host adapter or any other ASPI compliant host adapter to communicate between the computer - Epson ES-300C | User Manual - TWAIN - Page 57
target device A set of gamma correction, color correction, and resolution settings that match the characteristics of the scan to the final output device. Epson TWAIN provides several target device settings to adjust your scanned image to suit the target device you intend to use. You can also define - Epson ES-300C | User Manual - TWAIN - Page 58
3-2 problems, service, Intro-5 D Default settings scan mode, 3-13 target device, 3-18 Diskette contents, Intro-1 Dither, 3-12 Document source, 3-10, 4-4 DPI, 3-8, 3-16 E Electric shock, 1-3 Enter path, 2-5, 2-7 Epson bi-directional parallel interface, Intro-3 Epson Scanner Utility DOS Device Driver - Epson ES-300C | User Manual - TWAIN - Page 59
Scan mode, 3-11-14 add, 3-11 defaults, 3-13 delete, 3-13 edit, 3-11 modify, 3-13 problems, 4-3, 4-5 Scanners, supported, Intro-3 SCANTEST, 2-8 SCSI ID, 1-8 caution, 1-9 scanner, 2-7 Setup, starting, 2-2 Sharpness, 3-10, 4-4 Size, 3-7 Soft tone, 3-12 Spiral dither, 3-12 System requirements, Intro - Epson ES-300C | User Manual - TWAIN - Page 60
Canada, Ltd. 95 Mural Street Richmond Hill, Ontario L4B 3G3 Phone: (800) GO-EPSON Fax: (416) 881-5765 Epson Latin America Trading, Inc. 9002 N.W. 105 Way Medley, Florida 33178 Phone: (305) 888-1078 Fax: (305) 888-1079 Epson Argentina S.A. Avenida Del Libertad or 498, Piso 12 1001 Buenos Aires Phone - Epson ES-300C | User Manual - TWAIN - Page 61
Epson America, Inc. 20770 Madrona Avenue Torrance, California 90503
-
 1
1 -
 2
2 -
 3
3 -
 4
4 -
 5
5 -
 6
6 -
 7
7 -
8
-
9
-
10
-
11
-
12
-
13
-
14
-
15
-
16
-
17
-
18
-
19
-
20
-
21
-
22
-
23
-
24
-
25
-
26
-
27
-
28
-
29
-
30
-
31
-
32
-
33
-
34
-
35
-
36
-
37
-
38
-
39
-
40
-
41
-
42
-
43
-
44
-
45
-
46
-
47
-
48
-
49
-
50
-
51
-
52
-
53
-
54
-
55
-
56
-
57
-
58
-
59
-
60
-
61
 |
 |

Scanner Utility
for Epson TWAIN
User’s Guide