Epson ES-300C User Manual - TWAIN - Page 17
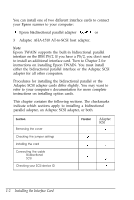
bidirectional parallel adapter, setting on
 |
View all Epson ES-300C manuals
Add to My Manuals
Save this manual to your list of manuals |
Page 17 highlights
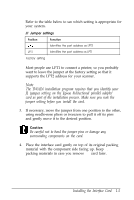
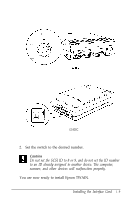
Refer to the table below to see which setting is appropriate for your system. J1 Jumper settings Position LPT2' Function Identifies the port address as LPT2 LPT1 Identifies the port address as LPT1 'Factory setting Most people use LPT1 to connect a printer, so you probably want to leave the jumper at the factory setting so that it supports the LPT2 address for your scanner. Note The TWAIN installation program requires that you identify your J1 jumper setting on the Epson bidirectional parallel adapter card as part of the installation process. Make sure you note the jumper setting before you install the card. 3. If necessary, move the jumper from one position to the other, using needle-nose pliers or tweezers to pull it off its pins and gently move it to the desired position. Caution Be careful not to bend the jumper pins or damage any surrounding components on the card. 4. Place the interface card gently on top of its original packing material with the component side facing up. Keep the packing materials in case you remove the card later. Installing the Interface Card 1-5
-
 1
1 -
2
-
3
-
4
-
5
-
6
-
7
-
8
-
9
-
10
-
11
-
 12
12 -
 13
13 -
 14
14 -
 15
15 -
 16
16 -
 17
17 -
 18
18 -
 19
19 -
 20
20 -
 21
21 -
 22
22 -
23
-
24
-
25
-
26
-
27
-
28
-
29
-
30
-
31
-
32
-
33
-
34
-
35
-
36
-
37
-
38
-
39
-
40
-
41
-
42
-
43
-
44
-
45
-
46
-
47
-
48
-
49
-
50
-
51
-
52
-
53
-
54
-
55
-
56
-
57
-
58
-
59
-
60
-
61
 |
 |