Epson MX-82 F/T User Manual - Page 48
Fig. 51, Loosening All 4 Screws, Upper case, Fig. 52 Pulling Out Wires Hooked to Control Panel
 |
View all Epson MX-82 F/T manuals
Add to My Manuals
Save this manual to your list of manuals |
Page 48 highlights
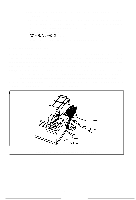
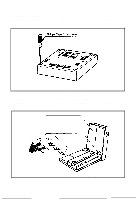
Turn the printer upside down on a soft surface. With a Phillips type screwdriver, completely loosen all 4 screws. (See Fig. 51) Place tape over the 4 holes so the screws won't fall off when you tip the printer right side up. Fig. 51 Loosening All 4 Screws Tip the printer right side up again. Gently loosen the upper case. Lift up the cover from the left side. And then pull out the wires hooked to the control panel on the right. (See Fig. 52) Upper case Lead wire Fig. 52 Pulling Out Wires Hooked to Control Panel -42-
-
 1
1 -
2
-
3
-
4
-
5
-
6
-
7
-
8
-
9
-
10
-
11
-
12
-
13
-
14
-
15
-
16
-
17
-
18
-
19
-
20
-
21
-
22
-
23
-
24
-
25
-
26
-
27
-
28
-
29
-
30
-
31
-
32
-
33
-
34
-
35
-
36
-
37
-
38
-
39
-
40
-
41
-
42
-
 43
43 -
 44
44 -
 45
45 -
 46
46 -
 47
47 -
 48
48 -
 49
49 -
 50
50 -
 51
51 -
 52
52 -
 53
53 -
54
-
55
-
56
-
57
-
58
-
59
-
60
-
61
-
62
-
63
-
64
-
65
-
66
-
67
-
68
-
69
-
70
-
71
-
72
-
73
-
74
-
75
-
76
-
77
-
78
-
79
-
80
-
81
-
82
-
83
-
84
-
85
-
86
-
87
-
88
-
89
-
90
-
91
-
92
-
93
-
94
-
95
-
96
-
97
-
98
-
99
-
100
-
101
-
102
-
103
 |
 |
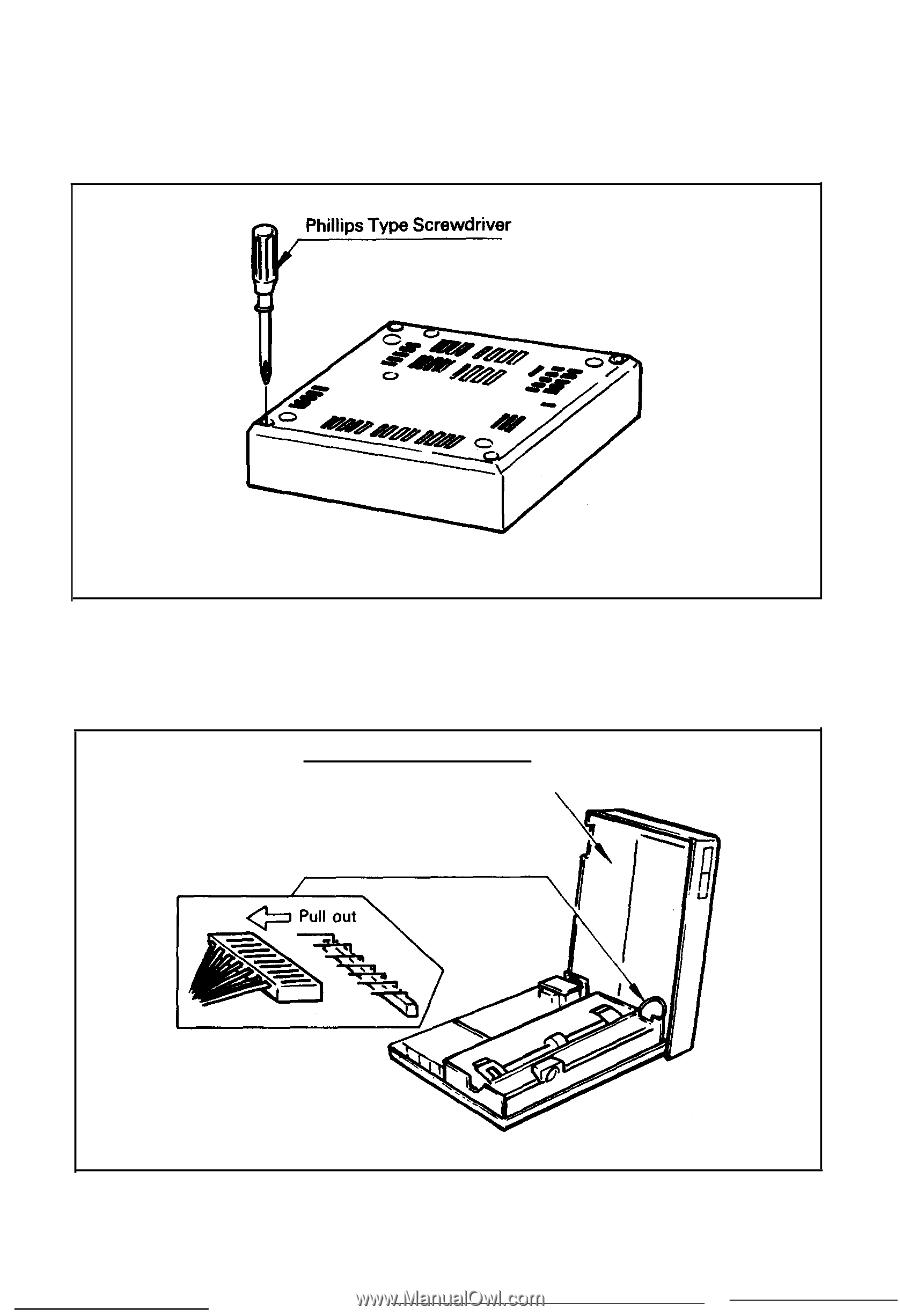
Turn the printer upside down on a soft surface. With a Phillips type screwdriver,
completely loosen all 4 screws. (See Fig. 51)
Place tape over the 4 holes so the screws won’t fall off when you tip the printer right
side up.
Fig. 51
Loosening All 4 Screws
Tip the printer right side up again. Gently loosen the upper case.
Lift up the cover from the left side. And then pull out the wires hooked to the control
panel on the right. (See Fig. 52)
Upper case
Lead wire
Fig. 52 Pulling Out Wires Hooked to Control Panel
-42-