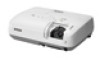
Epson PowerLite 78 User's Guide - Page 17
Additional Components, Positioning the Projector
 |
View all Epson PowerLite 78 manuals
Add to My Manuals
Save this manual to your list of manuals |
Page 17 highlights
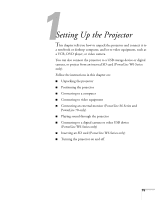
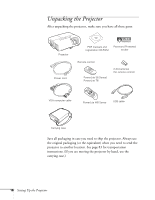
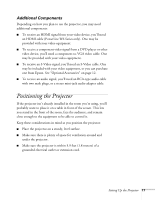
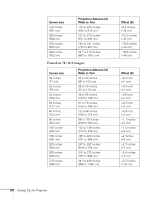
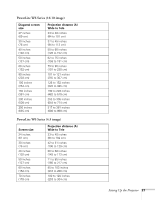
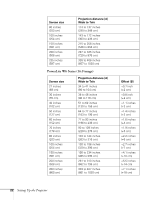
Additional Components Depending on how you plan to use the projector, you may need additional components: ■ To receive an HDMI signal from your video device, you'll need an HDMI cable (PowerLite W6 Series only). One may be provided with your video equipment. ■ To receive a component video signal from a DVD player or other video device, you'll need a component-to-VGA video cable. One may be provided with your video equipment. ■ To receive an S-Video signal, you'll need an S-Video cable. One may be included with your video equipment, or you can purchase one from Epson. See "Optional Accessories" on page 12. ■ To receive an audio signal, you'll need an RCA-type audio cable with two male plugs, or a stereo mini-jack audio adapter cable. Positioning the Projector If the projector isn't already installed in the room you're using, you'll probably want to place it on a table in front of the screen. This lets you stand in the front of the room, face the audience, and remain close enough to the equipment to be able to control it. Keep these considerations in mind as you position the projector: ■ Place the projector on a sturdy, level surface. ■ Make sure there is plenty of space for ventilation around and under the projector. ■ Make sure the projector is within 5.9 feet (1.8 meters) of a grounded electrical outlet or extension cord. Setting Up the Projector 17
-
 1
1 -
2
-
3
-
4
-
5
-
6
-
7
-
8
-
9
-
10
-
11
-
 12
12 -
 13
13 -
 14
14 -
 15
15 -
 16
16 -
 17
17 -
 18
18 -
 19
19 -
 20
20 -
 21
21 -
 22
22 -
23
-
24
-
25
-
26
-
27
-
28
-
29
-
30
-
31
-
32
-
33
-
34
-
35
-
36
-
37
-
38
-
39
-
40
-
41
-
42
-
43
-
44
-
45
-
46
-
47
-
48
-
49
-
50
-
51
-
52
-
53
-
54
-
55
-
56
-
57
-
58
-
59
-
60
-
61
-
62
-
63
-
64
-
65
-
66
-
67
-
68
-
69
-
70
-
71
-
72
-
73
-
74
-
75
-
76
-
77
-
78
-
79
-
80
-
81
-
82
-
83
-
84
-
85
-
86
-
87
-
88
-
89
-
90
-
91
-
92
-
93
-
94
-
95
-
96
-
97
-
98
-
99
-
100
-
101
-
102
-
103
-
104
-
105
-
106
-
107
-
108
-
109
-
110
-
111
-
112
-
113
-
114
-
115
-
116
-
117
-
118
 |
 |