Epson PowerLite Pro Cinema LS10000 User Manual - Page 62
Adjusting the Color Convergence (Panel Alignment), Adjust Focus, Parent topic, Extended, Enter
 |
View all Epson PowerLite Pro Cinema LS10000 manuals
Add to My Manuals
Save this manual to your list of manuals |
Page 62 highlights
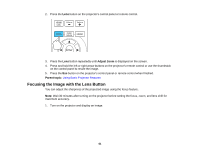
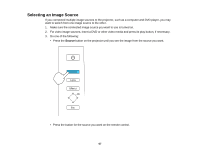
2. Press the Lens button on the projector's control panel or remote control. 3. Press the Lens button repeatedly until Adjust Focus is displayed on the screen. 4. Press and hold the left or right arrow buttons on the projector's remote control or use the thumbstick on the control panel to focus the image. 5. Press the Esc button on the projector's control panel or remote control when finished. Parent topic: Using Basic Projector Features Adjusting the Color Convergence (Panel Alignment) You can use the Panel Alignment feature to manually adjust the color convergence (the alignment of the red, green and blue colors) in the projected image. Note: Allow your projector to warm up for at least 10 to 15 minutes and make sure the image is in focus before you use the Panel Alignment feature. The projected image should be a minimum of 60 inches (152 cm) diagonally and the projection surface should not be colored or textured, otherwise the adjustment grids will be difficult to align. 1. Turn on the projector. 2. Press the Menu button. 3. Select the Extended menu and press Enter. 62
-
 1
1 -
2
-
3
-
4
-
5
-
6
-
7
-
8
-
9
-
10
-
11
-
12
-
13
-
14
-
15
-
16
-
17
-
18
-
19
-
20
-
21
-
22
-
23
-
24
-
25
-
26
-
27
-
28
-
29
-
30
-
31
-
32
-
33
-
34
-
35
-
36
-
37
-
38
-
39
-
40
-
41
-
42
-
43
-
44
-
45
-
46
-
47
-
48
-
49
-
50
-
51
-
52
-
53
-
54
-
55
-
56
-
 57
57 -
 58
58 -
 59
59 -
 60
60 -
 61
61 -
 62
62 -
 63
63 -
 64
64 -
 65
65 -
 66
66 -
 67
67 -
68
-
69
-
70
-
71
-
72
-
73
-
74
-
75
-
76
-
77
-
78
-
79
-
80
-
81
-
82
-
83
-
84
-
85
-
86
-
87
-
88
-
89
-
90
-
91
-
92
-
93
-
94
-
95
-
96
-
97
-
98
-
99
-
100
-
101
-
102
-
103
-
104
-
105
-
106
-
107
-
108
-
109
-
110
-
111
-
112
-
113
-
114
-
115
-
116
-
117
-
118
-
119
-
120
-
121
-
122
-
123
-
124
-
125
-
126
-
127
-
128
-
129
-
130
-
131
-
132
-
133
-
134
-
135
-
136
-
137
-
138
-
139
-
140
-
141
-
142
-
143
-
144
-
145
-
146
-
147
-
148
-
149
-
150
-
151
-
152
-
153
-
154
-
155
-
156
-
157
-
158
-
159
-
160
-
161
-
162
-
163
-
164
-
165
-
166
-
167
-
168
-
169
-
170
-
171
-
172
-
173
-
174
-
175
-
176
-
177
-
178
-
179
-
180
-
181
-
182
-
183
-
184
-
185
-
186
-
187
-
188
-
189
-
190
-
191
-
192
-
193
-
194
-
195
-
196
-
197
-
198
-
199
-
200
-
201
-
202
-
203
-
204
 |
 |
