Epson SureColor S80600 User Manual - Page 107
Cleaning Inside the Front Cover, Pre-Storage Maint, All Nozzles, Parent topic, Related references
 |
View all Epson SureColor S80600 manuals
Add to My Manuals
Save this manual to your list of manuals |
Page 107 highlights
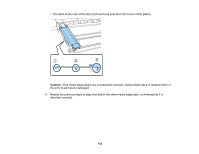
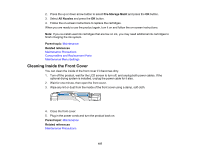
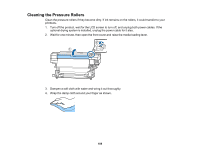
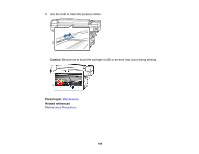
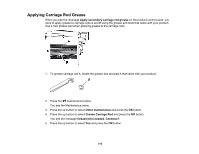
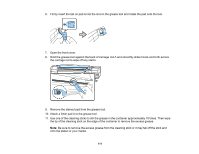
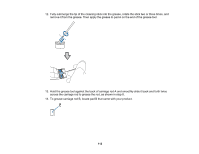
2. Press the up or down arrow button to select Pre-Storage Maint and press the OK button. 3. Select All Nozzles and press the OK button. 4. Follow the on-screen instructions to replace the cartridges. When you are ready to use the product again, turn it on and follow the on-screen instructions. Note: If you re-install used ink cartridges that are low on ink, you may need additional ink cartridges to finish charging the ink system. Parent topic: Maintenance Related references Maintenance Precautions Consumables and Replacement Parts Maintenance Menu Settings Cleaning Inside the Front Cover You can clean the inside of the front cover if it becomes dirty. 1. Turn off the product, wait for the LCD screen to turn off, and unplug both power cables. If the optional drying system is installed, unplug the power cable for it also. 2. Wait for one minute, then open the front cover. 3. Wipe any lint or dust from the inside of the front cover using a damp, soft cloth. 4. Close the front cover. 5. Plug in the power cords and turn the product back on. Parent topic: Maintenance Related references Maintenance Precautions 107
-
 1
1 -
2
-
3
-
4
-
5
-
6
-
7
-
8
-
9
-
10
-
11
-
12
-
13
-
14
-
15
-
16
-
17
-
18
-
19
-
20
-
21
-
22
-
23
-
24
-
25
-
26
-
27
-
28
-
29
-
30
-
31
-
32
-
33
-
34
-
35
-
36
-
37
-
38
-
39
-
40
-
41
-
42
-
43
-
44
-
45
-
46
-
47
-
48
-
49
-
50
-
51
-
52
-
53
-
54
-
55
-
56
-
57
-
58
-
59
-
60
-
61
-
62
-
63
-
64
-
65
-
66
-
67
-
68
-
69
-
70
-
71
-
72
-
73
-
74
-
75
-
76
-
77
-
78
-
79
-
80
-
81
-
82
-
83
-
84
-
85
-
86
-
87
-
88
-
89
-
90
-
91
-
92
-
93
-
94
-
95
-
96
-
97
-
98
-
99
-
100
-
101
-
 102
102 -
 103
103 -
 104
104 -
 105
105 -
 106
106 -
 107
107 -
 108
108 -
 109
109 -
 110
110 -
 111
111 -
 112
112 -
113
-
114
-
115
-
116
-
117
-
118
-
119
-
120
-
121
-
122
-
123
-
124
-
125
-
126
-
127
-
128
-
129
-
130
-
131
-
132
-
133
-
134
-
135
-
136
-
137
-
138
-
139
-
140
-
141
-
142
-
143
-
144
-
145
-
146
-
147
-
148
-
149
 |
 |
