Epson SureColor S80600 User Manual - Page 41
Printable Area and Media Size Checking, Remaining Setting, Parent topic, Related references
 |
View all Epson SureColor S80600 manuals
Add to My Manuals
Save this manual to your list of manuals |
Page 41 highlights
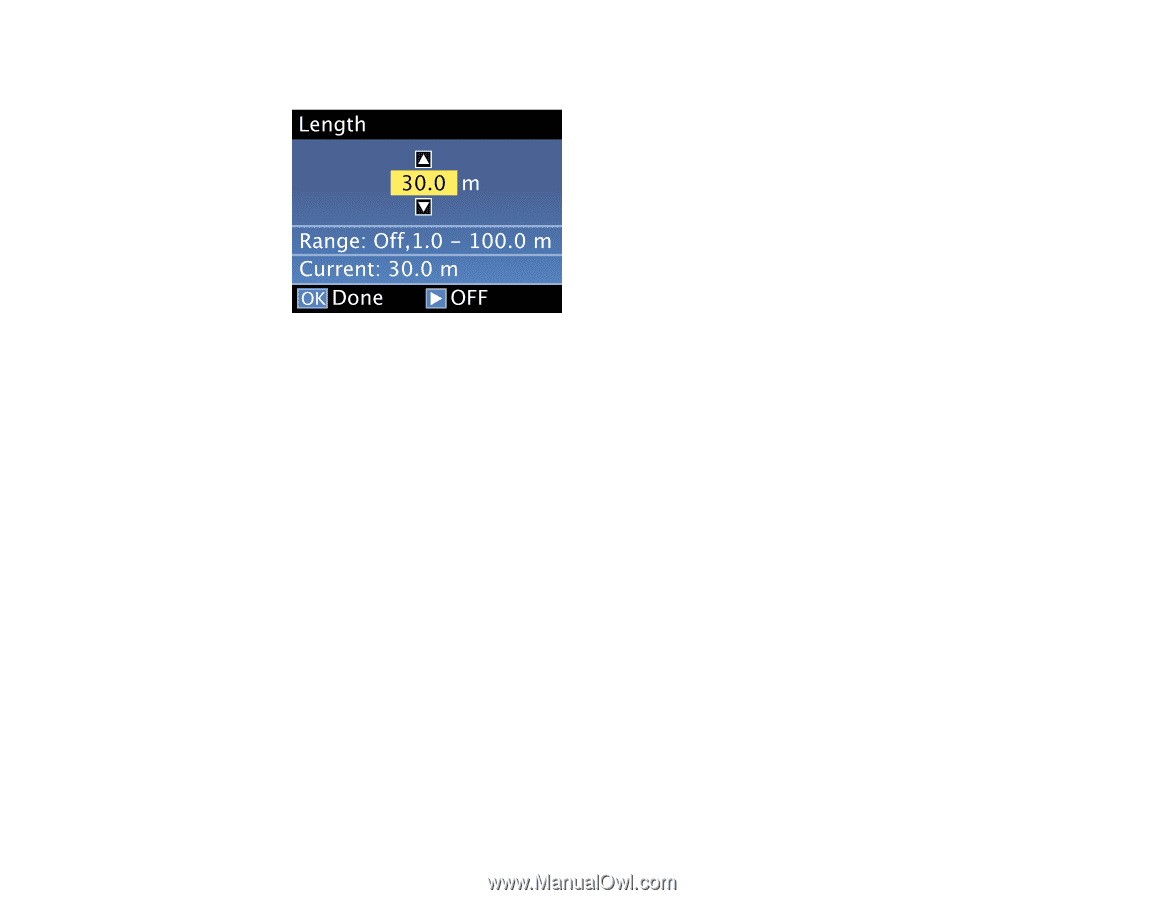
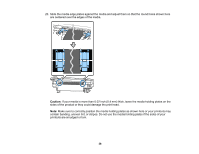
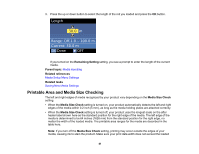
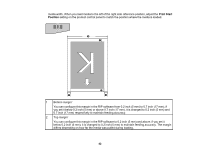
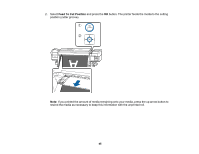
3. Press the up or down button to select the length of the roll you loaded and press the OK button. If you turned on the Remaining Setting setting, you see a prompt to enter the length of the current media. Parent topic: Media Handling Related references Media Setup Menu Settings Related tasks Saving New Media Settings Printable Area and Media Size Checking The left and right edges of media recognized by your product vary depending on the Media Size Check setting. • When the Media Size Check setting is turned on, your product automatically detects the left and right edges of the media within 0.2 inch (5 mm), as long as the media holding plates are attached correctly. • When the Media Size Check setting is turned off, your product uses the longest scale on the after heater label shown here as the standard position for the right edge of the media. The left edge of the media is determined to be 64 inches (1626 mm) from the standard position for the right edge, no matter the width of the loaded media. The printable area ranges for the media are described in the table here. Note: If you turn off the Media Size Check setting, printing may occur outside the edges of your media, causing ink to stain the product. Make sure your print data width does not exceed the loaded 41
-
 1
1 -
2
-
3
-
4
-
5
-
6
-
7
-
8
-
9
-
10
-
11
-
12
-
13
-
14
-
15
-
16
-
17
-
18
-
19
-
20
-
21
-
22
-
23
-
24
-
25
-
26
-
27
-
28
-
29
-
30
-
31
-
32
-
33
-
34
-
35
-
 36
36 -
 37
37 -
 38
38 -
 39
39 -
 40
40 -
 41
41 -
 42
42 -
 43
43 -
 44
44 -
 45
45 -
 46
46 -
47
-
48
-
49
-
50
-
51
-
52
-
53
-
54
-
55
-
56
-
57
-
58
-
59
-
60
-
61
-
62
-
63
-
64
-
65
-
66
-
67
-
68
-
69
-
70
-
71
-
72
-
73
-
74
-
75
-
76
-
77
-
78
-
79
-
80
-
81
-
82
-
83
-
84
-
85
-
86
-
87
-
88
-
89
-
90
-
91
-
92
-
93
-
94
-
95
-
96
-
97
-
98
-
99
-
100
-
101
-
102
-
103
-
104
-
105
-
106
-
107
-
108
-
109
-
110
-
111
-
112
-
113
-
114
-
115
-
116
-
117
-
118
-
119
-
120
-
121
-
122
-
123
-
124
-
125
-
126
-
127
-
128
-
129
-
130
-
131
-
132
-
133
-
134
-
135
-
136
-
137
-
138
-
139
-
140
-
141
-
142
-
143
-
144
-
145
-
146
-
147
-
148
-
149
 |
 |