Garmin eTrex Legend CX Owner's Manual - Page 69
Tones Setup, Sequence Setup, To transfer files to the microSD card
 |
UPC - 753759049140
View all Garmin eTrex Legend CX manuals
Add to My Manuals
Save this manual to your list of manuals |
Page 69 highlights
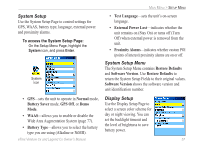
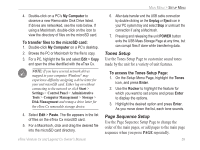
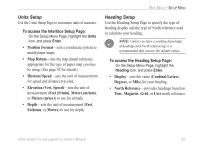
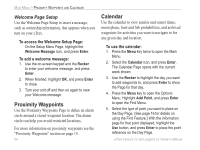
4. Double-click on a PC's My Computer to observe a new Removable Disk Drive listed. If drives are networked, see the note below. If using a Macintosh, double-click on the icon to view the directory of files on the microSD card. To transfer files to the microSD card: 1. Double-click My Computer on a PC's desktop. 2. Browse the PC or Macintosh for the file to copy. 3. For a PC, highlight the file and select Edit > Copy and open the drive identified with the eTrex Cx. NOTE: If you have several network drives mapped to your computer, Windows® may experience difficulty assigning a drive letter for your unit microSD card. Either log on without connecting to the network or click Start > Settings > Control Panel > Administrative Tools > Computer Management > Storage > Disk Management and remap a drive letter for the eTrex Cx removable storage device. 4. Select Edit > Paste. The file appears in the list of files on the eTrex Cx microSD card. 5. For a Macintosh, click and drag the desired file into the microSD card directory. eTrex Venture Cx and Legend Cx Owner's Manual MAIN MENU > SETUP MENU 6. After data transfer end the USB cable connection by double-clicking on the Unplug or Eject icon in your PC system tray and select Stop or unmount the connection if using a Macintosh. 7. Pressing and releasing the unit POWER button exits the USB Mass Storage Page at any time, but can corrupt files if done while transferring data. Tones Setup Use the Tones Setup Page to customize sound tones made by the unit for a variety of unit features. To access the Tones Setup Page: 1. On the Setup Menu Page, highlight the Tones icon, and press Enter. 2. Use the Rocker to highlight the feature for which you want to set a tone and press Enter to display the options. 3. Highlight the desired option and press Enter. As you move down the list, each tone sounds. Page Sequence Setup Use the Page Sequence Setup Page to change the order of the main pages, or add pages to the main page sequence when you press PAGE repeatedly. 59
-
 1
1 -
2
-
3
-
4
-
5
-
6
-
7
-
8
-
9
-
10
-
11
-
12
-
13
-
14
-
15
-
16
-
17
-
18
-
19
-
20
-
21
-
22
-
23
-
24
-
25
-
26
-
27
-
28
-
29
-
30
-
31
-
32
-
33
-
34
-
35
-
36
-
37
-
38
-
39
-
40
-
41
-
42
-
43
-
44
-
45
-
46
-
47
-
48
-
49
-
50
-
51
-
52
-
53
-
54
-
55
-
56
-
57
-
58
-
59
-
60
-
61
-
62
-
63
-
 64
64 -
 65
65 -
 66
66 -
 67
67 -
 68
68 -
 69
69 -
 70
70 -
 71
71 -
 72
72 -
 73
73 -
 74
74 -
75
-
76
-
77
-
78
-
79
-
80
-
81
-
82
-
83
-
84
-
85
-
86
-
87
-
88
-
89
-
90
-
91
-
92
-
93
-
94
-
95
-
96
 |
 |
