HP 2610 User Guide - Page 67
Copy a photo several times on one Copy Menu, Reduce/Enlarge, Fill Entire Letter Borderless - photosmart cartridges
 |
UPC - 829160502274
View all HP 2610 manuals
Add to My Manuals
Save this manual to your list of manuals |
Page 67 highlights
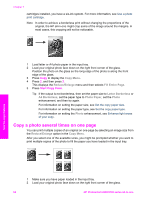
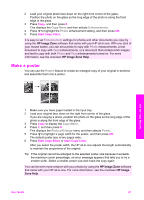
Chapter 7 cartridges installed, you have a six-ink system. For more information, see Use a photo print cartridge. Note In order to achieve a borderless print without changing the proportions of the original, the HP all-in-one might crop some of the image around the margins. In most cases, this cropping will not be noticeable. 1 Load letter or A4 photo paper in the input tray. 2 Load your original photo face down on the right front corner of the glass. Position the photo on the glass so the long edge of the photo is along the front edge of the glass. 3 Press Copy to display the Copy Menu. 4 Press 2, and then press 3. This displays the Reduce/Enlarge menu and then selects Fill Entire Page. 5 Press Start Copy Color. Tip If the output is not borderless, then set the paper size to Letter Borderless or A4 Borderless, set the paper type to Photo Paper, set the Photo enhancement, and then try again. For information on setting the paper size, see Set the copy paper size. For information on setting the paper type, see Set the copy paper type. For information on setting the Photo enhancement, see Enhance light areas of your copy. Copy a photo several times on one page You can print multiple copies of an original on one page by selecting an image size from the Reduce/Enlarge option in the Copy Menu. After you select one of the available sizes, you might be prompted whether you want to print multiple copies of the photo to fill the paper you have loaded in the input tray. Use the copy features 1 Make sure you have paper loaded in the input tray. 2 Load your original photo face down on the right front corner of the glass. 64 HP Photosmart 2600/2700 series all-in-one
-
 1
1 -
2
-
3
-
4
-
5
-
6
-
7
-
8
-
9
-
10
-
11
-
12
-
13
-
14
-
15
-
16
-
17
-
18
-
19
-
20
-
21
-
22
-
23
-
24
-
25
-
26
-
27
-
28
-
29
-
30
-
31
-
32
-
33
-
34
-
35
-
36
-
37
-
38
-
39
-
40
-
41
-
42
-
43
-
44
-
45
-
46
-
47
-
48
-
49
-
50
-
51
-
52
-
53
-
54
-
55
-
56
-
57
-
58
-
59
-
60
-
61
-
 62
62 -
 63
63 -
 64
64 -
 65
65 -
 66
66 -
 67
67 -
 68
68 -
 69
69 -
 70
70 -
 71
71 -
 72
72 -
73
-
74
-
75
-
76
-
77
-
78
-
79
-
80
-
81
-
82
-
83
-
84
-
85
-
86
-
87
-
88
-
89
-
90
-
91
-
92
-
93
-
94
-
95
-
96
-
97
-
98
-
99
-
100
-
101
-
102
-
103
-
104
-
105
-
106
-
107
-
108
-
109
-
110
-
111
-
112
-
113
-
114
-
115
-
116
-
117
-
118
-
119
-
120
-
121
-
122
-
123
-
124
-
125
-
126
-
127
-
128
-
129
-
130
-
131
-
132
-
133
-
134
-
135
-
136
-
137
-
138
-
139
-
140
-
141
-
142
-
143
-
144
-
145
-
146
-
147
-
148
-
149
-
150
-
151
-
152
-
153
-
154
-
155
-
156
-
157
-
158
-
159
-
160
-
161
-
162
-
163
-
164
-
165
-
166
-
167
-
168
-
169
-
170
-
171
-
172
-
173
-
174
-
175
-
176
-
177
-
178
-
179
-
180
-
181
-
182
-
183
-
184
-
185
-
186
-
187
-
188
-
189
-
190
-
191
-
192
-
193
-
194
-
195
-
196
-
197
-
198
-
199
-
200
-
201
-
202
-
203
-
204
-
205
-
206
-
207
-
208
-
209
-
210
-
211
-
212
-
213
-
214
-
215
-
216
-
217
-
218
-
219
-
220
-
221
-
222
-
223
-
224
-
225
-
226
-
227
-
228
-
229
-
230
-
231
-
232
-
233
-
234
-
235
-
236
-
237
-
238
-
239
-
240
-
241
 |
 |
